
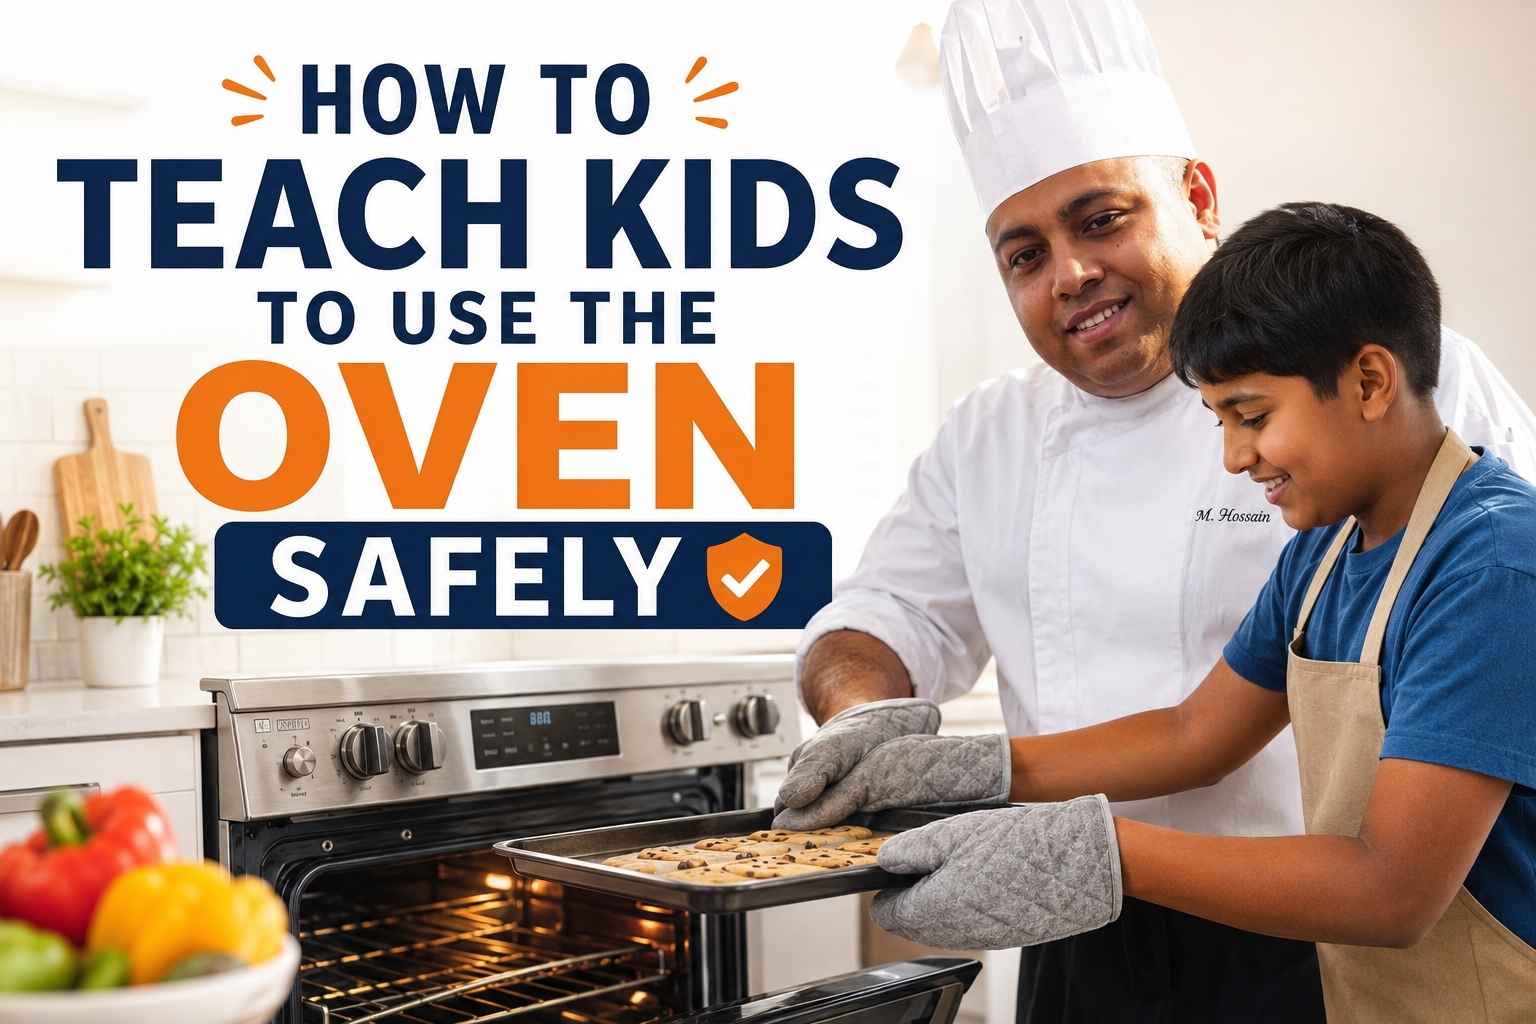
At A Glance
- Children as young as 8 can start learning oven basics with hands-on adult supervision – but emotional readiness matters more than age alone.
- The five non-negotiable safety rules (stay in the kitchen, use proper mitts, no loose clothing, set a timer, call an adult if unsure) must be memorized before any child touches the oven door.
- Pot holders cause more burns than oven mitts – always use silicone or quilted oven mitts that cover the wrist.
- Start with low-temperature, short-bake recipes like sheet-pan cookies or frozen pizza to build skill with low risk.
- Burns from contact with oven racks are the most common kitchen injury in children under 12, according to the American Burn Association (2023) – a proper progression plan cuts that risk dramatically.
My daughter burned her hand on our oven door when she was seven. That scared me more than anything. So I sat down and built real rules for how to teach kids to use the oven safely. I’ve taught cooking classes for years, and I’ve watched dozens of kids go from scared to confident in the kitchen. In this guide, I’ll walk you through the exact steps, age by age, so your child stays safe and you stay calm. Grab a cup of tea, and let’s make your kitchen a safe place to learn.
Why Teaching Kids to Use the Oven Safely Builds More Than Cooks
Teaching a child to use the oven safely is one of the most practical life skills you can give them. It builds patience, number sense, and real confidence – the kind that comes from doing something real with your hands and getting it right.
I have worked in professional kitchens for 15 years and taught hundreds of children – in after-school programs, weekend workshops, and home kitchens with a parent close by. The kids who learned oven skills early, under calm and structured guidance, grew up more confident in the kitchen. The ones who were kept away until they were older often came to me at 14 or 15 with no feel for heat, no patience for waiting, and no understanding of why preheating matters.
The oven is not a danger zone. It is a tool.
The American Academy of Pediatrics (2022) reports that structured kitchen participation between ages 6 and 10 builds fine motor skills, math readiness, and the ability to follow sequential instructions. Baking specifically – measuring, timing, reading temperature – maps directly onto early STEM skills.
This guide gives you a clear, stage-by-stage plan for introducing your child to the oven safely. Not a rules list. A real progression.
Kids’ Oven Readiness Chart: Age, Skills, and Appropriate Tasks
This chart is a starting point, not a rigid formula. A cautious, focused 9-year-old may be more ready than an impulsive 11-year-old. Use it alongside the emotional readiness signs in the next section.
| Age Range | Developmental Readiness | Appropriate Oven Tasks |
|---|---|---|
| 5-7 years | Watches and asks questions | Stand beside adult, observe preheating, learn what “hot” means |
| 7-8 years | Follows 2-step instructions | Help set the timer, place items on a low rack with adult hands guiding |
| 8-10 years | Reads numbers accurately, waits calmly | Set temperature and timer independently, open oven with supervision |
| 10-12 years | Understands cause and effect, handles setbacks | Full supervised use: load, bake, remove with mitts, check doneness |
| 12-14 years | Can problem-solve and self-monitor | Supervised independence: bake simple recipes start to finish |
| 14+ years | Ready for unsupervised use with house rules | Independent baking with agreed safety protocols in place |
How to Know If Your Child Is Ready – Signs Beyond Age
Readiness for oven use is about emotional regulation first, age second. A child who is ready to learn can stay focused for 15 to 20 minutes without needing redirection. They can handle disappointment – a recipe that didn’t rise, a cookie that burned at the edges – without melting down. They ask questions before acting, rather than after.
Three specific signs tell me a child is ready for supervised oven work:
They stop and wait. Ask your child to wait 60 seconds before opening a gift or starting a snack. If they can do it without constant reminders, they can wait for a timer.
They follow a two-step instruction. “Wash your hands, then get the oven mitts” – if they do both steps in order without being reminded of the second step, they are ready to follow a baking sequence.
They can name the danger. Ask them: “What’s dangerous about the oven?” A ready child does not just say “it’s hot.” They say “the rack is hot,” or “steam comes out when you open the door.” Specific awareness, not vague fear.
KidsHealth.org (2024) notes that children between 8 and 10 develop the prefrontal cortex capacity to inhibit impulsive responses more reliably – which is exactly why that age range is the natural entry point for hands-on oven work.
Essential Safety Gear: What to Buy and What to Skip
The right gear makes a real difference. The wrong gear – especially what parents default to – creates a false sense of safety.
Use silicone or quilted oven mitts that cover the wrist. Flat pot holders leave your wrist and forearm exposed to rack burn and steam. The American Burn Association (2023) reports that wrist and forearm burns are the most common oven injury in children. A full mitt that extends 2 to 3 inches past the wrist eliminates most of that risk.
Buy a close-fitting apron. Loose strings and wide sleeves are burn risks near an open oven door. A fitted cotton apron protects the torso and keeps fabric away from heat.
Put a non-slip mat in front of the oven. Children drop things and shift weight unexpectedly. A rubberized mat keeps them stable when holding a hot pan.
No dangling jewelry, no loose sleeves, no open-toe shoes. Explain the specific risk: “A bracelet can catch on the rack and pull a hot pan onto you.”
The 5 Non-Negotiable Safety Rules Every Child Must Memorize
These five rules are the foundation. Your child recites them before they touch the oven – not as a ritual, but because they need to be automatic.
Rule 1: Stay in the kitchen the entire time something is in the oven. Walking away is how fires start. The timer is not a permission slip to leave the room.
Rule 2: Always use oven mitts – both hands. One bare hand on a pan is all it takes for a serious burn. Both mitts, every time, no exceptions.
Rule 3: No loose clothing near the oven. Sleeves rolled up, apron tied, no scarves or hanging strings.
Rule 4: Set a timer and check at the timer – not before. Opening the oven repeatedly drops the temperature and teaches impatience. Set the timer, wait.
Rule 5: Call an adult if anything looks, smells, or sounds wrong. Smoke, a strange smell, a pan that is too heavy – stopping and asking is never the wrong choice. This is the hardest rule for kids who want to feel independent. Reinforce it by praising them every time they call you, even if it turns out to be nothing.
The National Fire Protection Association (2024) lists unattended cooking as the leading cause of home kitchen fires. Rule 1 addresses that directly.
The Step-by-Step Progression: From Watching to Supervised Independence
Teaching oven safety is not a single lesson. It is a progression across weeks or months, depending on your child’s pace. Here is how I structure it, both in professional programs and with my own family.
Stage 1 – Watch and Learn (Ages 5-8)
At this stage, your child is an observer. They stand beside you while you use the oven and you narrate everything out loud. “I’m setting it to 350 degrees because the recipe says 350. I’m using the mitts now because the rack will be at 350 degrees even if I can’t see the heat.”
This builds a mental model. They are learning that the oven is a system with rules, not a mystery box.
Let them set the timer at this stage. It is safe, concrete, and gives them a sense of participation.
Stage 2 – Assisted Handling (Ages 8-10)
Now they do the steps with your hands close by. They set the temperature. They place the pan on the rack while you hold the oven door and stay within arm’s reach. They set the timer. They watch through the oven window.
When the timer goes off, they put on their mitts – you check the fit – and they remove the pan with you guiding from behind. Your hands are not on the pan, but you are right there.
Give specific feedback after every session. Not just “good job.” Say: “You checked your mitts were on all the way before you grabbed the pan – that was exactly right.”
Stage 3 – Supervised Independence (Ages 10-14)
Your child runs the process start to finish. You are in the kitchen but not hovering. You review the recipe together before they start and stay available for questions.
After the bake, debrief: “What would you do differently?” This builds self-evaluation – the skill that makes someone genuinely safe in a kitchen long-term. America’s Test Kitchen Kids (2023) recommends practicing the same three to four recipes multiple times before moving to new ones. Repetition builds real confidence.
Stage 4 – Independent Use with House Rules (Ages 14+)
By 14, most children with prior training are ready to bake independently. Set house rules together: tell a parent before using the oven, no oven use alone in the house until 16, clean up after every session. Write the rules down together – children who help create the rules follow them.
Temperature and Timer Basics: Teaching Kids to Read and Set the Oven Correctly
Most children are confused by oven temperature because no one explains it clearly. Here is how I teach it.
Explain temperature ranges with examples. 300 to 325 degrees is slow and low – meringues, warming leftovers. 350 to 375 degrees is the standard baking range for cookies, cakes, and muffins. 400 to 425 degrees is hot and fast – roasted vegetables, pizza. 450 and above is for bread crusts and searing. Once a child maps these ranges to foods they know, temperature becomes a tool instead of an arbitrary number.
Teach preheating as non-optional. Putting food into a cold oven is like jumping into a pool before it fills – the food cooks at the wrong rate from the start.
Teach the timer as a minimum, not a guarantee. “The recipe says 22 minutes – check at 22. It might need 24. Look at the food, not just the clock.”
Gas vs. Electric Ovens: Which Is Safer for Beginners?
For a child learning oven basics, an electric oven is safer than a gas oven. Electric ovens heat more evenly, have no open flame, and do not require lighting a burner – which is a separate skill that should come after oven comfort is established.
Gas ovens heat faster and are preferred by many professional cooks for stovetop work. But for early oven learning, the consistent, visible heat of an electric oven gives a child more predictable results and removes the complexity of flame.
If you have a gas oven at home, that is fine – just teach oven use separately from stovetop and burner work. Do not introduce both at the same time.
The U.S. Consumer Product Safety Commission (2022) notes that gas range fires are three times more likely than electric range fires in residential settings. That is not a reason to avoid gas ovens entirely, but it is a reason to start children on electric when you have the choice.
How to Handle Burns and Emergencies: First Aid Every Parent Should Teach Alongside Baking
Burns will happen. Small ones – a finger brushing a rack edge, a wrist catching steam. Knowing what to do turns a scary moment into a handled moment.
Teach the three-step burn response before the first oven session. Cool, cover, call.
- Cool: Run cool (not cold, not ice) water over the burn for 10 minutes. Ice restricts blood flow and makes burns worse – the American Red Cross (2024) is explicit on this point.
- Cover: After cooling, cover loosely with a clean, dry cloth or non-stick bandage. Do not pop blisters.
- Call: Any burn larger than 1 inch, any burn on the face or hands, or any burn that blisters immediately needs medical attention.
Practice the response with your child before their first session. Ask them: “What do you do if you burn your wrist?” Walk through it. Then write it on an index card and tape it near the oven.
Knowing what to do makes children calmer when something happens. And calmness is what prevents a small burn from becoming a bigger injury caused by panicking.
The Best Starter Recipes for Kids Learning to Use the Oven
The best beginner recipes share three traits: they bake at 350 to 375 degrees (safe, standard), they have a clear visual doneness cue (golden edges, a set center), and they are forgiving – a minute or two over or under does not ruin them.
These five recipes have worked consistently in my cooking programs:
- Slice-and-bake sugar cookies: Pre-made dough, obvious doneness (golden edges), 10 to 12 minutes at 350 degrees – short enough for early attention spans.
- Sheet-pan roasted vegetables: Wide doneness window, teaches how heat changes texture. Carrots, broccoli, and potato chunks work well.
- Frozen pizza: Low stakes, familiar result, and a natural lesson in why preheating matters – frozen pizza on a cold rack always produces a soggy bottom.
- Banana muffins: Simple batter, muffin tin for portion control, and introduces the toothpick test as a doneness skill beyond the timer.
- Baked eggs in muffin cups: Short bake time, teaches visual doneness – whites set, yolks slightly loose.
America’s Test Kitchen Kids (2023) recommends repeating three to four recipes multiple times per stage. Repetition, not variety, builds real skill.
Common Parent Mistakes That Undermine Kitchen Confidence
Parents make well-meaning mistakes that accidentally teach the wrong lessons. Here are the ones I see most often.
Taking over mid-task. Your child is sliding a pan in slowly and you reach in and do it for them. Unless there is actual danger, let them finish the step. Doing it for them teaches them they are not capable.
Correcting technique during a timed step. If the timer is running and something is in the oven, wait. Debrief after the bake, not during it.
Praising the result instead of the process. “Your cookies look perfect!” teaches outcome-focus. “You set that timer and waited – that’s the right instinct” teaches safe process. KidsHealth.org (2024) notes that process praise in skill-learning contexts produces more consistent behavior than outcome praise.
Using fear as a teaching tool. “You could lose a finger” is a trauma trigger, not a safety lesson. Say instead: “If the rack catches your wrist without a mitt, it will burn you. The mitt stops that.” Specific and calm.
Skipping the debrief. Three to five minutes after a baking session – what went well, what to watch next time – is where real learning happens.
The First Time I Let a Young Cook Use the Oven Alone
The first child I trusted with solo oven use was a 13-year-old named Marcus. Eight months in the program, the same four recipes at least six times each, never rushed a step. He called me over twice during his sessions to ask questions he probably already knew the answer to. Both times I said “what do you think?” and he got it right.
The day came with banana muffins. I stood at the back of the room, visible but not hovering. He preheated, mixed the batter, filled the tin, set the timer, and sat down to wait. When the timer went off, mitts on – both of them, all the way up – tin out clean. He looked at me. I nodded. He set it on the cooling rack.
No drama. Just a kid who had learned the steps properly and done them.
That is how it goes when the progression is right. Practice first, permission second.
Frequently Asked Questions About Teaching Kids Oven Safety
What age can a child safely use the oven?
Most children are ready for assisted oven use between ages 8 and 10, with a capable adult present throughout. Independent use typically develops between 12 and 14, depending on the child’s focus, emotional regulation, and prior supervised practice. Age is a rough guide – maturity and training matter more than the number.
How do I know when my child is ready to use the oven without help?
Watch for three things: they consistently follow all five safety rules without reminders, they have completed the same recipe at least four to six times under supervision with no safety errors, and they can explain what to do if something goes wrong. When all three are true, you can begin supervised independence – present in the house, not necessarily in the kitchen.
Is a gas oven or electric oven safer for children?
Electric ovens are safer for early learners – no open flame, more even heat, more predictable results. The U.S. Consumer Product Safety Commission (2022) reports gas range fires at three times the rate of electric in residential settings. If you only have gas, introduce oven work before stovetop burner work.
What oven mitts are best for kids?
Silicone or thick quilted mitts that extend 2 to 3 inches past the wrist. Avoid flat pot holders – they leave the wrist exposed. Buy child-sized mitts so they fit and grip correctly.
What do I do if my child burns themselves?
Cool, cover, call. Run cool (not ice-cold) water over the burn for 10 minutes. Cover loosely with a clean cloth. Seek medical attention for any burn larger than 1 inch, any burn on the face or hands, or any burn that blisters immediately (American Red Cross, 2024). Teach your child this response before their first oven session so they know what to do if you are not right there.
What recipes should kids start with in the oven?
Start with recipes that bake at 350 to 375 degrees and have a clear visual doneness cue. Slice-and-bake cookies, sheet-pan vegetables, banana muffins, and frozen pizza are all good entry points. Short bake times (10 to 15 minutes) are better for early sessions – they keep the child engaged and reduce waiting time that can lead to impatience and early oven opening.
How do I teach oven safety without making my child scared of the kitchen?
Use specific, calm language about risk rather than dramatic warnings. Say “the rack will burn your wrist if you touch it without a mitt” instead of “you could get seriously hurt.” Practice the emergency response before anything goes wrong, so the procedure feels routine. Praise calm, careful behavior every time you see it. The goal is a child who respects the oven’s heat without fearing the oven itself.
Should I let my child use the oven alone when I’m not home?
No – not until at least 15 or 16, and only after they have at least a year of consistent supervised solo use at home. The National Fire Protection Association (2024) lists unattended cooking as the top cause of residential kitchen fires. An adult should be in the house when the oven is on.
Key Takeaways
- Start with supervised observation between ages 5 and 8, then move to assisted handling, supervised independence, and eventually independent use with house rules – skip no stage.
- Emotional readiness (focus, patience, awareness of risk) matters more than age when deciding when to start.
- Always use full oven mitts that cover the wrist – never flat pot holders.
- The five rules – stay in the kitchen, use both mitts, no loose clothing, set a timer, call an adult if unsure – must be automatic before any solo step is attempted.
- Electric ovens are safer for early learners than gas ovens.
- Teach the burn response (cool water for 10 minutes, cover, call) before the first session – not after.
- Praise the process, not the result. “You waited for the timer” is more valuable feedback than “your cookies look great.”
- Repetition builds real confidence. Three to four recipes done six times each are worth more than twenty recipes done once.
Starting small is the right move. One recipe. One supervised session. One debrief conversation. That is all it takes to begin building a skill your child will use for the rest of their life.
The parents who tell me later that their teenager makes dinner once a week, or that their college student can actually feed themselves – those outcomes start with a single session in front of a 350-degree oven, a pair of oven mitts, and a grown-up who was patient enough to let a child do the step themselves.
Start there. Stay patient. The kitchen will take care of the rest.

I’m Mossaraof, a trained chef and the founder of OvenInsights.com. I spent years cooking at Larrupin’ Cafe and in kitchens across Chicago and Seattle. Now I test kitchen gear for a living. I moved to North Acton, London, and I test every tool I write about. I use real meals and real heat. No brand deals. No shortcuts. I cover 12 kitchen types and hundreds of recipes. I believe this: the right tools matter as much as the recipe.




