
At A Glance
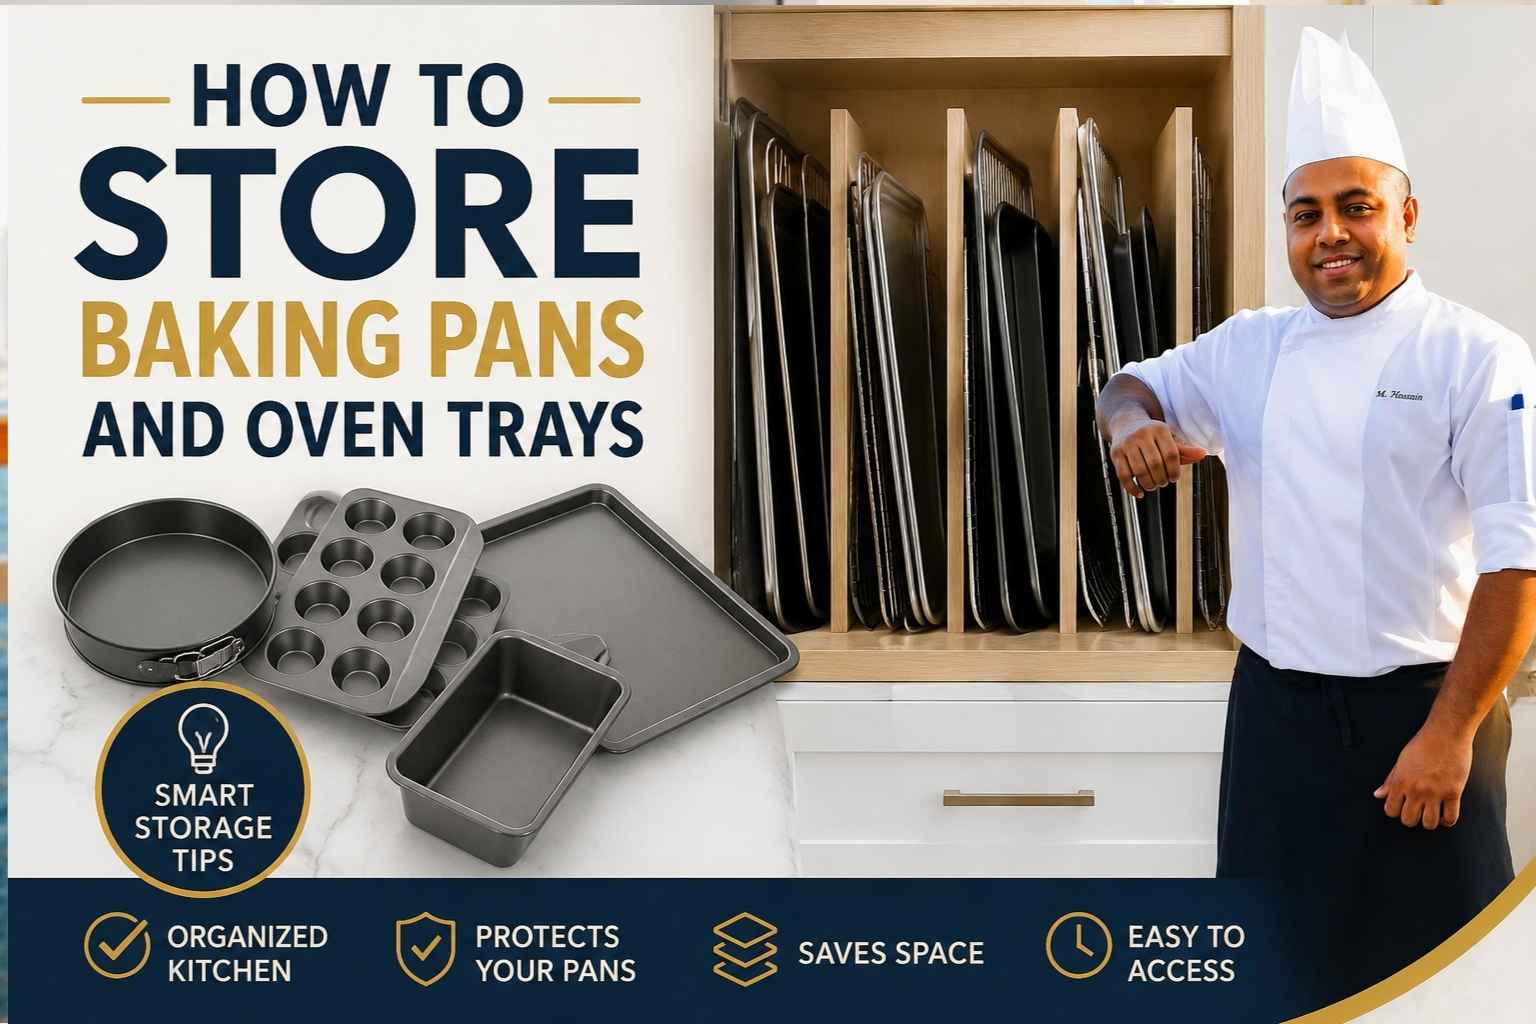
- Store pans on edge in vertical dividers, not stacked flat. Stacking is the top cause of warping and scratches (America’s Test Kitchen, 2023).
- Nonstick pans need a soft barrier – felt pan protectors, dish towels, or paper plates – between every layer.
- Cast iron and carbon steel need a dry spot with airflow. Damp basements and closed plastic bins cause rust within weeks.
- A pegboard or cabinet divider system costs $15-$60 and fits most kitchens, even small rentals.
- Label shelves by frequency of use: daily pans up front and at hand height, holiday pans up top or in the back.
- Sheet pans should stand up, not stack flat. Flat stacks dent the bottom pan and trap moisture.
My pans used to live in a scary pile under my stove. Every time I needed one, I’d pull out three others and drop a lid on my foot. That’s why I finally sat down and figured out how to store baking pans and oven trays the smart way. I’ve tested every trick in my own tiny kitchen, so I know what actually works. Grab a cup of coffee, and let’s fix that messy cabinet together.
Why Pan Storage Actually Matters
Bad storage ruins bakeware faster than bad cooking does. I’ve replaced more pans because of how they sat in a cabinet than because of how they were used.
Three things happen when pans are stored wrong: warping, scratching, and rust. Each one has a clear cause, and each one has a fix that takes five minutes.
Warping from Stacking and Heat
Warping happens when a flat pan gets stacked under weight, especially while it’s still slightly warm from the dishwasher or oven. The metal bends under pressure and never goes fully flat again (Cook’s Illustrated, 2022).
I learned this the hard way in my first head chef job. We stacked sheet pans ten high, fresh out of the dish pit, every single night. Within two months, half our pans rocked on the stovetop like little boats. A warped pan heats unevenly. Cookies brown on one side and stay pale on the other.
The fix is simple: let pans cool fully before stacking, and never stack more than three or four flat pans without a buffer.
Scratching That Kills Nonstick Coatings
Scratches on nonstick pans usually come from one pan’s edge or rivets digging into the coating of the pan below it. Once the coating is scratched, food sticks, and small flecks of coating can flake into food (The Kitchn, 2024).
A $30 nonstick pan with a ruined coating is now a $30 pan that sticks worse than a $10 one. The coating doesn’t wear out from cooking. It wears out from storage.
Rust on Cast Iron and Carbon Steel
Rust forms when bare metal meets moisture and sits that way for more than a day or two. Cast iron and carbon steel both rely on a seasoning layer – a thin coat of polymerized oil – to keep oxygen and water off the metal (Lodge Cast Iron, 2023).
If that seasoning gets scraped off in storage, or if the pan goes into a bin while still slightly damp, rust starts fast. I’ve seen a brand-new carbon steel pan grow a rust bloom in 48 hours sitting in a closed plastic tote in a basement.
Vertical vs. Horizontal Storage: Which Is Better?
Vertical storage is better for most bakeware, and horizontal stacking should be limited to two or three pans of the exact same size and shape. Vertical storage stops warping, reduces scratches, and makes it easier to grab one pan without moving five others.
When Vertical Storage Wins
Vertical storage works for sheet pans, cookie sheets, cooling racks, cutting boards, and muffin tins. You slide each item into its own slot, side by side, like books on a shelf.
This setup has three advantages. First, no weight presses down on any single pan. Second, you can see every pan at a glance. Third, pulling one pan out doesn’t disturb the others.
The downside is that vertical storage takes up more cabinet width. A drawer that holds eight stacked pans flat might only fit four pans standing up.
When Horizontal Stacking Is Okay
Horizontal stacking works fine for identical pans of the same material and size – say, three matching 9×13 cake pans, or a nested set of mixing bowls. The key word is identical. When pans match exactly, weight distributes evenly and nothing rocks or digs in.
Stacking different pans together – a heavy cast iron skillet on top of a thin aluminum sheet pan – is where damage happens. The heavy pan’s edges and handle dig straight into the soft pan below.
A Quick Rule of Thumb
If you wouldn’t stack two dinner plates of different sizes and weights without a napkin between them, don’t stack mismatched pans without a buffer either. Same logic, bigger stakes.
Storing Nonstick Pans Without Scratching the Coating
The best way to store nonstick pans is to separate every layer with a soft buffer – a felt pan protector, a folded dish towel, or even a paper plate works in a pinch. The goal is simple: never let metal touch the coated surface of another pan.
Felt Pan Protectors
Felt pan protectors are flat circles or squares of padded fabric, sold in multipacks, that slide between stacked pans. Container Store sells sets of these for around $10-$15 for a pack of five (Container Store, 2024).
I keep a stack of these in every kitchen I run. They’re cheap, they last for years, and they take ten seconds to use. Slide one in between each pan, stack as normal, done.
Dish Towels and Paper Plates as a Free Alternative
If you don’t want to buy felt protectors, a folded kitchen towel does the same job. So does a stack of paper plates – one between each pan. Neither costs extra money if you already own them.
The towel method has one downside: towels need to be clean and dry, or you’re storing moisture against your pans. Paper plates avoid that problem entirely and are my pick for anyone on a tight budget.
Why You Should Avoid Stacking Nonstick Pans at All If Possible
My honest opinion: nonstick pans should go in vertical dividers whenever the kitchen has the space. Even with a buffer, stacking nonstick cookware means some weight and pressure on the coating every time.
In my home kitchen, I keep my two nonstick skillets hanging on a wall rail by their handles. Zero weight on the cooking surface, ever. That’s the gold standard if your kitchen layout allows it.
Storing Cast Iron and Carbon Steel Trays
Cast iron and carbon steel need a dry storage spot with airflow, and every piece should be lightly oiled before it goes into storage for more than a few days. Skip these steps and rust shows up fast, even on well-seasoned pans.
Moisture Is the Enemy
Cast iron and carbon steel are bare metal under that seasoning layer. Any spot where moisture collects – a damp towel left underneath, a basement with humidity above 50%, or a sealed container – creates rust conditions (Lodge Cast Iron, 2023).
Before storing either type of pan, dry it completely on the stovetop over low heat for two or three minutes. This drives off any water hiding in the pores of the metal, not just the surface water you can see.
Re-Oil Before Long-Term Storage
After drying, wipe a thin layer of oil across the cooking surface using a paper towel. Use a neutral oil with a high smoke point, like grapeseed or vegetable oil. This isn’t re-seasoning the whole pan. It’s a light protective film for storage.
I do this every time I put my carbon steel pans away for more than a week. It takes thirty seconds and has saved me from rust more times than I can count.
Where to Store Cast Iron and Carbon Steel
Store these pieces somewhere dry with some air circulation – an open shelf, a cabinet with a vent, or hanging on hooks. Avoid airtight plastic bins entirely. Trapped air holds moisture against the metal.
Never store cast iron stacked with the lid on tight. If you stack a cast iron pot with its lid sitting directly on the cooking surface, moisture gets trapped between the lid and the pan. Set a folded paper towel between the lid and the pot to let air move.
Small Kitchen Storage Solutions That Actually Work
Small kitchens need storage that uses vertical space and unused gaps – cabinet dividers, pegboards, pull-out drawers, over-the-door racks, and pantry shelving all turn dead space into pan storage. None of these require a major renovation.
Cabinet Dividers
Cabinet dividers are metal or wire racks that sit inside an existing cabinet and create vertical slots for pans to stand in. They cost $15-$40 for a set and install in minutes with no tools (Wayfair, 2024).
I’ve used these in every rental kitchen I’ve cooked in. They turn one deep, awkward cabinet shelf into four or five organized slots.
Pegboards
A pegboard is a board with evenly spaced holes that hold movable hooks, letting you hang pans, lids, and utensils on a wall. Pegboards cost $20-$50 depending on size and are common in professional kitchens for exactly this reason – everything is visible and within reach (Real Simple, 2023).
Pull-Out Drawers
Pull-out drawers near the oven are the best spot for heavy bakeware because you don’t have to bend into a low cabinet to dig through a stack. If your kitchen doesn’t have drawers, a slide-out wire basket can be added to most base cabinets for $20-$40.
Over-the-Door Racks
Over-the-door racks hang on a cabinet or pantry door and hold smaller pans, cutting boards, and lids. These are ideal for muffin tins, loaf pans, and cooling racks – lighter items that won’t strain the door hinges.
Under-Bed and Pantry Storage for Occasional Bakeware
Holiday bakeware – turkey roasters, large stockpots, specialty molds – can live outside the kitchen entirely. Under-bed storage bins or a top pantry shelf work fine for items used a few times a year. Just make sure the storage spot is dry, not a damp basement or garage.
Storage Solutions Reference Table
| Method | Space Needed | Cost Estimate | Best For |
|---|---|---|---|
| Vertical cabinet dividers | One cabinet shelf, 12-18 inches deep | $15-$40 | Sheet pans, cookie sheets, cutting boards |
| Pegboard wall system | 2×3 ft of open wall | $20-$50 | Skillets, lids, frequently used pans |
| Pull-out drawer / slide basket | Base cabinet, 18-24 inches wide | $20-$60 | Heavy pans near the oven |
| Over-the-door rack | Pantry or cabinet door | $15-$30 | Muffin tins, loaf pans, cooling racks |
| Stacking with felt protectors | Existing shelf or drawer | $10-$15 | Nonstick pans, identical pan sets |
| Hanging wall rail | 2-3 ft of open wall | $15-$35 | Skillets, frying pans, lids |
| Under-bed/pantry bins | Closet or under-bed space | $10-$25 | Holiday and occasional-use bakeware |
Stacking Sheet Pans, Cookie Sheets, and Muffin Tins Without Damage
The safest way to store sheet pans and cookie sheets is standing up in a vertical divider, never stacked more than three flat. Muffin and cupcake tins are the exception – they nest safely because their wells keep weight off the baking surface.
Sheet Pans and Cookie Sheets
These are the pans most likely to warp because they’re thin, flat, and have a large surface area. Stacked flat, the weight of pans above presses down unevenly, especially if the top pan has any existing warp.
Stand them up in a vertical divider, slotted like files in a filing cabinet. If you must stack them flat, limit it to two or three and put the heaviest, flattest pan on the bottom.
Muffin and Cupcake Tins
Muffin tins are actually fine to nest inside each other because the cups create a gap – the bottom tin’s cups don’t press against the top tin’s baking surface. Two or three muffin tins can nest safely.
The one thing to watch: don’t nest a muffin tin inside a flat sheet pan stack. The raised cups create pressure points that can dent the sheet pan above or below it.
A Note on Glass and Ceramic Bakeware
Glass and ceramic dishes need extra care because they chip and crack rather than bend. Always put a towel or felt layer between glass dishes, and never stack a heavy ceramic dish on top of a glass one.
Storing Lids, Racks, and Oven Accessories
Lids, cooling racks, and oven accessories should be stored separately from the pans they go with, using flat vertical slots or a dedicated shelf – trying to nest a lid on top of its matching pan usually wastes more space than it saves.
Lids
Lids stack well on their own in a vertical divider, sorted roughly by size. I keep a small wire rack just for lids, separate from the pots and pans. This also makes it easier to find the right lid fast during service.
Cooling Racks and Oven Racks
Cooling racks slide into the same vertical dividers as sheet pans – they’re flat and thin, so they fit right alongside. Spare oven racks, if you have extras, can hang flat against a wall using two large hooks, keeping them out of cabinets entirely.
Small Accessories
Pizza stones, baking steels, and oven thermometers each need their own small home. A pizza stone is heavy and awkward – I store mine standing on its edge in the back of a low cabinet, with a towel underneath to protect the floor of the cabinet from chips.
Labeling and Organizing by Frequency of Use
Organize bakeware into two groups – everyday pans and occasional pans – and store everyday pans at arm height near the oven, while occasional pans go higher, lower, or further away.
Everyday Bakeware
Everyday bakeware includes the sheet pan you use for roasted vegetables three times a week, your go-to skillet, and whatever pan makes your weeknight dinners. These belong in the most accessible spots: eye-level shelves, the drawer right by the stove, or hooks within arm’s reach.
Occasional and Holiday Bakeware
Occasional bakeware includes turkey roasters, specialty cake pans, holiday cookie cutters, and anything used less than once a month. These can go on a top shelf, in a pantry, or even in another room. There’s no reason a 17-inch turkey roaster needs prime real estate in March.
Labeling Shelves and Bins
A simple label – even a piece of masking tape with a marker note – on a shelf or bin edge saves time for everyone in the kitchen. In a professional kitchen, I label shelves by pan type and size: “Half Sheet Pans,” “Hotel Pans – Full,” “Muffin Tins.” At home, the same idea works for a family kitchen where more than one person cooks.
Common Storage Mistakes and How to Fix Them
The most common bakeware storage mistakes are stacking mismatched pans flat, storing damp pans, and using closed plastic bins in humid spaces – each one causes damage that’s avoidable with a small change in habit.
Mistake 1: Stacking Mismatched Pans Flat
The problem: A heavy cast iron skillet sitting directly on a thin nonstick pan. The skillet’s weight and rough bottom scratch and dent the pan below.
The fix: Separate by type. Heavy pans get their own stack or their own slot. Light pans get vertical dividers or felt protectors.
Mistake 2: Putting Pans Away While Still Damp
The problem: A pan goes from the dish rack straight into a closed cabinet while still slightly wet. For cast iron and carbon steel, this means rust within days. For any pan, it means a musty smell in the cabinet over time.
The fix: Let every pan air-dry fully, or dry it by hand, before it goes into storage. For cast iron, a quick pass on the stove burner finishes the job.
Mistake 3: Storing Bakeware in Damp Basements or Garages
The problem: Basements and garages often run 60-70% humidity, especially in summer. Bare metal pans stored there – even in a closed bin – will rust. I’ve opened storage totes in a client’s basement and found a full set of cast iron covered in surface rust after just one season.
The fix: Keep bare metal cookware in the main living space of the house, somewhere with normal humidity (30-50%). If a basement is the only option, oil every piece heavily before storage and check on it monthly.
Mistake 4: Using Closed Plastic Bins for Everything
The problem: Plastic bins seem like a tidy solution, but a sealed bin traps whatever moisture is already on the pans inside it. There’s nowhere for that moisture to go.
The fix: Use open shelving, wire racks, or bins with ventilation holes for metal cookware. Save sealed plastic bins for plastic or silicone bakeware, which doesn’t rust.
Mistake 5: Hanging Heavy Pans on Weak Hooks
The problem: A cast iron skillet on a thin adhesive hook is an accident waiting to happen. I’ve seen a hook pull straight out of drywall, sending a 9-pound skillet onto a counter.
The fix: Use hooks rated for at least double the pan’s weight, and mount into a stud or a pegboard with proper anchors, not just adhesive strips.
My Personal Pan-Storage System
After 15 years of running professional kitchens and organizing more home kitchens than I can count, here’s exactly what I do in my own kitchen.
Zone 1: The Oven-Adjacent Drawer
Right under my oven, a wide pull-out drawer holds my three most-used sheet pans, standing on edge in a simple wire divider. These are the pans I touch almost every day – for roasting, for sheet-pan dinners, for reheating leftovers.
Zone 2: The Pegboard
On the wall beside my stove, a pegboard holds my cast iron skillet, my carbon steel pan, and two lids, all hanging on sturdy hooks. Nothing touches anything else. Everything dries fully in open air after washing, right where it lives.
Zone 3: The Nonstick Drawer
A shallow drawer holds my two nonstick pans, each wrapped in a felt protector, lying flat. I only have two, so a vertical setup isn’t worth the space here – but the felt protectors are non-negotiable.
Zone 4: The High Shelf
My muffin tins, a springform pan, and my turkey roaster live on the highest cabinet shelf. I use these maybe ten times a year combined. The roaster gets a light coat of oil before it goes up there each January, after the holidays.
Why This System Works for Me
Every zone matches how often I reach for something. The drawer by the oven is the laziest possible reach – that’s where my daily pans live. The high shelf is the most annoying spot in the kitchen – that’s where the once-a-year pans go. I’m not fighting my own kitchen every time I cook.
Frequently Asked Questions
What is the best way to store sheet pans?
Stand sheet pans up in a vertical divider, slotted side by side like files. This stops warping from stacked weight and lets you grab one pan without disturbing the rest. If you must stack flat, keep it to two or three pans of the same size.
How do I store nonstick pans so they don’t get scratched?
Place a felt pan protector, folded towel, or paper plate between every layer when stacking nonstick pans. Better yet, store them in vertical dividers or hang them by the handle so nothing presses against the coating at all.
Can I store cast iron in a plastic bin?
Avoid sealed plastic bins for cast iron. They trap any moisture against the metal and speed up rust. Use an open shelf or a vented container, and apply a light coat of oil before any storage longer than a few days.
Is it bad to stack different types of pans together?
Yes, stacking different types together causes the most damage. A heavy pan’s edges dig into a lighter pan’s surface below it. Group pans by weight and material, or separate every layer with a protective buffer.
How do I stop my cabinets from smelling musty with stored pans?
Make sure every pan is completely dry before it goes into the cabinet, and avoid sealed containers. A small moisture-absorbing packet placed in the back of the cabinet also helps in humid climates.
What’s the best storage solution for a small kitchen?
Cabinet dividers and pegboards give the most storage for the least space and cost. Both turn unused vertical space – inside a cabinet or on a bare wall – into organized pan storage for $15-$50.
How often should I oil cast iron for storage versus seasoning?
A light wipe of oil before storage is different from full seasoning. Do the light wipe every time you put the pan away for more than a few days. Do a full re-seasoning only when the cooking surface looks dull, dry, or shows bare spots.
Should I store muffin tins flat or on their side?
Muffin tins can nest flat inside each other safely because their cups create natural gaps between layers. Two or three nested muffin tins work fine in a drawer or on a shelf. Just don’t nest them inside a stack of flat sheet pans.
Key Takeaways
- Store flat pans vertically, not in tall flat stacks. This is the single biggest change that prevents warping.
- Always separate nonstick pans from anything that can scratch them – felt, towels, or paper plates all work.
- Cast iron and carbon steel need to be bone-dry and lightly oiled before storage, especially in basements or humid climates.
- A pegboard or cabinet divider system costs under $50 and solves most small-kitchen storage problems.
- Sort your bakeware by how often you use it. Daily pans go where you can reach them without thinking. Holiday pans go wherever is most out of the way.

I’m Mossaraof, a trained chef and the founder of OvenInsights.com. I spent years cooking at Larrupin’ Cafe and in kitchens across Chicago and Seattle. Now I test kitchen gear for a living. I moved to North Acton, London, and I test every tool I write about. I use real meals and real heat. No brand deals. No shortcuts. I cover 12 kitchen types and hundreds of recipes. I believe this: the right tools matter as much as the recipe.




