
At A Glance
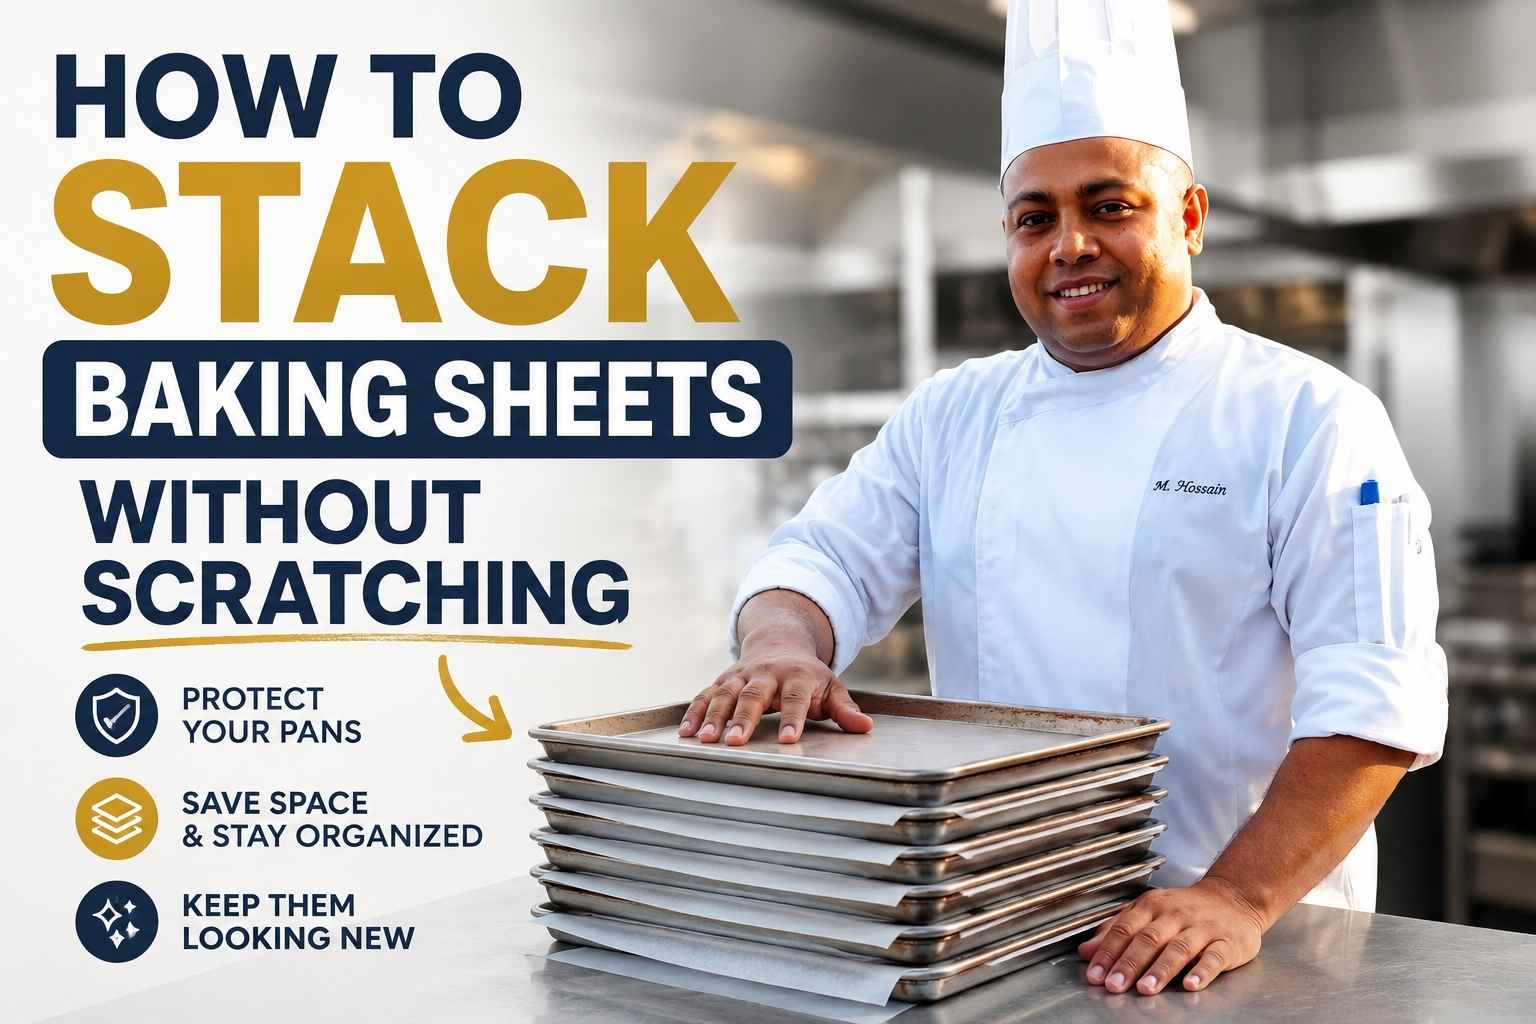
- Place a dish towel, silicone baking mat, or dedicated felt pan protector between every stacked sheet pan to prevent scratches and coating damage.
- Nonstick pans are the most scratch-prone — they need a soft barrier every single time, no exceptions.
- Scratches on bare aluminum are mostly cosmetic; scratches on nonstick coatings can release PFAS particles into food and are a genuine health concern (Environmental Working Group, 2023).
- Professional kitchens almost never stack sheet pans — they use vertical slot racks, and you can replicate that system at home for under $30.
- Stack pans largest-to-smallest, never the reverse, and always store them bone-dry to prevent corrosion under the stack.
I still cringe thinking about the scratch marks on my favorite baking sheet. I stacked it wrong, and it paid the price. That’s why I want to show you how to stack baking sheets without scratching them ever again. It’s such a simple fix, and it saves your pans for years to come. Trust me, your kitchen will thank you.
Why Baking Sheets Scratch So Easily — The Metallurgy Behind the Damage
Most baking sheets scratch because two hard metal surfaces slide against each other under pressure. That friction is the whole problem. Understanding what your pans are made of tells you exactly how much protection they need.
Bare aluminum (also called “natural finish” aluminum) is a soft metal with a hardness rating of roughly 2.5–3 on the Mohs scale — about as hard as a fingernail (Machinery’s Handbook, 2020). It scratches easily from contact with other metal pans, oven racks, and metal utensils. The scratches are mostly surface-level and don’t affect food safety, but they do dull the finish and, over time, can create microscopic grooves where grease and food residue collect.
Aluminized steel — the material used in heavy-duty commercial sheet pans like the ones from Nordic Ware and Lloyd’s Pans — is aluminum-coated carbon steel. The steel core is harder, but the aluminum surface layer still scuffs against metal contact. These pans are more durable than pure aluminum, but they’re not scratch-proof (King Arthur Baking, 2022).
Nonstick coatings are the most vulnerable of all. The polytetrafluoroethylene (PTFE) coating — the chemical that makes food release cleanly — sits as a thin layer, often just 0.025 mm thick, over the base metal (Cook’s Illustrated, 2021). That layer does not recover from scratches. Once it’s breached, the pan loses its nonstick properties in that spot, and degraded PTFE can leach into food at high temperatures.
Ceramic-coated pans use a silica-based coating that’s harder than PTFE but still chips and scratches when metal makes contact. The damage looks different — it tends to flake rather than score — but the result is the same: the coating no longer functions as intended.
Dark carbon steel pans, which some home bakers use for deep-colored crusts, are the most scratch-tolerant. The seasoning layer on carbon steel is self-repairing to a point — you can re-season a scratched or scuffed carbon steel pan. The same is true of cast iron baking dishes.
The Real Cost of a Scratched Pan — Why This Isn’t Just About Looks
Scratched baking sheets cause four specific problems. Cosmetic damage is the least of them.
1. Nonstick coating degradation and food safety risk. When PTFE coating is scratched, it can release particles into food and, at temperatures above 500°F (260°C), begin to off-gas toxic fumes (Environmental Working Group, 2023). The FDA considers PTFE inert at normal cooking temperatures, but a damaged coating accelerates degradation. If your nonstick pan has visible scratches that go through the coating to the metal beneath, retire it.
2. Flavor transfer and surface contamination. Bare metal exposed by scratches is porous at a microscopic level. Strong-smelling foods — garlic, fish, spiced meats — can lodge in those micro-grooves and transfer faint off-flavors to the next batch you bake. I’ve had this happen with sheet pans used for salmon one night and cookies the next. It is not pleasant.
3. Rust initiation on steel-core pans. Aluminized steel and carbon steel pans develop rust when the protective surface layer is breached and the pan is stored with any moisture present. A single shallow scratch on an aluminized steel pan, combined with humid cabinet air, can start a rust patch within weeks (America’s Test Kitchen, 2022).
4. Uneven heat distribution. This one surprises people. Scratches in the reflective surface of a bare aluminum pan change how it absorbs and reflects radiant heat. Heavy scratching across the surface can create small hot spots that cause uneven browning — particularly noticeable when baking cookies or sheet-cake layers.
The Best Materials to Place Between Stacked Baking Sheets
Place a physical barrier between every pan you stack. Here are your options, ranked by how well they work:
Felt Pan Protectors — Best Overall for Home Storage
Felt pan protectors (also called “pan guards” or “pan cushions”) are thick felt pads cut to fit sheet pan dimensions. They’re the closest thing home cooks have to a professional solution. A set of 12 runs about $10–$15 on Amazon or from restaurant supply stores like WebstaurantStore.
The felt is soft enough to protect nonstick coatings, thick enough to prevent contact between metal surfaces, and — unlike fabric — it stays put because it has just enough grip to not slide around when you pull a pan from the stack. It also doesn’t retain moisture the way a dish towel can.
Best for: All pan types, especially nonstick. Long-term storage of pans you use less than weekly.
Silicone Baking Mats — Best If You Already Own Them
If you own silicone baking mats (Silpat is the most recognized brand; half-sheet size fits a standard 18×13-inch sheet pan), they double as excellent pan protectors. The silicone surface is non-abrasive, slightly grippy, and thick enough to keep metal surfaces apart.
The downside is that silicone mats are bulky. A stack of 6 pans with silicone mats between each one takes up roughly twice the vertical space of the pans alone (Williams Sonoma, 2023). They also absorb odors over time if not washed regularly, and storing a mat pressed between pans while damp will eventually cause mildew.
Best for: Home bakers who already own mats. Mats you’ll use in the oven anyway — grab one from the stack, bake with it, wash it, then put it back between pans when you re-stack.
Dish Towels — Best Free Option, Worst Long-Term Solution
A folded dish towel between pans works. It’s free, soft, and always available. I used this method for the first three years of my home kitchen setup before I learned better.
The problem with dish towels is moisture. A towel that isn’t completely dry traps humidity against your pans. Put a slightly damp towel between an aluminized steel pan and its neighbor, stack three more pans on top, and leave it in a closed cabinet for a week. You may come back to rust spots and water marks that take serious scrubbing to remove.
If you use dish towels, they must be bone-dry. And I mean dry dry — not just dry to the touch.
Best for: Emergency use, short-term stacking (same-day or overnight), bare aluminum pans only.
Paper Towels — Acceptable, Not Ideal
Paper towels are better than nothing and worse than felt. They’re thin enough that heavy pans compress them almost flat, reducing their cushioning effect. They also tear if you slide pans rather than lift them cleanly.
That said, paper towels work fine for nonstick pans stored in a low-traffic spot where you’re not pulling pans in and out frequently. I use them in my second cabinet — the one with pans I reach for maybe once a month.
Best for: Light-use nonstick pans, infrequent access, short-term storage.
Foam Dividers — Best for Long-Term Storage or Moving Pans
Foam dividers (the same open-cell foam used in knife storage rolls) cut to sheet pan size offer the most protection of any barrier material. They’re used in food service equipment storage and by caterers transporting sheet pans between locations.
The downside for home use: foam retains moisture and, if stored in a humid kitchen cabinet, can develop mold on the surface. They need to be aired out regularly. Also, unless you’re moving or storing pans long-term, they’re overkill for a kitchen drawer.
Best for: Long-term storage, transported pans, moving day.
Stacking Method Comparison Table
| Barrier Material | Scratch Protection | Moisture Risk | Cost | Best Pan Type | Best Use Case |
|---|---|---|---|---|---|
| Felt pan protectors | Excellent | Low | $10-15 for 12 | All types | Daily-use home storage |
| Silicone baking mats | Excellent | Medium (if stored damp) | Already owned | All types | Active bakers who use mats regularly |
| Dish towels | Good | High if damp | Free | Bare aluminum only | Same-day stacking |
| Paper towels | Fair | Low | Minimal | Nonstick, light use | Infrequent access pans |
| Foam dividers | Excellent | High if humid | $8-12 | All types | Long-term or transport storage |
| No barrier (direct stack) | None | None | Free | None | Never recommended |
How Pan Material Changes Your Stacking Strategy
Not all baking sheets need the same level of care when stacking. Here’s how to adjust your approach by pan type.
Nonstick Sheet Pans — Treat Them Like Glassware
Nonstick pans need a soft barrier every single time you stack them, with no exceptions. That includes stacking a nonstick pan under a bare aluminum pan — the aluminum rim will scratch the nonstick surface of the pan below it.
Never stack nonstick pans directly on top of each other rim-to-rim. The raised edge of the top pan sits right on the nonstick cooking surface of the pan below.
Store nonstick sheet pans separately from bare metal pans if you can. A dedicated shelf or slot in a vertical rack (more on that below) is the safest option.
Bare Aluminum Sheet Pans — Most Forgiving
Bare aluminum pans can be stacked with just about any barrier. They scratch each other, but the scratches are cosmetic. Heavy commercial bakers use aluminum sheet pans precisely because they’re easy to care for — warp-resistant, scratch-tolerant, and easy to clean.
If you have a mix of nonstick and bare aluminum pans, always put the bare aluminum pans on top when stacking. A bare aluminum rim resting on another bare aluminum surface is fine. A bare aluminum rim resting on a nonstick surface is damage.
Aluminized Steel — Watch for Rust, Not Just Scratches
Aluminized steel pans (like Nordic Ware’s commercial half-sheet) are harder than pure aluminum but vulnerable to rust if the surface coating is breached. Stack them with a felt protector or dry dish towel and always — always — make sure they’re completely dry before stacking.
Ceramic-Coated Pans — Handle Like Nonstick
Treat ceramic-coated pans the same way you treat nonstick: soft barrier every time, never stacked under bare metal rims, and stored away from high-traffic cabinet areas where pans get banged around on retrieval.
How to Stack Baking Sheets by Size and Shape to Prevent Sliding
Stack pans largest-to-smallest, with the largest pan on the bottom. This creates a stable base and prevents the stack from tilting when you add or remove pans from the middle.
A standard home kitchen has three pan sizes: full sheet (26×18 inches, rarely used at home), half sheet (18×13 inches), and quarter sheet (13×9 inches). Stack half sheets together and quarter sheets together — don’t mix sizes in the same stack without a plan for how the rims will interact.
When you pull a pan from the middle of a stack, lift it straight up. Sliding a pan out sideways — even with a barrier in place — drags the barrier across the pan below it, which can still cause micro-scratches over time. Lift, don’t slide.
If your stack is more than 4 pans high, it’s time for a different storage system. Tall stacks are unstable, the bottom pans are hard to access, and the weight of the stack above compresses the barriers and reduces their effectiveness.
Drawer and Cabinet Storage That Eliminates Stacking Altogether
The best way to prevent stacking scratches is to not stack at all. Two storage systems make this practical for home kitchens.
Vertical Slot Racks — The Professional Kitchen’s Secret
Every professional kitchen I’ve worked in stores sheet pans vertically in wire racks with individual slots — no stacking, no contact between pan surfaces. A single pan slides into each slot, standing on its edge. You can grab any pan without disturbing the others.
Home versions of these racks are sold as “bakeware organizers” or “pot lid organizers.” The Yamazaki bakeware organizer (about $25) and the YouCopia ShelfSteps (about $20) both hold 6-8 pans vertically and fit in a standard cabinet or deep drawer. This is the system I use at home now, and I haven’t had a stacking scratch since I switched.
The only downside: vertical storage takes up more cabinet height and requires a shelf deep enough for the pan to stand upright. A half-sheet pan is 13 inches wide when standing on edge — measure your cabinet depth before buying a rack.
Deep Drawer Storage — Best for Quarter Sheets
Quarter sheet pans (13×9 inches) fit flat in a standard kitchen drawer with room to spare. Store them in a single layer with barriers between if you stack two, and you eliminate vertical storage problems entirely. This is how I store my quarter sheets — three pans in a deep drawer, silicone mats between each one, handles all facing the same direction so I can read the stack at a glance.
How Professional Kitchens Handle Sheet Pan Storage — and What You Can Borrow
In a professional kitchen, sheet pans live in sheet pan racks: stainless steel rolling carts with horizontal rails spaced about 2.5 inches apart. Each pan slides onto its own rail. There’s no contact between pan surfaces. Pans go in clean, come out clean, and last for years.
The key insight from professional storage isn’t the specific equipment — it’s the principle: each pan gets its own space, with air circulation around it.
You can replicate this at home in two ways:
- Buy a vertical slot organizer for your cabinet (as described above).
- Dedicate one cabinet shelf entirely to sheet pans stored on their edges, leaning against the back wall with a baking rack as a divider between groups.
The second option costs nothing if you already have a wire cooling rack. Stand the cooling rack vertically in the cabinet as a divider, then lean sheet pans on either side of it. It’s not elegant, but it works.
Professional kitchens also enforce one rule that home cooks ignore constantly: pans go back clean and dry, always. A pan with grease residue stacked on top of another pan transfers that grease to the surface below. In a home kitchen, that means the pan on the bottom gets baked-on residue from the pan above it every time the oven heats up. Clean, dry pans only in the stack.
When a Scratch Is Cosmetic vs. When to Throw the Pan Out
Here’s how to tell the difference:
Keep the pan if:
- The scratch is on bare aluminum, aluminized steel, or carbon steel, and it’s surface-level only.
- The scratched area doesn’t affect the cooking surface — rim scratches, bottom exterior scratches, and side wall scratches are all cosmetic.
- The pan still sits flat and heats evenly.
Replace the pan if:
- The scratch goes through the nonstick or ceramic coating to the bare metal beneath.
- You can see silver metal through a formerly dark nonstick surface.
- The coating is peeling, flaking, or bubbling anywhere on the cooking surface.
- The pan is a nonstick pan and has been scratched by metal utensils repeatedly over time — even if no single scratch looks severe, cumulative damage to PTFE coating is additive (Cook’s Illustrated, 2024).
A scratched bare aluminum pan is not a safety risk. A scratched nonstick pan with coating damage is. That’s the line.
How to Clean and Dry Pans Before Stacking to Prevent Corrosion
Moisture trapped under a stack is the second-biggest cause of pan damage after scratching. Follow this routine before every stack:
- Wash the pan as you normally would — hand-wash for nonstick and ceramic-coated, dishwasher-safe for bare aluminum (though hand-washing extends life).
- Dry immediately with a dish towel. Don’t leave pans in a drying rack — water pools in the corners of rimmed sheet pans and takes 20+ minutes to evaporate on its own.
- Run the pan through the oven at 200°F (95°C) for 5 minutes if you want to be sure it’s completely dry before storage. This is what I do for aluminized steel pans before long-term storage.
- Let the pan cool to room temperature before stacking. Stacking a warm pan on a cool one creates condensation on the cool pan’s surface — exactly the moisture trap you’re trying to avoid.
Common Stacking Mistakes and How to Fix Them
Mistake: Stacking pans while still warm from the oven. Fix: Let pans cool completely on a wire rack before returning them to storage. 20 minutes at room temperature is enough.
Mistake: Using a damp dish towel as a pan barrier. Fix: Check the towel with the back of your hand before using it as a barrier. If there’s any cool feeling at all, it’s too damp. Switch to a felt protector.
Mistake: Stacking nonstick pans under bare aluminum pans. Fix: Bare aluminum always goes on top when mixing pan types. The rim of the upper pan should never rest directly on the cooking surface of a nonstick pan below.
Mistake: Stacking more than 4 pans high. Fix: If you have more than 4 sheet pans, add a vertical slot rack or second shelf. A stack taller than 4 pans is unstable and puts too much pressure on the barriers and the bottom pan.
Mistake: Sliding pans out from the middle of a stack instead of lifting. Fix: Always lift straight up. Sliding drags the edge of the pan across the barrier and the pan below, creating lateral friction even with a barrier in place.
Mistake: Storing pans in a cabinet with no airflow. Fix: Leave the cabinet door slightly ajar in humid climates, or add a small silica gel packet to the shelf. Humidity buildup in a sealed cabinet accelerates corrosion on aluminized steel.
My Personal Storage Routine — What I Actually Do
I have 14 sheet pans across my home kitchen: four half-sheet bare aluminum, three half-sheet aluminized steel, three quarter-sheet nonstick, two quarter-sheet bare aluminum, and two full-sheet commercial aluminum pans I use for large batches.
Here’s my exact system:
The full-sheet pans go on the bottom shelf of the lower cabinet, stored flat with a single felt protector between them. I use these maybe twice a month, so a simple two-pan stack with one protector is fine.
The half-sheet pans go into a vertical slot organizer I installed on the middle shelf — three bare aluminum and three aluminized steel, each in its own slot. No barriers needed because no surfaces touch.
The quarter-sheet nonstick pans live in a deep drawer to the left of the oven. I store them with silicone mats between each pan because I reach for them constantly, and silicone mats go back in the drawer after use anyway.
The quarter-sheet bare aluminum pans share the same drawer, stored in a separate slot holder — a $12 adjustable bakeware rack from IKEA that holds four pans vertically.
Every pan goes back clean and dry. That’s the rule I don’t break. I’ve worked in kitchens where the rule was “clean at the end of service, not at the end of each use,” and every one of those kitchens had pans that looked like they’d been through a decade of abuse in three years.
Clean dry pans, barriers on anything nonstick, and a vertical rack for anything you reach for daily. That’s the whole system.
Frequently Asked Questions About Stacking Baking Sheets
What is the safest material to put between stacked baking sheets?
Felt pan protectors are the safest option for most home kitchens. They’re soft enough to protect nonstick coatings, thick enough to keep metal surfaces from contacting each other, and they don’t retain moisture. A set of 12 half-sheet-sized protectors costs about $12-15. Silicone baking mats are an equally good option if you already own them.
Can you stack nonstick baking sheets directly on top of each other?
No. Stacking nonstick pans without a barrier between them will scratch the coating every time you add or remove a pan. The rim of the upper pan slides across the nonstick surface of the pan below when you pull them apart. Even a single scratching event can breach the coating in a spot that widens with each subsequent use.
How do you stack baking sheets in a small kitchen with limited storage?
A vertical slot organizer (sold as a “bakeware organizer” or “pot lid rack”) lets you store 6-8 pans in the same horizontal space as a single stacked pile. If you have a deep kitchen drawer, store quarter-sheet pans flat in a single layer with barriers between them. The goal is to eliminate tall stacks, not create more of them.
Are scratches on baking sheets a food safety issue?
It depends on the pan type. Scratches on bare aluminum or aluminized steel are not a food safety issue — they’re cosmetic and may eventually cause minor rust on steel-core pans if moisture is present. Scratches on nonstick (PTFE) coatings are a food safety concern because damaged PTFE can release particles into food and degrade faster at high temperatures (Environmental Working Group, 2023). Replace scratched nonstick pans.
How many baking sheets can you safely stack?
Stack no more than 4 pans per pile. More than 4 creates an unstable stack, puts too much weight on the barriers between pans, and makes accessing pans in the middle physically difficult. If you regularly use more than 4 sheet pans, a vertical rack is the right solution.
Do silicone baking mats actually protect pans when used as barriers?
Yes. Silicone mats are non-abrasive, grippy enough to stay in place, and thick enough to keep metal surfaces from touching. The main limitation is that silicone mats are large and add significant bulk to a stack. Make sure they’re completely dry before using them as barriers — silicone holds surface moisture longer than you’d expect.
How do I stop my stacked baking sheets from sliding when I open the cabinet?
Stack pans largest-to-smallest, biggest pan on the bottom. This creates a stable pyramid shape. If you’re stacking same-size pans, the barrier material’s grip is what holds the stack steady — felt and silicone both grip better than paper towels. For a cabinet where vibration from opening and closing is a problem, a rubber shelf liner under the bottom pan anchors the whole stack.
Is it okay to put baking sheets in the dishwasher before stacking?
Dishwasher cleaning is fine for bare aluminum, but it’s not recommended for nonstick or aluminized steel pans — the high heat and harsh detergents in dishwashers accelerate coating degradation and can cause aluminized steel to discolor (America’s Test Kitchen, 2023). More importantly, dishwashers don’t get pans completely dry. Always run a dry cycle AND dry by hand before stacking, or use the oven-drying method described above.
Key Takeaways
- Use a physical barrier between every stacked pan: felt protectors are best, silicone mats are equally good, dry dish towels work short-term.
- Nonstick pans need a soft barrier every time and should never have bare metal resting directly on their cooking surface.
- Scratches on nonstick coatings are a food safety issue; scratches on bare aluminum are not — know the difference.
- Stack pans largest-to-smallest, never more than 4 high, and always lift pans straight up rather than sliding them out sideways.
- Vertical slot racks eliminate stacking scratches entirely and cost $20-30 — the professional kitchen solution that works equally well at home.
- Always store pans completely dry. Moisture trapped under a stack causes more long-term damage than scratching does.
- A clean, dry, properly stored sheet pan can last 20+ years; a scratched and poorly stored nonstick pan may need replacement in 2-3 years.

I’m Mossaraof, a trained chef and the founder of OvenInsights.com. I spent years cooking at Larrupin’ Cafe and in kitchens across Chicago and Seattle. Now I test kitchen gear for a living. I moved to North Acton, London, and I test every tool I write about. I use real meals and real heat. No brand deals. No shortcuts. I cover 12 kitchen types and hundreds of recipes. I believe this: the right tools matter as much as the recipe.




