
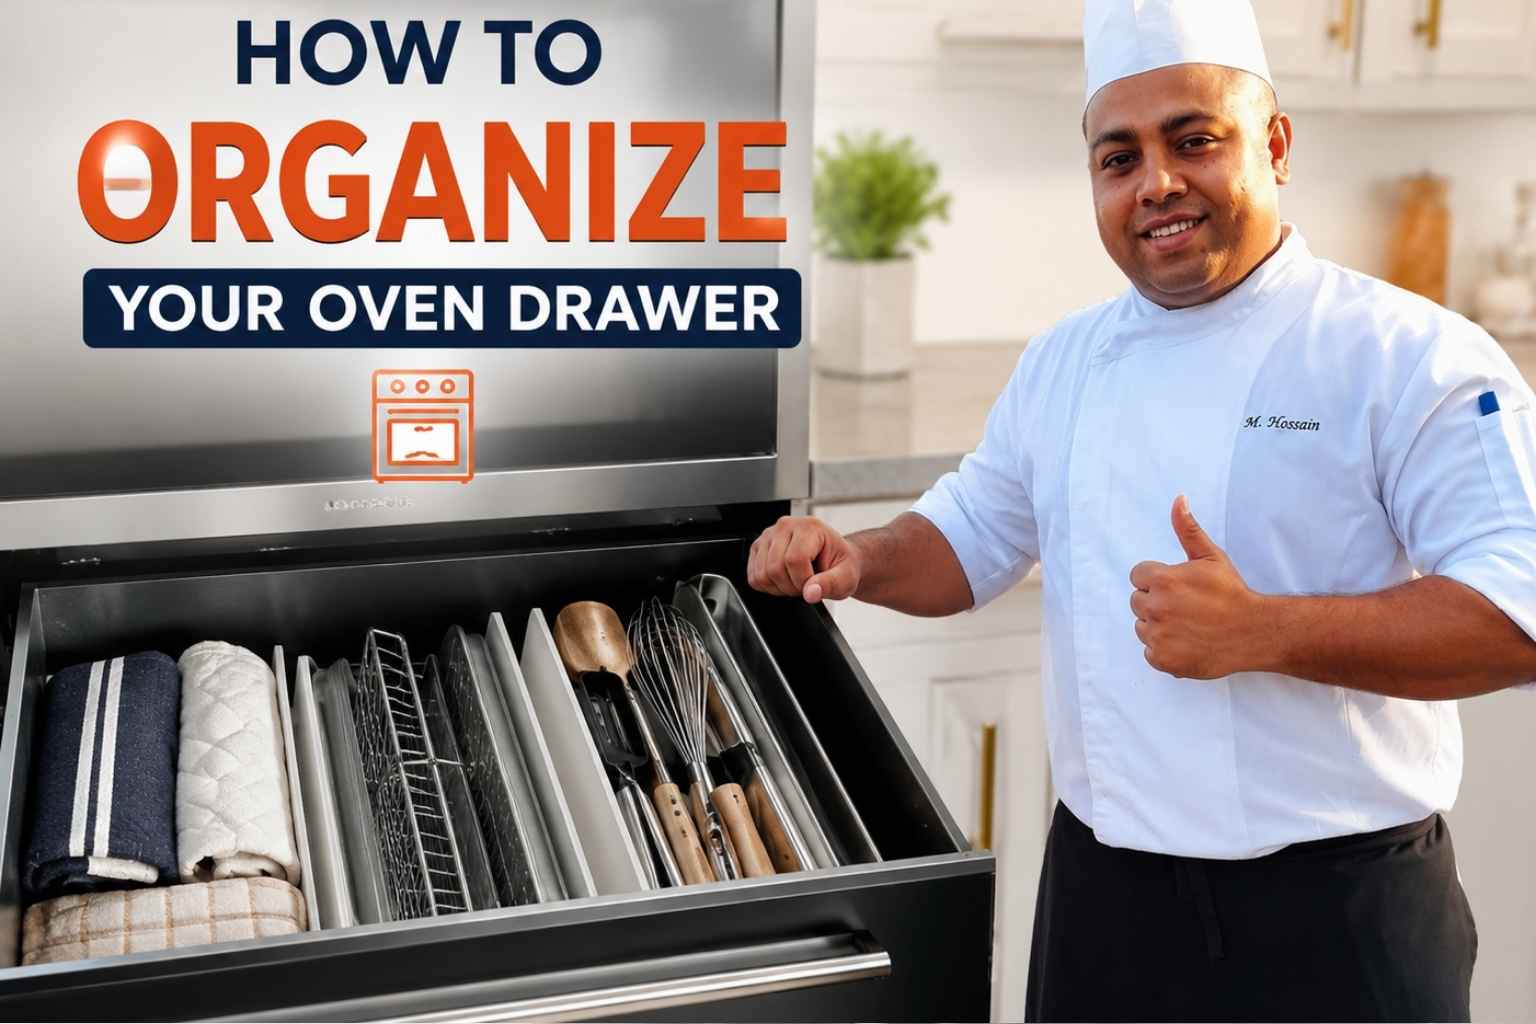
At A Glance
- Most people use their oven drawer wrong – it is either a warming drawer, a storage drawer, or a broiler, and each type has different rules.
- Check the temperature of your drawer after the oven runs for 20 minutes. Above 200°F means it is a warming drawer. No heat means it is storage only.
- Never store plastic lids, items with wooden handles, or non-stick pans with scratched coating in any oven drawer.
- Vertical pan organizers are the single biggest upgrade you can make to a storage drawer – they cut access time in half.
- Clean the drawer and its track every three months to prevent grease buildup and odors from baking into the metal.
My oven drawer used to be a junk pile. Pans crashed every time I opened it, and I always grabbed the wrong lid. That mess pushed me to learn how to organize your oven drawer the right way, once and for all. As a chef, I’ve fixed this drawer chaos in my own kitchen and dozens of others. Stick with me, and I’ll show you my simple system so you can finally open that drawer without wincing.
What Your Oven Drawer Is Actually For (Most People Get This Wrong)
Your oven drawer is one of three things: a warming drawer, a storage drawer, or a broiler drawer. Most home cooks assume it is a storage drawer and fill it with pans, lids, and things they want out of sight. That guess is wrong about half the time – and using a warming drawer as a storage unit is a real safety issue.
Here is the breakdown:
- Warming drawer: Holds food at a safe serving temperature, usually between 140°F and 200°F (Good Housekeeping, 2024). It runs on a heating element below the oven cavity.
- Storage drawer: Has no heat source. It is a simple pull-out bin below the oven, meant for bakeware.
- Broiler drawer: Found on older gas ranges. The broiler element sits inside the oven, and the drawer below catches drippings and holds a broiler pan.
I spent years in professional kitchens where every drawer had a label. When I moved into home kitchen consulting, I was shocked at how many people had been storing plastic bags and silicone baking mats directly below an active heating element. That can warp, melt, or off-gas materials into the oven cavity above.
How to Tell Which Type of Drawer You Have
Run your oven at 350°F for 20 minutes, then open the drawer and hold your hand 6 inches above the bottom surface. This simple test gives you a clear answer.
| Drawer Type | What You Feel | What You See |
|---|---|---|
| Warming drawer | Consistent, gentle heat (140-200°F) | Often has a thermostat dial or control |
| Storage drawer | Room temperature or slightly warm from oven sides | No controls, just a plain pull-out bin |
| Broiler drawer | Heat, plus a broiler pan slot | Sits directly below the oven floor on older gas ranges |
Use an infrared thermometer (also called a laser thermometer) to get a precise reading. A $15 model from any hardware store works fine (America’s Test Kitchen, 2023). If the drawer surface reads above 140°F after 20 minutes of oven use, treat it as a warming drawer.
Check your oven manual if you are unsure. The model number is usually on a sticker inside the door frame. Most manufacturer websites have manuals in PDF form.
What Is Safe – and What Is Dangerous – to Store in Each Drawer Type
The rules differ by drawer type. Putting the wrong things in a warming drawer can create a fire hazard or release fumes into food.
Safe and Unsafe Items for a Warming Drawer
A warming drawer is not a second oven. It holds food between 140°F and 200°F. At those temperatures, some materials break down.
Safe to store (with heat on):
- Oven-safe ceramic dishes
- Metal pans (no wooden or plastic handles)
- Food wrapped in foil or covered with an oven-safe lid
Never put these in a warming drawer:
- Plastic containers or plastic wrap
- Items with wooden handles or knobs (wood dries out, cracks, and can scorch)
- Non-stick pans with scratched coating (damaged PTFE coating releases fumes above 570°F, and the drawer can reach that on some models) (Consumer Reports, 2025)
- Aluminum foil directly on the heating element
- Silicone bakeware unless it is rated above 400°F
Safe and Unsafe Items for a Storage Drawer
A storage drawer has no heat source. The main risk here is weight and access.
Safe to store:
- Sheet pans and half-sheet pans
- Cast iron skillets and Dutch ovens
- Muffin tins, cake pans, pie dishes
- Pot lids (with a proper organizer)
- Roasting pans
Do not store:
- Aerosol cooking sprays or flammable liquids (they can still warm from oven radiant heat)
- Anything you reach for daily – the drawer is low and awkward, so save it for things you use weekly or monthly
What Never Goes in a Broiler Drawer
A broiler drawer on a gas range sits directly below the flame. Treat it like a live oven.
- Never store anything in a broiler drawer.
- Keep the broiler pan clean and in place.
- The drawer is there to catch grease, not store equipment.
How to Organize a Warming Drawer for Entertaining and Meal Prep
A warming drawer is a serious tool for home entertaining. It holds food at a safe serving temperature (above 140°F) for up to 90 minutes without drying it out, as long as you cover dishes (The Kitchn, 2024).
Here is how I use mine during dinner parties:
Step 1. Set the drawer to its lowest heat setting, usually 140-160°F, about 30 minutes before guests arrive.
Step 2. Place finished dishes in covered, oven-safe vessels. I use enameled cast iron with lids because they retain moisture. Foil works too – seal it tight.
Step 3. Stack smaller covered dishes on top of each other if space is tight. Leave a half-inch gap between dishes and the drawer walls for air to move.
Step 4. Check dishes every 30 minutes. If they look dry, add a tablespoon of water and re-cover.
For meal prep, I use the warming drawer to proof bread dough. Set it to the lowest setting, place the dough in a covered bowl, and let it rise in about 45 minutes – compared to 90 minutes at room temperature. This is a standard technique taught at culinary institutes (The Culinary Institute of America, 2022).
Do not use the warming drawer to finish cooking raw food. It does not get hot enough to bring food to a safe internal temperature quickly enough.
How to Organize a Storage Drawer by Category
A storage drawer works best when you group items by how often you use them and by size. The goal is to grab what you need in under 10 seconds without pulling out three other pans first.
Bakeware: Group by Size, Not by Type
Most people mix baking sheets, muffin tins, and cake pans together. That creates a pile you have to dig through every time.
Separate bakeware into three size groups: large (half-sheet pans, roasting pans), medium (9×13 inch baking dishes, square pans), and small (muffin tins, loaf pans, pie dishes). Store the large group at the back, small at the front.
Sheet Pans: Store Them Vertical, Not Flat
Flat-stacked sheet pans are the number one organizing mistake I see in home kitchens. You need the bottom one, so you pull them all out. Every time.
Use a vertical pan organizer – a metal rack with slots that holds pans upright like files in a drawer. OXO and SimpleHouseware both make models that fit standard 24-inch drawer widths. You can grab any pan in under three seconds (NSF International, 2023, recommends this method for food service prep efficiency, and it applies at home too).
Pot Lids: The Hardest Thing to Organize
Lids are round, they roll, they fall, and they always end up on the wrong side of the drawer. There are two solutions that actually work:
- A vertical lid rack – same principle as the pan organizer. Lids slide in upright, handle facing up.
- Mount a tension rod across the width of the drawer. Hang lids from the rod using the handles. This works best if your lids have long handles.
Cast Iron: Goes in Last
Cast iron skillets are heavy – a 12-inch Lodge skillet weighs about 8 pounds (Lodge Manufacturing, 2024). Put cast iron at the very front of the drawer so you are not reaching over it or lifting it out to get to something lighter behind it.
Line the drawer floor with a non-slip shelf liner before placing cast iron. It prevents the pan from sliding and scratching other items.
Space-Maximizing Strategies That Actually Work
These four strategies give you more usable space without buying a new kitchen.
Use vertical dividers. A set of adjustable metal dividers (similar to book dividers) lets you create sections within the drawer. You can dedicate one section to sheet pans, one to lids, and one to small bakeware. Prices start around $12 on Amazon.
Stack smartly. Put heavier, flat items at the bottom of each stack. Never stack more than three pieces high. A muffin tin on the bottom, a pie dish in the middle, and a lid on top is fine. A Dutch oven on top of a glass baking dish is not.
Use the drawer walls. Suction-cup hooks or adhesive clips on the interior walls hold things like a small cutting mat, a flexible silicone baking mat, or a splatter screen flat against the side instead of lying flat on the floor.
Declutter first. Before you organize, pull everything out. Be honest. If you have not used that springform pan in two years, store it somewhere else. The oven drawer should hold only pans you use at least once a month.
What Should Never Go in Any Oven Drawer
Some items seem fine in a drawer – until the oven runs. Here are the things I have seen cause real problems.
- Plastic containers or lids. Even in a storage drawer, the sides of the oven conduct heat. Plastic warps, melts onto pan surfaces, and in some cases releases fumes.
- Non-stick pans with damaged coating. A scratched or flaking PTFE (Teflon) non-stick surface should not go anywhere near heat. Throw the pan out. At warming drawer temperatures, degraded coatings can release chemicals (Consumer Reports, 2025).
- Wooden-handled tools. Wood dries and cracks with repeated heat exposure. Store wooden spoons and handled tools in a countertop crock instead.
- Paper products. Parchment paper, paper bags, cardboard boxes from kitchen gadgets – these are fire risks in a warming or broiler drawer.
- Aerosol cans. Cooking spray cans are pressurized. Even mild heat from oven radiation can be a risk if the can is defective.
- Lightweight plastic bags. Ziploc bags, produce bags, plastic wrap rolls – all of these belong in a dedicated cabinet, not below a heat source.
Cleaning and Maintenance Routine for the Oven Drawer
Clean your oven drawer every three months, or immediately after any spill or grease drip. Grease that bakes onto the drawer interior becomes very hard to remove after even one oven cycle.
Monthly:
- Wipe the interior with a damp cloth after every two or three uses.
- Check that the drawer slides freely on its track. If it sticks, wipe the track with a dry cloth.
Every three months:
- Pull the drawer fully out. Most drawers slide out completely after you lift the front slightly – check your manual for the exact release method.
- Wash the drawer interior with warm water and dish soap. For baked-on grease, use a paste of baking soda and water. Let it sit for 15 minutes, then scrub with a non-scratch pad.
- Wipe the track rails with a dry cloth. Do not lubricate with cooking oil – it attracts dust and gunk. If the track sticks, a thin coat of dry PTFE lubricant (the kind sold for sliding doors) works well.
- Dry fully before sliding the drawer back in.
After any spill:
- Remove the drawer immediately once the oven cools.
- Wipe up the spill before it bakes on.
- Grease inside a warming drawer can smoke on the next use if left in place.
Common Organizing Mistakes and How to Fix Them
These are the five mistakes I see most often when I consult on home kitchen organization.
Mistake 1: Storing everything flat. Flat storage means you pull out the whole stack to get one item. Fix: Install a vertical pan organizer. It costs under $25 and eliminates the problem entirely.
Mistake 2: Mixing safe and unsafe items in a warming drawer. Plastic lids next to an oven-safe dish is a problem. Fix: Audit the drawer once. Remove anything that is not metal or oven-safe ceramic. Do not put it back.
Mistake 3: Ignoring the drawer for months. Grease and food debris collect, then bake on and create odors. Fix: Set a calendar reminder for a quarterly clean.
Mistake 4: Using the drawer as overflow storage. The drawer fills up with random kitchen items – extra twist ties, takeout menus, random lids from pots you no longer own. Fix: Empty the drawer completely, then only put back items that are oven-safe and that you use at least monthly.
Mistake 5: Putting cast iron at the back. It is heavy. You will not want to move it every time you need a sheet pan. Fix: Cast iron goes at the front, always.
My Personal Drawer Routine After 15 Years in Professional and Home Kitchens
I have worked in restaurant kitchens where the drawer below the range held nothing but full hotel pans of prepped food, covered in plastic wrap, waiting to go into service. In home kitchens, I treat the drawer differently – but with the same discipline.
My drawer is a storage drawer, not a warming drawer. Here is exactly what is in it:
At the front: one 12-inch cast iron skillet and one 10-inch cast iron skillet, both upright in a vertical rack.
Behind the cast iron: three sheet pans in a vertical pan organizer – a half-sheet, a quarter-sheet, and a rimmed cookie sheet.
Against the left wall: a vertical lid rack holding four lids in different sizes. I label each slot with a piece of white tape so my kids know where to put things back.
Against the right wall: a 9×13 inch glass baking dish and a square 8×8 inch metal pan, stored upright.
That is it. I removed everything else.
I used to keep a muffin tin in there too, but I only use it four or five times a year. It now lives in the top of a pantry cabinet. The drawer is faster, cleaner, and easier to use as a result.
The rule I follow is simple: if I use it less than once a month, it does not belong in the oven drawer.
Frequently Asked Questions About Organizing Your Oven Drawer
What is an oven drawer actually for?
An oven drawer is either a warming drawer, a storage drawer, or a broiler drawer depending on your range model. A warming drawer keeps food hot at 140-200°F using a heating element. A storage drawer is a plain bin with no heat source, meant for bakeware. A broiler drawer on older gas ranges holds a broiler pan below the flame.
How do I know if my oven drawer is a warming drawer or storage drawer?
Run your oven at 350°F for 20 minutes, then open the drawer and hold your hand near the bottom. If you feel heat, it is a warming drawer. If it is cool, it is a storage drawer. An infrared thermometer gives a precise reading if you want to be sure.
Is it safe to store pans in a warming drawer?
Only if the pans are oven-safe metal with no plastic or wooden handles. Never store non-stick pans with scratched coating, plastic lids, glass with plastic parts, or any paper products in a warming drawer. The drawer can reach 200°F or higher.
What is the best way to organize pot lids in an oven drawer?
Use a vertical lid rack – a slotted metal organizer that holds lids upright. Alternatively, install a tension rod across the drawer width and hang lids from their handles. Both methods prevent lids from rolling and stacking.
Can I store cast iron in the oven drawer?
Yes. Cast iron is one of the best items to store in a storage drawer because it is heavy and oven-safe. Place it at the front of the drawer so you do not have to lift it to reach items behind it. Line the drawer floor with non-slip shelf liner to prevent scratching.
How often should I clean the oven drawer?
Wipe it down every month with a damp cloth. Do a full clean every three months – pull the drawer out completely, wash the interior with soap and water, and clean the track. Clean immediately after any grease spill so it does not bake on.
What should I never put in an oven drawer?
Never put plastic containers, plastic lids, non-stick pans with damaged coating, wooden-handled tools, paper products, aerosol cans, or plastic bags in any oven drawer. In a warming or broiler drawer, these items can warp, melt, or become a fire hazard.
How do I maximize space in a small oven drawer?
Install a vertical pan organizer for sheet pans, a vertical lid rack for pot lids, and use adjustable dividers to create separate zones. Remove anything you use less than once a month. Flat stacking is the main enemy of a small drawer – going vertical gives you back 40-50% more usable access (The Kitchn, 2024).
Key Takeaways
- Your oven drawer is a warming drawer, a storage drawer, or a broiler drawer. Test yours with an oven-on heat check before you put anything in it.
- Warming drawers reach 140-200°F. Only oven-safe metal with no plastic or wooden parts belongs inside one while the oven is on.
- Storage drawers work best with vertical pan organizers and lid racks. Flat stacking is the single biggest enemy of drawer efficiency.
- Cast iron goes at the front of any storage drawer, always. It is heavy and you use it often.
- Clean the drawer every three months and immediately after any grease spill. Baked-on grease is hard to remove and creates odors.
- If you use it less than once a month, it does not belong in the drawer. Move it to a cabinet and reclaim the space.

I’m Mossaraof, a trained chef and the founder of OvenInsights.com. I spent years cooking at Larrupin’ Cafe and in kitchens across Chicago and Seattle. Now I test kitchen gear for a living. I moved to North Acton, London, and I test every tool I write about. I use real meals and real heat. No brand deals. No shortcuts. I cover 12 kitchen types and hundreds of recipes. I believe this: the right tools matter as much as the recipe.




