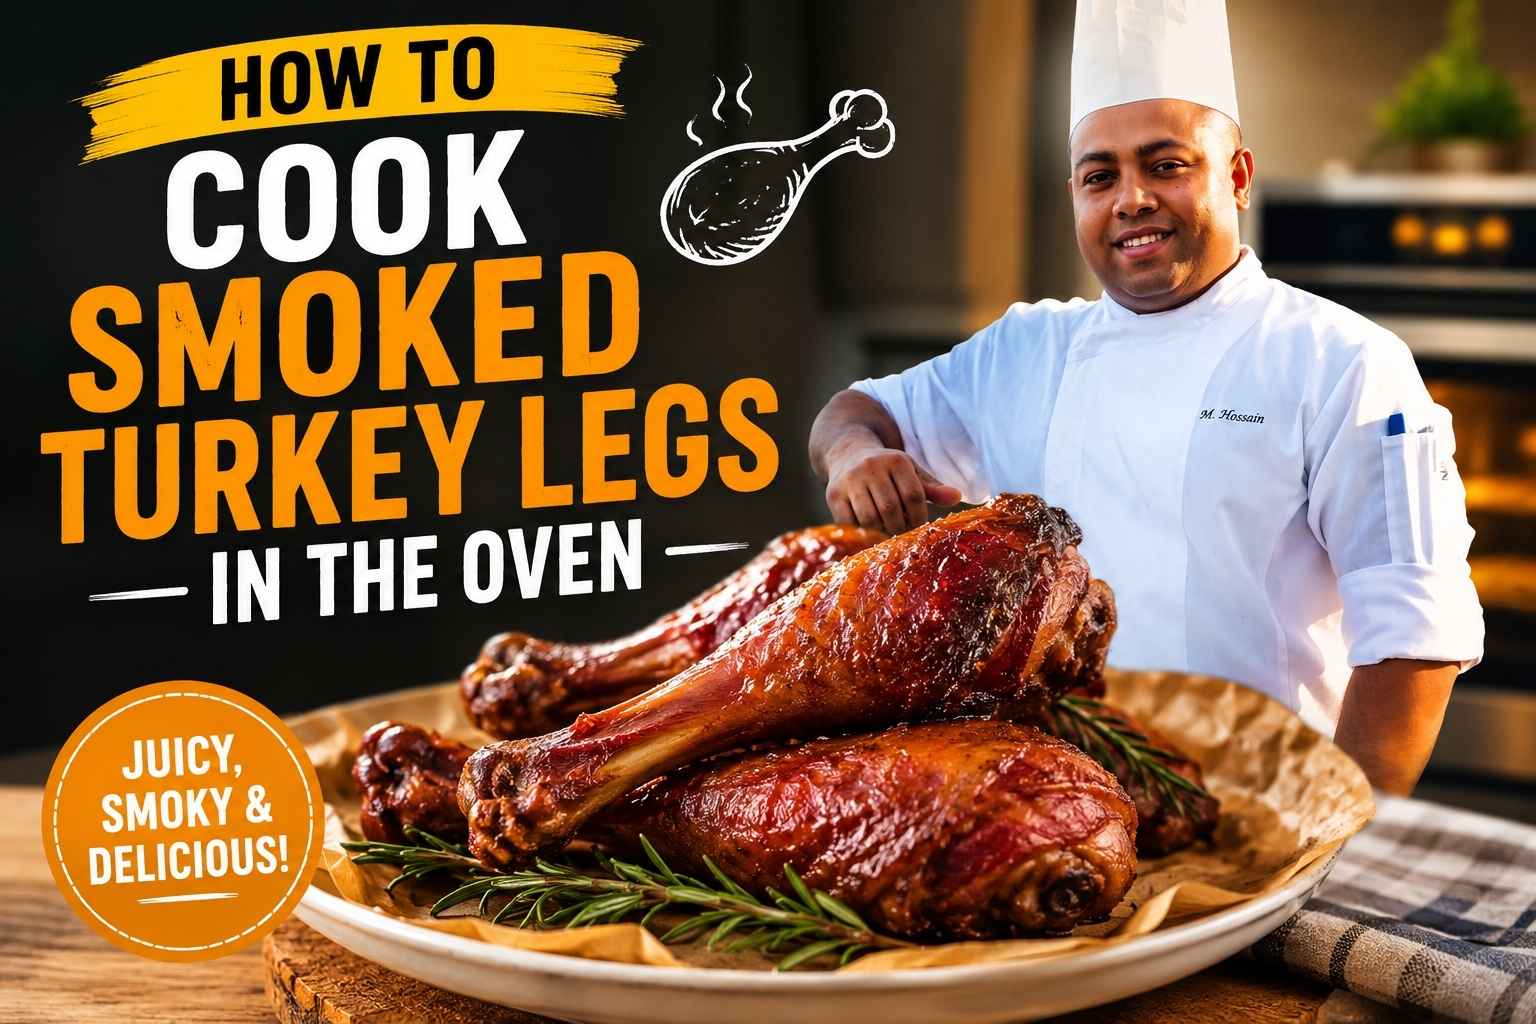
Ever feel like a busy week is winning? I’ve been there, so let me show you how to cook keto chicken in the oven for a fast, juicy meal. As a cook, I know that keeping things low-carb should still taste like a treat. My Ultimate Guide to Master Your Oven will help you get that perfect crunch every time. Let’s dive into my kitchen secrets so you can start cooking right now!
Mastering the Basics of Keto Oven Roasting
Success starts long before you turn the dial. You need to understand how air and heat play together to create that perfect low-carb crust.
Why Dry Heat is Your Keto Best Friend
In my kitchen, moisture is often the enemy of the crunch. When you roast chicken, you want the water to leave the skin. This is what we call the Maillard reaction. It sounds fancy, but it just means “browning.”
On a keto diet, we can’t use sugar-filled rubs to get color. We rely on pure heat and salt. I always tell my friends to pat the chicken dry with paper towels. If the skin is wet, it just steams. Steam is for vegetables, not for my Sunday roast.
- Airflow: Use a wire rack inside your baking sheet.
- Space: Don’t let the pieces touch. They need to breathe.
- Heat: High temps at the start lock in the juices.
Choosing the Right Cut for High-Fat Success
I’ve cooked thousands of chickens. Most Americans reach for the boneless, skinless breast first. In the keto world, that’s a mistake. You want the fat. Fat is flavor, and fat is fuel.
I prefer chicken thighs with the bone in and the skin on. The bone acts like an insulator. it keeps the meat from drying out too fast. Plus, the skin provides that natural “breading” we miss when we ditch the flour.
- Dark Meat: Higher in fat and stays moist longer.
- Skin-On: This is where the healthy monounsaturated fats live.
- The Price: Thighs are usually cheaper at stores like Kroger or Publix.
Essential Kitchen Gear for the Perfect Bake
Your tools are your hands’ extension. I’ve used cheap, thin pans that warped with a loud bang at 400 degrees, and trust me, it ruins the vibe.
Heavy-Duty Sheet Pans and Skillets
I swear by my 12-inch Lodge cast iron skillet. It is an American classic for a reason. It holds heat like a champion. When you put a cold piece of chicken on it, the pan doesn’t get cold. It just keeps searing.
If you aren’t using cast iron, go for a heavy-rimmed baking sheet. Brands like Nordic Ware are staples in U.S. kitchens. They don’t bend, and they heat evenly. This prevents those annoying “hot spots” where one leg burns while the other is raw.
- Cast Iron: Great for going from stove to oven.
- Aluminum: Best for even browning on the bottom.
- Weight: If the pan feels light, it’s probably not great for roasting.
Accuracy Tools: Don’t Guess, Measure
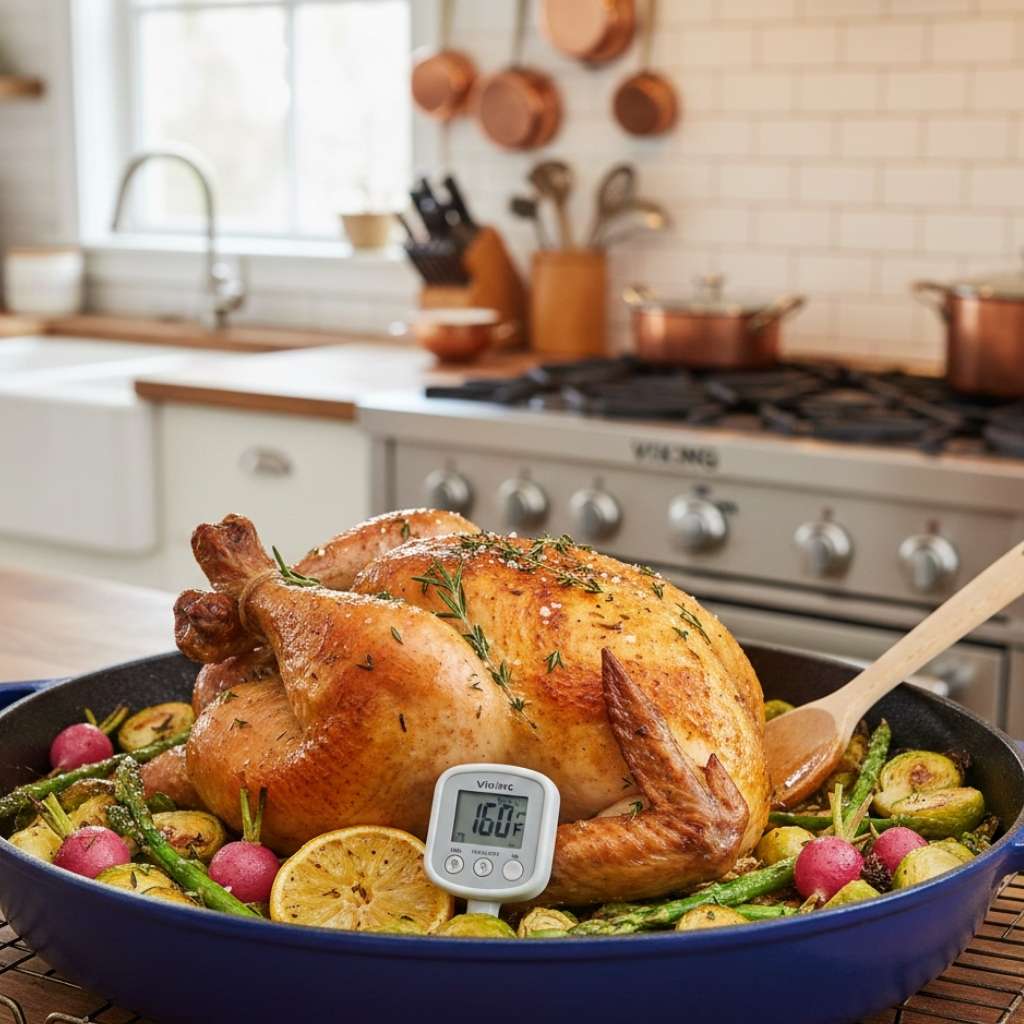
Stop poking the meat with your finger to see if it’s done. I did that for years until I realized my “feel” was off on humid days. Get a good digital thermometer.
I use a Thermapen, but any quick-read tool works. In the U.S., we look for that magic 165°F mark. But here is a pro secret: pull it out at 160°F. The “carry-over” heat will finish the job while the bird rests on your counter.
- Digital Probe: Lets you see the temp without opening the door.
- Oven Thermometer: Most ovens are off by 10 to 25 degrees.
- Peace of Mind: No more cutting into a raw chicken breast at dinner.
Step-by-Step: How to Cook Keto Chicken in the Oven
Let’s get our hands dirty. I’m walking you through my personal process. It’s simple, it’s fast, and it works every single time I crave a home-cooked meal.
The “Dry Brine” Secret
I learned this trick early on. Salt your chicken the night before. Or even just an hour before. I use Kosher salt because the grains are big and easy to see.
The salt draws out moisture, dissolves into a brine, and then gets sucked back into the meat. It seasons the bird all the way to the bone. If you wait until the last second to salt, you only season the surface.
- Timing: 24 hours is best, but 30 minutes helps.
- Storage: Keep it uncovered in the fridge for the crispiest skin.
- Flavor: Mix in some dried thyme or cracked black pepper.
Temperature Strategies for Maximum Flavor
I like to start my oven hot. I’m talking 425°F. This high heat hits the fat in the skin and starts the sizzle immediately. It’s a sensory joy—the smell of roasting fat filling the house.
After about 15 minutes, I might dial it back to 370°F. This ensures the inside cooks through without the outside turning into a charcoal briquette. If you have a convection setting (the fan icon), use it! It moves the hot air around like a commercial kitchen oven.
The Fan: Use convection to shave off 10% of the cook time.
The Blast: Start high for crunch.
The Finish: Lower for tenderness.
The Role of Healthy Fats (The Keto Core)
In my kitchen, fat isn’t just a side thought; it’s the main event. When you remove carbs, fat becomes the vehicle for all your flavor and your primary energy source.
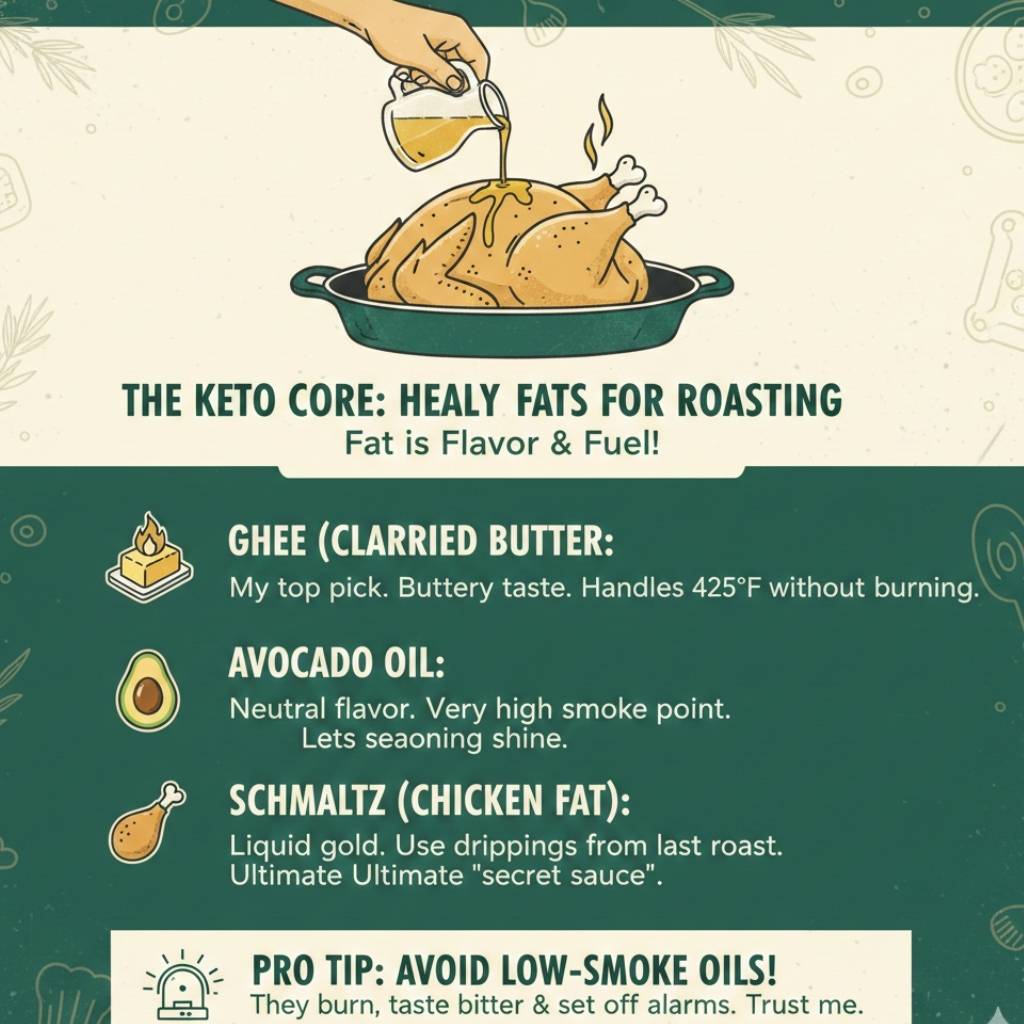
I’ve experimented with every oil on the shelf. In the U.S., we have so many choices, but not all are created equal for high-heat roasting. If you use a low-smoke point oil, your kitchen will fill with blue smoke, and your chicken will taste bitter. I’ve set off a few smoke alarms in my time—don’t be like me.
- Ghee (Clarified Butter): This is my top pick. It has the buttery taste we love but can handle the 425°F heat without burning.
- Avocado Oil: It is neutral and has a very high smoke point. It’s perfect if you want the seasoning to be the star.
- Schmaltz (Chicken Fat): If you save the drippings from your last roast, use them! It’s the ultimate keto “secret sauce” for coating the next bird.
The “Chef’s Shower” Technique
This is a move I used every single night on the line. About ten minutes before the chicken is done, I pull the pan out. I tilt it slightly so the hot, bubbling fat pools at the bottom.
I take a large spoon and pour that liquid gold right back over the skin. It’s like a hot spa treatment for the chicken. This “basting” ensures every inch of the skin gets crispy and seasoned. It also helps the herbs stick to the meat rather than falling into the pan.
Keto-Friendly Rubs and Marinades
Forget the sugary BBQ rubs you see at the local grocery store. We are going to build deep, earthy flavors using spices that keep your blood sugar stable.
The Garlic-Lemon-Butter Wash
This is a classic for a reason. I love the way the acidity of the lemon cuts through the richness of the chicken fat. I usually zest a whole lemon and mix it into softened butter with four cloves of minced garlic.
I rub this under the skin. This is a pro move. If you put garlic on top of the skin, it usually burns and turns acrid. Placing it underneath protects the garlic and perfumes the meat from the inside out.
- Fresh Lemon: Always use real lemons, not the plastic squeeze bottles.
- Garlic: Use a microplane to turn the garlic into a paste for better distribution.
- Salt: Make sure to add a pinch of salt to the butter mix to help it penetrate.
Smoked Paprika and Cumin Crust
If you want a bit of a “Tex-Mex” vibe, this is your go-to. I used to make a version of this for staff meals. It feels smoky and hearty without needing any honey or brown sugar.
Smoked paprika gives you that deep red color that makes the chicken look like it came off a professional grill. I add a little onion powder and some cayenne pepper for a kick. In the U.S., we love our heat, and this delivers without the carbs of a hot sauce.
- Smoked Paprika: Look for “Pimentón” for the best quality.
- Cumin: It adds an earthy, nutty flavor that pairs perfectly with roasted fat.
- Chili Powder: Be careful to check the label for added cornstarch or sugar fillers.
Troubleshooting Common Chicken Disasters
Let’s be honest. Sometimes things go wrong. I have served chicken that looked like a dry sponge, and it’s a soul-crushing feeling when you’ve worked hard.
My Skin is Rubbery, Help!
This usually happens because of trapped steam. If you cook your chicken in a deep baking dish (like a Pyrex), the sides trap the moisture. The chicken ends up boiling in its own vapor.
The fix is simple: use a flat sheet pan or a shallow skillet. Also, make sure you didn’t crowd the pan. If the chicken pieces are touching, they will be soggy on the sides. Give them at least an inch of “personal space.”
- The Baking Powder Trick: Mix 1/2 teaspoon of baking powder into your dry rub. It changes the pH of the skin and makes it shatteringly crisp.
- Pat Dry: I’ll say it again—use those paper towels until the bird is bone-dry.
- Higher Heat: If it’s almost done but still pale, turn on the broiler for the last 2 minutes.
The Meat is Dry but the Skin looks Great
This is the heartbreak of the “overcooked bird.” It often happens when people follow a timer instead of a thermometer. Every oven in America is a little different. A “400-degree” oven might actually be 375 or 425.
If you find the breast is dry, you likely cooked it past 165°F. Remember, meat keeps cooking after you take it out. This is called carry-over cooking. It can rise another 5 to 7 degrees while sitting on the board.
- Resting: Let the meat sit for 10 minutes. This allows the fibers to relax and soak up the juices.
- Pull Early: Take it out at 160°F. Trust the process.
- Brining: If you struggle with dryness, a wet brine (water, salt, and herbs) for 2 hours before cooking is a lifesaver.
Regional Twists on Keto Chicken
The U.S. is a massive place, and our tastes change depending on where we live. I’ve cooked for people from coast to coast, and I love how regional styles can make keto feel like a brand-new diet.
The Southern Keto “Fried” Bake
I spent some time down South, and let’s be real—everyone misses fried chicken. To get that fix without the flour, I use a mix of almond flour and crushed pork rinds. It sounds a bit wild, but it’s a game changer.
The pork rinds provide the fat and the crunch, while the almond flour acts as the “binder.” I dip the chicken in a heavy cream and egg wash first. This adds even more keto-friendly fat and helps the “breading” stay put during the bake.
- Parmesan: Add a handful of grated Parm for a salty, savory kick.
- The Bake: Cook these on a wire rack so the bottom doesn’t get soggy.
California Citrus and Avocado Bake
When I want something lighter, I look toward the West Coast. This style is all about fresh flavors. I roast the chicken with just salt, pepper, and a little avocado oil.
The magic happens when it comes out of the oven. I top the hot chicken with fresh avocado slices and a squeeze of lime. The heat from the meat slightly softens the avocado, making it creamy and rich. It’s a perfect way to hit your fat macros for the day.
- Freshness: Use Meyer lemons if you can find them; they are sweeter and very Californian.
- Herbs: Finish with a handful of fresh cilantro or flat-leaf parsley.
- The Fat: Avocado is the king of healthy keto fats.
Meal Prepping and Storage Tips
As a busy cook and blogger, I rarely cook for just one meal. I want my Tuesday effort to feed me on Thursday too. But reheating chicken can be a disaster if you don’t do it right.
Keeping it Crispy for Leftovers
If you put crispy chicken in a plastic container while it’s still warm, the steam will ruin the skin. I always let my chicken cool completely on the counter first. Then, I store it in glass containers.
Whatever you do, stay away from the microwave for reheating. It turns the chicken into rubber. Use a toaster oven or your main oven at 350°F. It takes ten minutes, but the skin will actually sizzle again. It feels like a fresh meal, not a sad leftover.
- Cold Chicken: Don’t sleep on cold roasted chicken; it’s great in a keto “power bowl.”
- Air Fryer: This is the best tool for reheating—3 minutes and it’s perfect.
- Freezing: You can freeze roasted thighs for up to 3 months. Just thaw them in the fridge overnight.
Safety and Durability
Food safety is huge in professional kitchens, and it should be at home too. I always label my containers with a sharpie and tape. I know exactly when I cooked that bird.
In the U.S., we tend to keep leftovers too long. My rule is the “four-day rule.” If I haven’t eaten it by day four, it goes in the trash or to the dog (if it’s plain). This keeps your gut happy and your meals fresh.
- Glass Containers: They don’t hold onto smells like plastic does.
- Cooling: Don’t leave chicken on the counter for more than two hours.
- Shredding: If the meat feels a bit dry on day three, shred it and mix it with full-fat mayo for a quick chicken salad.
Final Chef’s Thoughts on Keto Success
At the end of the day, How to Cook Keto Chicken in the Oven is about confidence. It’s about knowing that you don’t need a bun or a side of fries to feel satisfied. When you nail that crispy, salty skin and the meat pulls apart with a fork, you’ve won.
I’ve shared my best tips from the line at Larrupin’ Cafe and my kitchen at Oven Insights. Now it’s your turn. Don’t be afraid to turn up the heat. Don’t be afraid of the fat. And most importantly, don’t be afraid to make a mess. That’s how the best meals are born.
The Chef’s Deep Dive: Advanced Techniques for Every U.S. Kitchen
After years of running a line, you start to see patterns. Whether you are in a humid Florida kitchen or the dry air of Colorado, the environment changes your cook. I want to share the “pro” tweaks that separate a home cook from a seasoned chef.
Understanding Your Oven’s Personality
I’ve never met two ovens that cook the same. My old unit in North Acton had a “hot spot” in the back-left corner that would burn a wing in minutes. You need to learn your oven’s quirks to master keto chicken.
The best way to do this is the “Toast Test.” Lay out cheap white bread on a sheet pan and bake at 350°F. See which slices brown first. This map tells you exactly where to place your chicken for the most even roast.
- Electric Ovens: These are common in U.S. apartments. They provide dry heat, which is great for keto skin but can be harsh on the meat.
- Gas Ovens: These have more moisture in the air. You might need to leave the bird in for an extra five minutes to get that “shatter-crisp” skin.
- Convection Fans: If your oven has one, use it. It circulates the air, ensuring the fat renders out perfectly from every angle.
Pro-Level Keto “Breadings” and Textures
We already touched on pork rinds, but the world of keto textures is much wider. When I’m developing recipes for Oven Insights, I look for things that mimic that “crunch” we all crave during a Sunday night football game.
The Pecan and Herb Crust
Living in the States, we have access to incredible pecans. They are high in fat and low in net carbs. I pulse them until they are the size of coarse salt and mix them with dried sage and thyme.
When you roast chicken with a nut crust, the oils from the pecans meld with the chicken fat. It creates a rich, buttery coating that smells like Thanksgiving. It’s a sophisticated way to stay in ketosis without feeling like you are eating “diet food.”
- The Glue: Use a thin layer of Dijon mustard to help the nuts stick.
- The Temp: Lower your heat to 375°F. Nuts burn faster than meat.
- The Flavor: The mustard adds a sharp vinegary bite that cuts through the fat.
The “Hidden” Vegetable Bind
Sometimes, I want my chicken to feel “stuffed.” I’ll take frozen spinach, squeeze every drop of water out (this is vital!), and mix it with cream cheese and garlic.
I cut a pocket into a thick chicken breast and stuff it full. As it bakes, the cream cheese melts and bastes the meat from the inside. It’s a self-saucing meal. It keeps the lean breast meat from ever becoming “cardboard.”
- Squeeze the Spinach: Use a kitchen towel. If it’s wet, your chicken will be soggy.
- Seal it: Use toothpicks to keep the filling inside the bird, not on the pan.
- Seasoning: Salt the inside of the pocket before you stuff it.
The Sensory Experience: What to Look, Smell, and Listen For
In a loud, busy kitchen, I don’t always have time to look at a clock. I use my senses. You can do this at home, too. It makes cooking feel less like a chore and more like a craft.
Listening to the Sizzle
When you first put your chicken in a hot oven, listen. You want to hear a steady, rhythmic sizzling. That is the sound of fat rendering and moisture evaporating.
If it sounds like a dull hum, your oven might be too cold. If it sounds like a frantic popping, you might have too much loose fat on the pan, which can lead to a grease fire. It should sound like a gentle rain on a tin roof.
- The Visual: Look for the skin to “tighten.” It will go from loose and pale to taut and golden.
- The Aroma: You’ll smell the garlic and herbs first. When you start to smell “roasted nuttiness,” that’s the chicken fat reaching its peak flavor.
- The Touch: Press the thickest part of the thigh. It should feel firm but have a slight “bounce” back.
My Personal Kitchen Rituals
When I’m cooking for myself after a long day of writing and editing for Oven Insights, I make it an experience. I pour a glass of sparkling water with lime, put on some jazz, and let the oven do the heavy lifting.
Cooking “How to Cook Keto Chicken in the Oven” shouldn’t be stressful. It’s a time to slow down. I love the moment I open the oven door and that puff of roasted-chicken-scented steam hits my face. It feels like home.
The Reward: Save the bones! I keep a gallon bag in my freezer for all my roasted bones. When it’s full, I make the best keto bone broth you’ve ever tasted.
The Clean-Up: Line your pan with parchment paper (if under 400°F) or foil for an easy night.
The US Grocery Store Hunt: Finding the Right Bird
Your keto chicken is only as good as the animal you start with. In the US, the way we process poultry makes a huge difference in how it reacts to your oven’s heat.

I used to just grab whatever was on sale at Safeway or Kroger. But I noticed that some chicken would shrink by half and leave a puddle of “mystery liquid” in the pan. That’s because most American chicken is “water-chilled.” It’s dunked in cold chlorine baths and absorbs up to 8% of its weight in water. You’re literally paying for water that will steam your chicken instead of roasting it.
- Look for “Air-Chilled”: Brands like Smart Chicken, Bell & Evans, and even Perdue’s premium lines use cold air instead of water.
- The Texture Win: Air-chilled birds have a tighter skin and deeper flavor. They crisp up almost instantly because there is no excess water to evaporate.
- Where to Buy: Whole Foods and Sprouts are safe bets, but even Costco and Aldi have started stocking air-chilled organic options for a great price.
One-Pan Keto Side Dishes
The best part about How to Cook Keto Chicken in the Oven is that you can cook your entire dinner on one sheet pan. In a professional kitchen, we call this “efficiency,” but at home, I call it “less dishes to wash.”
The “Roast-Along” Veggie Strategy
I love using vegetables that can handle the same high heat as the chicken. While the bird is rendering its delicious schmaltz (fat), your veggies are down there soaking it up. It’s like they’re being braised in liquid gold.
In the US, we have great access to cruciferous veggies that are keto powerhouses. I usually toss them in a bit of avocado oil and salt before spreading them around the chicken. Just make sure you don’t pile them up, or they’ll steam.
- Brussels Sprouts: Halve them and place them flat-side down on the pan for a charred, nutty crunch.
- Radishes: If you miss potatoes, roast some radishes. The peppery bite disappears, leaving a mellow, “tater-like” texture.
- Asparagus: These only need the last 10–12 minutes of roasting time, so toss them in toward the end.
Creamy Cauliflower “Mash” Hacks
If you want a side that feels like a classic American comfort meal, cauliflower mash is the way to go. I often steam the cauliflower on a rack above the chicken drippings if I’m using a deeper roasting pan.
Once it’s soft, I throw it in the blender with a massive dollop of Kerrygold butter and some heavy cream. If you’re feeling bold, add some shredded sharp cheddar from Tillamook. It’s rich, filling, and keeps your carb count near zero.
- Garlic Punch: Roast a few whole cloves of garlic with the chicken and blend them into the mash.
- Texture Tip: Use a food processor for a smooth puree, or a potato masher for a “homestyle” chunky feel.
- The Secret Ingredient: A teaspoon of Dijon mustard in the mash adds a sophisticated zing.
Best Roasting Pans for the American Home
I’ve had my fair share of kitchen disasters with cheap pans. I once used a flimsy dollar-store tray that buckled in a 425°F oven and sent grease flying everywhere. For a safe and successful roast, the pan matters.
The Classics: All-Clad and Cuisinart
If you’re looking to invest, an All-Clad D3 stainless steel roasting pan is the industry gold standard. It distributes heat so evenly that you’ll never see a pale, soggy spot on your chicken again. It’s heavy, durable, and will likely outlive your oven.
For a more budget-friendly option, the Cuisinart MultiClad Pro is a fantastic runner-up. It has the same triple-ply construction—aluminum sandwiched between stainless steel—for about half the price. It’s a workhorse in many US kitchens for a reason.
- Flat Racks vs. V-Racks: I prefer a flat rack for chicken. It lets the air circulate under the bird without the “wedging” effect of a V-rack.
- Handles: Look for upright, riveted handles. You don’t want to be fumbling with a hot, greasy pan using small, flush handles.
- Material: Avoid thin non-stick coatings that flake off. A well-seasoned cast iron or high-quality stainless steel is safer for high-heat roasting.
The Modern Choice: Ceramic and Caraway
If you prefer non-toxic coatings, Caraway has become a massive hit in the States recently. Their ceramic-coated roasting pans are naturally non-stick and very easy to clean.
I’ve found that they brown chicken surprisingly well, which isn’t always true for older non-stick pans. Plus, they look great on the counter if you’re serving family-style. Just be careful with metal utensils so you don’t scratch the surface.
- Eco-Friendly: Ceramic is free of PFOAs and PTFEs.
- Heat Limit: Most ceramic pans are safe up to 550°F, which is plenty for our keto roast.
- Colors: They come in fun colors like Sage or Cream, making them a “display-worthy” piece of gear.
My Final Take: Keeping it Real in the Kitchen
Look, I’m a professional, but I’ve had days where I’ve forgotten the timer or used the wrong salt. Cooking is a practice, not a destination. The more you roast, the more you’ll “feel” when the chicken is ready.
At Oven Insights, I always say the best meal is the one that makes you feel good. Keto shouldn’t feel like a chore. It should feel like an upgrade to your lifestyle. When you can pull a perfectly roasted, golden-brown chicken out of your oven on a rainy Tuesday night, you aren’t just dieting. You’re thriving.
- Be Patient: Let the oven preheat fully—don’t rush the start.
- Be Bold: Try a new spice or a different brand of US-raised chicken.
- Be Kind: If you overcook it, turn it into a creamy chicken soup with heavy cream.
Thanks for joining me in my virtual kitchen. I hope these tips from my professional journey help you find your own rhythm at home. Now, go turn that oven on and get that sizzle started!
FAQs: How to Cook Keto Chicken in the Oven
How long does it take to cook keto chicken in the oven?
At 400°F, it takes 20 to 30 minutes. Use a meat thermometer to be safe. Pull the bird at 160°F for the best juice.
How do I get crispy skin without using flour or breading?
Pat the skin very dry with a paper towel. Rub it with ghee or avocado oil. High heat is the key to a perfect keto crunch.
Can I use frozen chicken for my keto oven recipes?
It is best to thaw meat first. Frozen birds release too much water. This makes the skin soft instead of crispy and brown.
What is the best temperature for roasting keto chicken?
Start your oven at 425°F for 15 minutes. Then drop it to 375°F. This method keeps the meat moist and the skin very tasty.
Which oils are best for high-heat keto roasting?
Use avocado oil or ghee for the best results. They do not smoke at high heat. Avoid butter alone as it can burn too fast.
I’m Mossaraof, a trained chef and the founder of OvenInsights.com. I spent years cooking at Larrupin’ Cafe and in kitchens across Chicago and Seattle. Now I test kitchen gear for a living. I moved to North Acton, London, and I test every tool I write about. I use real meals and real heat. No brand deals. No shortcuts. I cover 12 kitchen types and hundreds of recipes. I believe this: the right tools matter as much as the recipe.