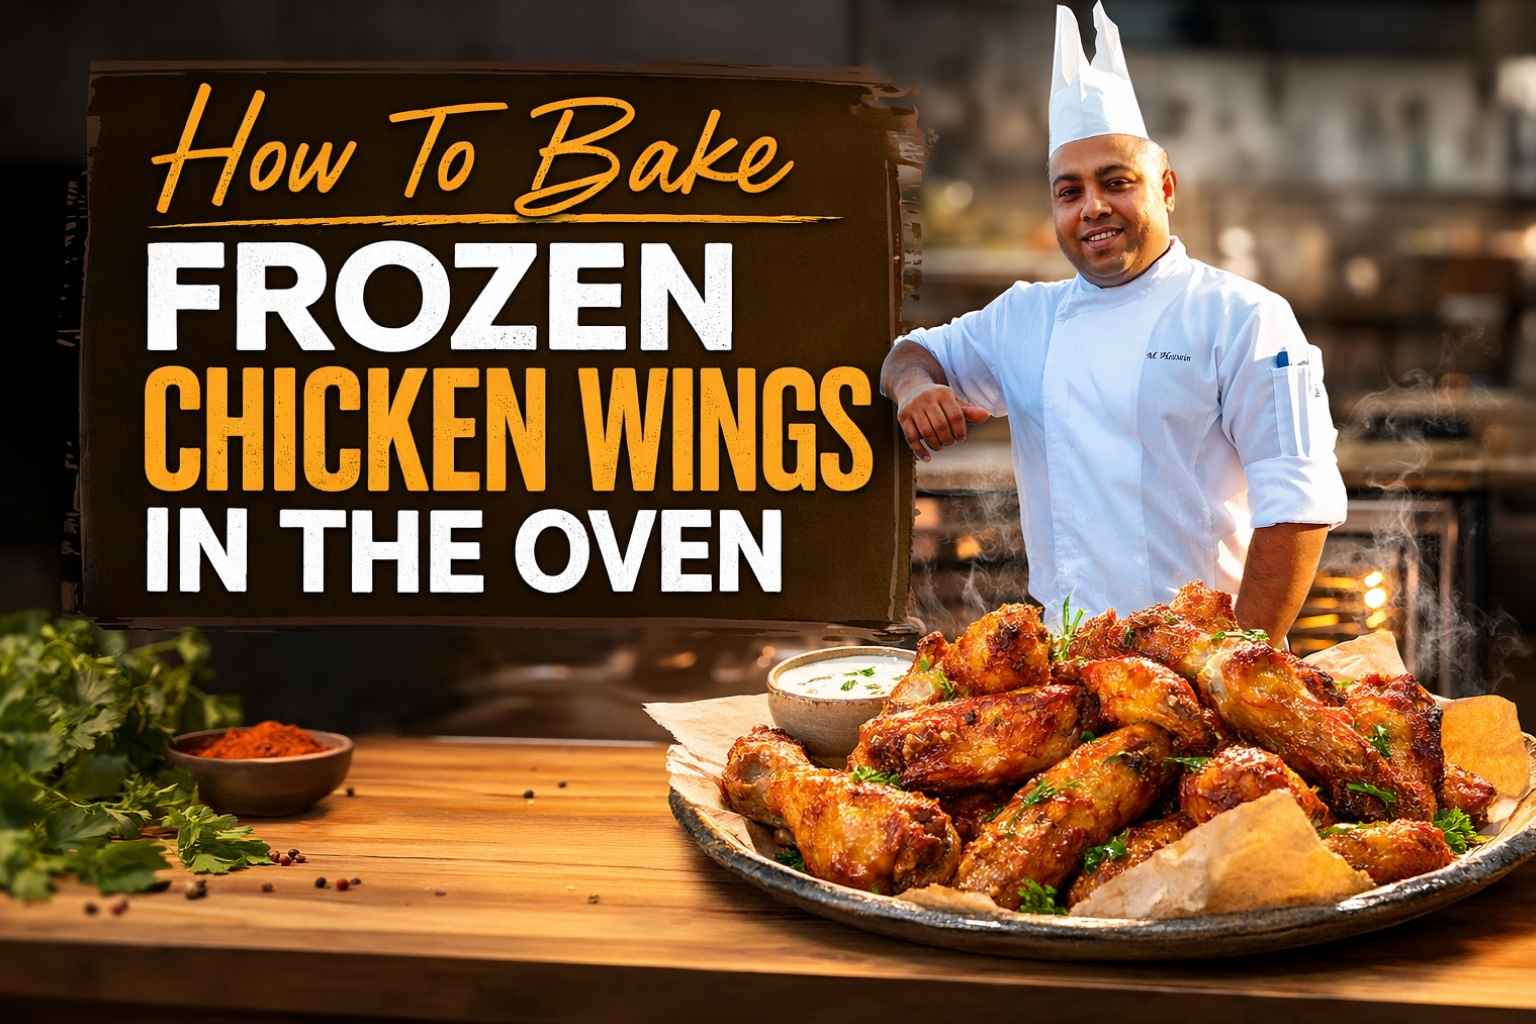
Hey, I’m Mossaraof — a professional cook and food blogger.
We all want that salty, hot crunch of a great wing even when we forget to thaw the bag. I will show you how to bake frozen chicken wings in the oven so they turn out crisp and juicy every single time.
My years in a busy Chicago kitchen taught me that a hot rack is the true secret to a perfect snap without the wait. Use my Ultimate Guide to Master Your Oven to find the best heat settings for a fast, golden finish. Let’s grab your sheet pan and start this easy, tasty snack together right now!
Why I Bake Frozen Wings Instead of Thawing — My Real Kitchen Routine
Some nights, I just don’t have the patience.
You know those evenings when your energy’s running on empty, your fridge is bare, and you forgot (again) to thaw the chicken? That’s been me — too many times to count.
One Thursday night last spring, after a long shift and zero prep, I pulled a bag of frozen raw wings out of the freezer. No plan. Just hunger.
I thought, “Well, I’ll just try baking frozen chicken wings in the oven and see what happens.”
That moment changed the game for me.
Why Thawing Can Be More Trouble Than It’s Worth
Thawing sounds easy, right? Just plan ahead and let them sit. But here’s the deal:
- Thawing in the fridge takes 8–12 hours (I never remember in time)
- Microwave thawing gives weird, rubbery edges
- Water-bath thawing gets messy — and I hate soggy chicken skin
Plus, even if I did thaw them, they’d still need to go in the oven. So why not skip the middle step?
The Day I Realized Frozen-to-Oven Wings Actually Work
That first time I baked them frozen, I expected disaster.
But the wings? They came out shockingly decent. Skin browned up by the 40-minute mark. I flipped them once halfway through. They were juicy inside, crisp outside — and I didn’t have to babysit a stove or deep fryer.
It was a lightbulb moment. I thought, “Why doesn’t everyone cook frozen wings like this?”
Wings Straight From the Freezer = Weeknight Win
Now, whenever I’m in a rush or just feeling lazy, here’s what I reach for:
- Frozen raw wings (Tyson®, Kirkland™, or my own pre-portioned freezer bags)
- No thawing. No frying. No stress.
And when folks ask me how to cook frozen chicken wings in the oven, this is what I tell them:
“Preheat. Line a tray. Toss those suckers on frozen. Flip once. Check doneness. Eat.”
That’s the real answer. And it works.
It’s not perfect every time. Some wings brown unevenly. Some stick to the tray if I forget parchment. But it’s still better than skipping dinner or ordering overpriced wings that show up soggy.
That’s why baking frozen wings is part of my real kitchen rhythm now. It’s not about perfection — it’s about getting crispy wings without extra work.
Tools I Trust for Baking Frozen Wings in My Oven
If you’ve ever pulled off a tray of wings and found half of them glued to foil — yeah, I’ve been there.
When I first started figuring out how to cook frozen chicken wings in the oven, I didn’t think much about the gear. I figured any old pan would do.
Wrong.
The tools you use make a difference — not just for crispiness, but for cleanup, consistency, and how evenly your wings cook.
My Sheet Pan Journey (The Cheap One vs The Keeper)
At first, I used this old warped baking sheet I’d had since college. No joke, it tilted sideways like a seesaw. Oil pooled in the corner, and my wings cooked unevenly — some burnt, some soggy.
I finally upgraded to a Nordic Ware® aluminum half-sheet pan. Game changer.
- It heats evenly
- Doesn’t warp at high temps (even at 450°F)
- Easy to clean if you use parchment
Now that’s my go-to tray. I’ve got two of them and rotate batches if I’m making wings for more than one person.
Wire Rack or No Wire Rack? Here’s My Take
People always ask if a wire rack is necessary.
Short answer? Not always. But when I’m baking raw frozen chicken wings, a rack helps big time.
Why?
- It lets hot air circulate under the wings
- Drips fall below, so skin crisps instead of steaming
- Less flipping, more even browning
I use a USA Pan® nonstick rack that fits perfectly in my sheet tray. Just don’t forget to spray it — or you’ll be scrubbing for days.
Now, for breaded or saucy wings, I skip the rack. They get messy and sauce drips everywhere. For those, I go tray-only with parchment.
What About Foil? Let’s Talk Wing Failures
I used to line everything with foil to avoid cleanup.
Big mistake.
- Wings stuck and tore the skin
- Foil reflected heat weirdly — sometimes overbrowning the bottoms
- I tossed more wings in the trash than I’d like to admit
Now I use unbleached parchment paper or a silicone baking mat. Both hold up to high temps (400°F–450°F) and release wings easily.
Bonus Tools That Save Me Time
I don’t use a lot of gadgets, but a few simple tools make this whole frozen-to-crispy thing smoother:
- Oven thermometer (my old GE oven runs 15°F cold)
- Tongs with silicone tips (don’t tear the skin)
- Instant-read thermometer (more on that in Part 6 — I swear by it)
And when I really want to crisp things fast? I sometimes finish wings in a Lodge® cast iron skillet under the broiler for 2–3 minutes. It’s overkill on a weeknight… but it’s so good.
How to Bake Frozen Chicken Wings in the Oven — Step by Step
This is my actual, no-thaw method — tested on lazy Tuesdays, late Sundays, and “oh no, I forgot to shop” nights. Whether you’re working with raw, pre-cooked, or breaded wings, I’ve got you covered.
For Raw Frozen Chicken Wings (Unseasoned Tyson®, Kirkland™, etc.)
I use this method the most. Raw wings take the longest, but they’re worth it — the skin crisps up beautifully if you do it right.
🔥 Step-by-step:
- Preheat your oven to 400°F.
I’ve tried 375°F and 425°F too, but 400°F is my personal sweet spot for raw frozen wings. Even heat, solid browning, and less chance of drying them out. - Line your sheet pan with parchment.
Or use a wire rack if you want more airflow. Just don’t skip the lining unless you like scrubbing. - Lay the wings out in a single layer.
No overlapping. Give each wing its personal space. - Bake for 25 minutes. Then flip.
I use silicone-tipped tongs. You’ll see the bottoms getting golden. - Bake another 20–30 minutes.
Total time is usually 45–55 minutes, depending on how thick the wings are. They’re done when the skin’s crispy and the inside hits 165°F. - Optional: Broil for the last 3 minutes.
If I want extra crunch, I broil them on the top rack at the very end. Just don’t walk away. I’ve burnt more than one batch that way.
Quick Glance:
- ✅ Frozen raw wings? 400°F, 45–55 min, flip halfway
- ✅ Using rack? Crispier.
- ✅ Using tray? Works fine — just avoid overcrowding.
For Pre-Cooked Frozen Chicken Wings (Buffalo, BBQ, etc.)
These are easier, faster, and great for when I’m too tired to care. Most pre-cooked wings just need to be reheated properly.
🔥 My simple steps:
- Preheat oven to 375°F.
Lower temp helps avoid burning the sauce. - Line your tray.
I use parchment here — racks make a mess with saucy wings. - Spread wings out, skin-side up.
- Bake for 20–25 minutes.
You’ll start to see the sauce bubble and edges crisp. - Check temp — hit at least 165°F inside.
- Let them rest 3–5 minutes before serving.
I always do this so the steam settles and the skin firms up.
For Breaded Frozen Wings (Store-brand Buffalo, Honey BBQ, etc.)
These need a little more care — breading can burn or go soggy if handled wrong.
🔥 What I do:
- Bake at 400°F for 25–30 minutes
- Skip the rack — go straight tray and parchment
- Flip halfway, gently (don’t lose that crust!)
- Let rest before serving
I’ve had better luck avoiding broiling here — broil can burn sugar in BBQ sauces fast.
How Long to Cook Frozen Chicken Wings in Oven at 400°F or 450°F?
Here’s what’s worked in my oven (mid-range GE gas oven in a Chicago apartment):
- 400°F (raw): 45–55 minutes
- 400°F (pre-cooked): 20–25 minutes
- 400°F (breaded): 25–30 minutes
- 450°F (raw): 35–40 minutes — faster but riskier
- 450°F (saucy): Not recommended — sauce burns easily
If you’re wondering how long to bake frozen chicken wings in oven at 450°F — I only do it when I’m watching them closely. The higher temp browns fast but dries the wings if you miss the timing.
What Happens If You Don’t Flip Your Frozen Wings?
Some nights I get lazy. Or distracted.
There was one Thursday when I tossed frozen wings in the oven, set a timer for 50 minutes, and walked away. No flip. No check. Just vibes and a football game on in the background.
The result? Eh. Edible. But not great.
Why Flipping Matters More Than I Thought
When you’re baking frozen chicken wings in the oven, you’re asking a lot of the heat: thaw, cook, and crisp — all in one go. If you leave one side pressed against the pan the whole time, here’s what tends to happen:
- Bottoms turn soggy from trapped moisture
- Top crisps unevenly, especially on thicker wings
- Meat cooks unevenly — some parts still pink, some overcooked
It’s not dangerous… but it’s definitely disappointing.
That batch I didn’t flip? The wings were chewy underneath. The skin stuck to the tray. One side looked air-fried, the other side looked steamed.
What I Do Instead (Even When I’m Feeling Lazy)
Now I build the flip into my process — always around the halfway mark.
- Raw frozen wings: Flip after 25–30 minutes
- Breaded or pre-cooked: Flip around 12–15 minutes
If I’m really not in the mood to flip (it happens), I cheat a little:
- I raise the tray closer to the top heating element
- I use convection bake mode to get more even airflow
- I broil at the end for 2–3 minutes just to crisp the bottoms
But let’s be honest — nothing replaces flipping. Even with a wire rack, the top will always brown faster than the bottom unless you give it a chance to rotate into the hot zone.
How I Remember to Flip Without Setting 5 Alarms
This sounds silly, but I time it to something I already do. Like:
- When I refill my coffee
- After loading the dishwasher
- When the second half of the game starts
That way I don’t forget — because when I do? It shows.
Should You Bake Frozen Wings Covered or Uncovered?
Short answer? Don’t cover them.
I made that mistake once. Actually, twice. Both times, it turned into a soggy mess I regretted halfway through dinner.
The First Time I Covered Them — Total Regret
I thought I was being smart.
One Saturday, I covered a tray of frozen wings with foil, thinking it would “steam them through faster” and lock in moisture.
Technically? It did.
But what I got was:
- Pale, rubbery skin
- Zero browning
- Moisture puddled under each wing like a sad little bath
They cooked, sure — but they didn’t taste like wings. More like sad, boiled meat with the spirit of Buffalo sauce.
Why I Always Bake Wings Uncovered Now
Letting the heat hit the skin directly is what makes oven wings great — especially when starting frozen.
When you bake frozen chicken wings in the oven uncovered, you get:
- Dry heat circulation = crispier skin
- Natural moisture evaporates instead of soaking in
- Better browning and color on both sides
Even without a wire rack, I’ve had success just by leaving the tray uncovered and flipping once.
No foil tent. No lid. Just hot air doing its job.
The One Exception: Saucy Pre-Cooked Wings That Burn Too Fast
Okay — I’ll admit, there’s one time I partially cover wings.
If I’m reheating pre-cooked wings that already have sticky sauce (like honey BBQ), and they start charring too fast… I’ll loosely tent the tray with foil.
Not wrapped. Just floated on top like a little heat umbrella.
That gives them enough cover to avoid burning, while still letting steam escape.
But honestly? Even then I’ve had better results baking uncovered at a slightly lower temp (like 350°F for 30–35 minutes) than trying to play hide-and-seek with foil.
Sauce Timing — When to Toss, Dip, or Glaze
I’ve burned more sauce than I care to admit.
I’ve also pulled out trays of wings that looked perfect… until I tossed them too early and watched the skin go soggy right before my eyes.
So let’s talk sauce timing — because it makes or breaks oven wings. Especially when they start out frozen.
Rule One: Never Sauce Raw Frozen Wings Before Baking
The first time I did this was with homemade honey garlic sauce. It smelled amazing going in. But when I pulled the wings out?
- The sugar had scorched
- The skin was soft
- The whole tray was sticky in the wrong way
That’s when I learned: baking frozen chicken wings in the oven works best when the wings are dry at first. Let them cook. Let them crisp. Then sauce.
When I Sauce: Right After Baking While They’re Still Hot
This is my go-to method — works every time.
- Bake the wings until golden and cooked through
- Let them rest for 2–3 minutes so the juices settle
- Toss them in sauce while still hot in a big bowl
- Serve immediately
The heat helps the sauce stick better. The crisp stays intact. The skin doesn’t get drowned.
It’s simple, it’s fast, and it works with almost every sauce I’ve tested.
The Exception: Lightly Sauced Pre-Cooked Wings
Some store-bought frozen wings already come pre-coated — like Foster Farms® Buffalo or Great Value® BBQ. These go in the oven with sauce already on.
What I do:
- Bake uncovered at a lower temp (375°F)
- Watch closely near the end — sugars in BBQ love to burn
- If they look dry or sad, I toss on a fresh coat of sauce once they’re out
It’s like giving them a second chance at life.
U.S. Sauces That Have Worked Great in My Kitchen
These are my regular rotation — and yes, I’ve ruined some towels cleaning up after the sticky ones:
- Frank’s RedHot® + melted butter — classic Buffalo
- Sweet Baby Ray’s® Honey BBQ — good for tossing post-bake
- Trader Joe’s® Peri Peri — spicy, bright, needs a light hand
- Homemade honey sriracha — only add after cooking or it’ll burn
For anything sugar-based (BBQ, teriyaki, honey garlic), I always wait until the wings are done. Otherwise, it’s a race between the sauce burning and the chicken finishing.
Bonus Tip: Sauce in a Bowl, Not on the Tray
I used to pour sauce straight onto wings on the baking sheet.
Looked cool. Cleaned terrible.
Now I use a big stainless bowl, toss quickly, and serve.
Takes 20 seconds. Saves me 20 minutes of scrubbing.
How to Tell If Frozen Wings Are Done (Without Cutting Them Open)
Back in the day, I’d just slice one open and hope it looked cooked.
Juices running pink? Back in. Dry and gray? Too late.
Now? I’ve got better ways.
If you’re baking frozen chicken wings in the oven, there are three signs I use every time to check doneness — without hacking them open or guessing.
1. The Instant-Read Thermometer (My Kitchen MVP)
Seriously — if you don’t own one yet, grab one.
I use a ThermoPro® digital reader I bought online years ago. Still going strong.
Here’s what I check:
- Insert into the thickest part of the wing, away from the bone
- If it reads 165°F or higher, you’re good
- If it’s hovering around 158°F, I give it 5 more minutes and recheck
I trust the thermometer more than looks — especially with bigger wings or when I’m baking at 400°F or higher.
2. The Wiggle Test (Yeah, I Said It)
This one’s old-school and oddly satisfying.
Grab a wing and gently wiggle the bone — if it moves easily and the meat starts pulling back from the ends, that’s a good sign it’s cooked through.
It’s not as precise as a thermometer, but I’ve used this trick when my battery died and it worked well enough.
3. Visual Cues That Never Lie
Over time, I’ve trained my eyes to spot doneness — here’s what I look for:
- Juices run clear — no pink liquid on the tray
- Skin is golden and starting to bubble at the edges
- Meat pulls back slightly from the bone
- No rubbery shine — they should look “dry crisp,” not wet
If they’re pale or slippery looking? Not done yet.
If the outside’s perfect but the inside’s under, I’ll flip them all skin-down and blast the heat up for 5 minutes. That usually finishes the job without drying them out.
Real Mistakes I’ve Made While Baking Frozen Wings (And How to Fix Them)
I’ve had some real clunkers.
Not every batch turns out photo-worthy — and that’s okay. I’ve overcooked, undercooked, and once filled my whole kitchen with smoke because of one sticky sauce incident.
Here are my worst frozen wing fails… and how I learned to fix them.
1. Overcrowding the Pan = Steamed, Soggy Wings
I once crammed 20 frozen wings onto a single sheet tray because I was too lazy to use two.
Big mistake.
What I got was:
- Steam traps between wings
- Zero crisp on the bottoms
- Weird gray color on some pieces
Fix:
Now I always space wings out — at least an inch between each one. If I’m cooking for a crowd, I use two pans or bake in batches.
Also, if you have convection mode, use it. That air circulation helps a ton.
2. Baking Directly on Foil = Skin Rips and Wing Rage
This one still haunts me. I lined a tray with foil thinking it would help with cleanup. Halfway through, I tried flipping — and the skin peeled right off the wings like tape.
They stuck. Tore. Looked like they’d been in a fight.
Fix:
I switched to parchment paper or a silicone baking mat. Way better release. If I use a rack, I spray it lightly with oil first. No more sticking.
3. Forgot to Flip = Burnt on One Side, Raw on the Other
There was one night — I was tired, had music playing, and completely forgot to flip the wings.
The tops looked golden. The bottoms? Burnt patches, soft skin, and undercooked centers.
Fix:
Now I always set a timer halfway through. Even if I’m multitasking, that little beep keeps me on track. If I ever forget again, I flip them all and toss them under the broiler for 2 minutes to rescue the texture.
4. Sauced Too Soon = Sugar-Burned Sadness
I once brushed BBQ sauce on my raw frozen wings before baking them.
Thought I was being clever. I was not.
The sugars blackened before the wings even cooked through. Whole tray smelled like burnt marshmallows and char.
Fix:
Always sauce after. Or in the last 3–5 minutes if you’re glazing. Never at the start.
5. Forgot to Preheat the Oven = Soft and Uneven
I tossed wings into a cold oven once when I was in a rush.
Result? Uneven cooking. Pale skin. Took way longer. No crisp.
Fix:
Now I make preheating part of the ritual. I usually turn the oven on while I’m lining the pan or spacing out the wings.
Oven Settings Matter — What Mode Should You Use?
I used to think “Bake” was just… bake.
But depending on your oven, that one little word can mean different things. And it can make or break your wings.
Here’s what I’ve learned from testing frozen wings in three different ovens — a Whirlpool electric, a GE gas, and a newer Frigidaire convection.
Bake Mode: The Safe Default
If you’re unsure, just use regular bake.
I still use it when I want even, slow crisping — especially for raw frozen wings that need 45–55 minutes at 400°F.
- Pros: Gentle heat, less burning risk
- Cons: Takes longer to crisp unless you flip or broil at the end
- Great for beginners or older ovens
My GE gas oven runs cooler than my electric did, so I usually bump the temp 10–15°F higher to make up for it. Always use an oven thermometer — mine’s been a lifesaver.
Convection Bake: Faster, Crispier, but Riskier
Convection mode uses a fan to blow hot air around. I call it the turbo setting.
When I use convection to bake frozen chicken wings, they usually come out crispier — especially the skin on the bottom. But…
- Pros: Faster cook times, great air circulation
- Cons: Can dry out wings if you’re not watching
- Flip early and check them 5–10 minutes before the usual time
This setting helped me big time during Florida summers when humidity made my oven feel sluggish. Convection cut through the moisture like a champ.
But when I used it in dry Arizona air? I had to lower the temp or my wings dried out quick.
Broil: A Finishing Move, Not a Full Method
I love broil — but only in small doses.
Sometimes, I’ll broil my wings for the last 2–3 minutes to get that extra golden finish. But leave them in too long? It’s scorched city.
- Only use broil at the very end, when wings are already cooked
- Keep the tray on the middle rack (not too close)
- Never walk away — trust me
One time I broiled saucy wings on the top rack for “just a minute.” I blinked — and the sugar in my BBQ sauce turned black. Smoke alarm. Window open. Not fun.
My Preheat Habit: Always On
I used to skip preheating when I was tired. But baking frozen wings in a cold oven = uneven cooking.
Now, I always:
- Start preheating before I line the tray
- Give it a full 10–15 minutes — even if the oven says it’s ready early
- Use an external thermometer to double-check (some ovens lie)
Regional Oven Adjustments (What Works in Florida vs Midwest vs Arizona)
Your oven might be the same model as mine — but if you live in a different part of the country, your results can look totally different.
I’ve cooked frozen wings in a steamy Florida rental, a wintery Chicago apartment, and a dry Arizona kitchen that felt like a desert oven even before preheating.
And every location needed its own little tweaks.
Florida (High Humidity = Slower Crisp)
That Florida air? Thick like soup. I could practically feel the moisture clinging to my sheet pan.
When I baked frozen chicken wings in that climate:
- They took longer to brown
- Skin crisped slower, even with convection
- Steam built up more on the tray
What I did to fix it:
- Used convection bake at 425°F to push through the humidity
- Cooked wings on a wire rack to lift them off the wet tray
- Gave them an extra 5–10 minutes past my usual timing
Also: I learned not to open the oven door as much. Every time I did, warm moist air rushed in and set my crisping back.
Midwest Winters (Ovens Run Cooler)
In my old Chicago apartment, winter messed with my oven.
Even with the dial at 400°F, I’d check my thermometer and it’d barely hit 380°F.
The wings cooked — but they took longer, and I kept second-guessing doneness.
How I adjusted:
- Let the oven preheat for at least 20 minutes
- Used a second oven thermometer to track real temp
- Baked wings closer to the top rack to boost heat exposure
- Let wings go a full 55–60 minutes if needed
Also, I’d let wings rest in the oven with the door slightly cracked after turning off the heat. That helped dry the skin a little more without burning.
Arizona Dryness (Crisps Fast — Maybe Too Fast)
The first time I baked wings in my Arizona kitchen, I thought I nailed it. The skin crisped up fast. Looked golden. Smelled amazing.
But when I bit in? Dry. Overcooked. Some wings even split.
Dry air can be tricky — it speeds up surface cooking but pulls moisture from inside the meat quicker than you’d expect.
Here’s what saved the day:
- Lowered the baking temp to 385°F
- Cut total time by 5–7 minutes
- Added a small baking dish with water on the bottom rack to add light humidity
- Let wings rest 5 minutes after baking before saucing
Now, when I bake frozen chicken wings in the oven in dry climates, I check internal temp early — around the 35-minute mark — and I skip broiling unless the skin really needs it.
Final Thoughts from My Oven to Yours
If you’ve made it this far, you probably love wings as much as I do.
And not the fancy ones on a platter with celery roses and drizzle lines. I mean the real kind — the kind you pull out of the freezer when you’re tired, hungry, and not in the mood for a big production.
Wings that go from frozen solid to crispy and golden in under an hour — no thawing, no frying, no stress.
I didn’t learn this from a cookbook. I figured it out in the middle of real-life chaos:
- Kids yelling in the background
- Smoke alarm chirping from a low battery
- Me flipping wings in pajama pants with sauce on my socks
And through it all, the oven has been steady. Imperfect, but steady.
So if you’re standing in your kitchen right now, frozen wings in one hand, doubt in the other — trust the process.
You don’t need a commercial kitchen.
You don’t need a Ph.D. in poultry.
You just need heat, space on a tray, and a little patience.
Give them time. Flip them once. Let the smell fill your kitchen.
Then toss them in your favorite sauce — or eat them plain, right off the tray like I sometimes do when no one’s watching.
Because that’s the thing about baking frozen wings in the oven — it’s simple, forgiving, and strangely satisfying.
And after dozens of test batches, burn marks, sauce splatters, and late-night bites straight off the sheet pan… I still look forward to the next tray.
So here’s to crispy skin, warm trays, and knowing dinner’s only one preheat away — no thawing required.
Cheers from my kitchen to yours,
– Mossaraof
FAQs
How to bake frozen chicken wings in the oven without thawing?
You can bake frozen chicken wings in the oven straight from the freezer. Just place them on a tray and bake at 400°F. They cook well and stay juicy with crisp skin.
What temperature is best to bake frozen chicken wings in the oven?
The best temperature to bake frozen chicken wings in the oven is 400°F. This heat helps them cook evenly and get crispy outside while staying tender inside.
How long does it take to bake frozen chicken wings in the oven?
Frozen chicken wings take about 45 to 55 minutes in the oven. Flip them halfway for even cooking. This helps get a golden and crispy finish.
How do you make frozen chicken wings crispy in the oven?
To make frozen chicken wings crispy in the oven, bake them on a wire rack. This lets air move around them. You can also broil for a few minutes at the end.
Should I season frozen chicken wings before baking in the oven?
Yes, you can season frozen chicken wings before baking in the oven. Add simple spices or sauce. The flavor builds as they cook and makes them more tasty.
I’m Mossaraof, a trained chef and the founder of OvenInsights.com. I spent years cooking at Larrupin’ Cafe and in kitchens across Chicago and Seattle. Now I test kitchen gear for a living. I moved to North Acton, London, and I test every tool I write about. I use real meals and real heat. No brand deals. No shortcuts. I cover 12 kitchen types and hundreds of recipes. I believe this: the right tools matter as much as the recipe.