
At A Glance
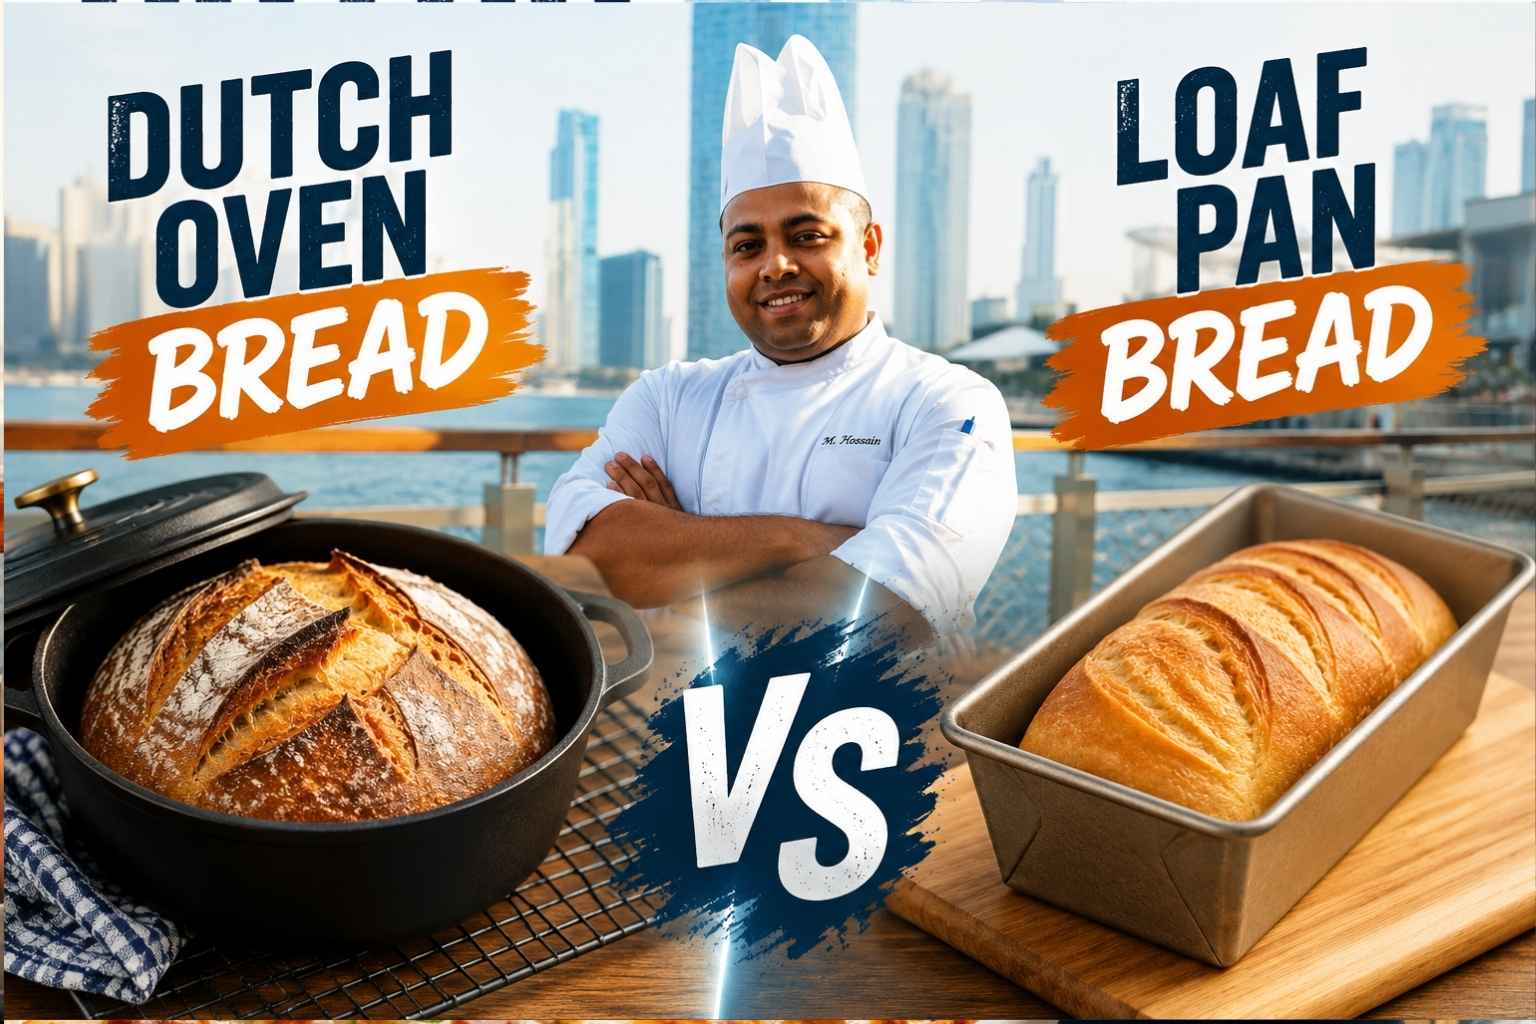
- A Dutch oven traps steam in the first phase of baking, producing a thick, crackly crust and open crumb that a loaf pan cannot replicate.
- A loaf pan controls shape and gives you a consistent, sliceable sandwich loaf every time — making it better for enriched doughs and beginner bakers.
- Sourdough, boules, and artisan breads belong in a Dutch oven. Sandwich bread, banana bread, and brioche belong in a loaf pan.
- The lid-on phase (first 20 minutes) creates steam; the lid-off phase (final 20-25 minutes) builds crust color and crunch.
- After 15 years in professional and home kitchens, I reach for the Dutch oven 80% of the time — but I keep both on the shelf.
I still remember the day my first loaf came out flat as a pancake. That’s when I learned the real fight is Dutch oven bread vs loaf pan, and the winner isn’t always obvious. I’m Mossaraof, and I’ve baked hundreds of loaves in both, so I know the tricks that actually work. Stick with me, and you’ll see exactly which one gives you that perfect crust every single time. Let’s dig in and fix your bread game for good.
Why the Baking Vessel Changes Everything
The pan you choose is not a minor detail. It changes the crust, the crumb, the shape, and the rise.
Here’s what happens inside the oven: bread needs steam in the early stages of baking. Steam keeps the outer crust flexible while the loaf is still expanding. Without it, the crust sets too early, traps the gas inside, and the loaf either bursts at the sides or stays dense and flat.
Professional deck ovens inject steam directly into the baking chamber. Home ovens do not. That gap is exactly what the Dutch oven solves — and what the loaf pan makes no attempt to fix.
The loaf pan, on the other hand, solves a different problem: shape. Free-form loaves spread sideways if the dough is too slack or too warm. A loaf pan holds the sides in, forces the loaf upward, and gives you that familiar rectangular slice every time.
Neither vessel is universally better. They are tools for different jobs.
Side-by-Side Comparison: Dutch Oven vs Loaf Pan
| Feature | Dutch Oven | Loaf Pan |
|---|---|---|
| Crust type | Thick, crackly, artisan | Thin, soft, even |
| Crumb structure | Open, irregular holes | Tight, uniform |
| Steam source | Trapped from dough moisture | None (open top) |
| Shape control | None — free-form | High — rectangular |
| Best bread types | Sourdough, boules, ciabatta, bâtards | Sandwich bread, brioche, banana bread, quick breads |
| Skill level | Intermediate | Beginner-friendly |
| Preheat required | Yes — 450°F/230°C minimum | Optional |
| Material options | Cast iron (primary), enameled cast iron | Glass, metal, ceramic |
| Oven spring | Excellent | Moderate |
| Cleanup | Moderate | Easy |
How a Dutch Oven Mimics a Professional Deck Oven
A Dutch oven is a sealed chamber. When you drop a cold, shaped loaf into a preheated Dutch oven and put the lid on, the moisture in the dough turns to steam — and that steam goes nowhere.
For the first 20 minutes, the loaf bakes in its own humid environment. The crust stays soft and pliable. The dough expands freely. That expansion is called oven spring, and it is the difference between a loaf that looks store-bought and one that looks like it came out of a professional bakery.
I trained in kitchens that used 400-pound deck ovens with steam injection systems. The result I get from a $60 Lodge Dutch oven at home is not identical, but it is genuinely close. (King Arthur Baking, 2023) conducted tests comparing Dutch oven bakes to open-pan bakes of the same sourdough recipe. The Dutch oven loaves scored higher on crust thickness, crumb openness, and oven spring in every trial.
The reason is simple physics. Cast iron holds heat at a level most baking sheets and pans cannot match. When the cold dough hits the hot surface, the bottom crust starts forming immediately — no sticking, no sogging out.
After 20 minutes, the lid comes off. Now the loaf is set, the steam has done its job, and the surface is ready to brown. The dry heat of the oven takes over and drives the Maillard reaction — that browning process that creates flavor and color in the crust.
Lid-On Phase vs Lid-Off Phase: When to Switch
The two-phase method is the foundation of Dutch oven bread baking.
Lid-on phase (first 20 minutes at 450°F/230°C): Steam builds inside. The loaf expands. The crust stays flexible. Scoring opens up.
Lid-off phase (final 20-25 minutes at 450°F/230°C or reduced to 430°F/220°C): The crust dries, colors, and crisps. Internal temperature climbs to 205-210°F/96-99°C, which is the target for a fully baked lean dough (Serious Eats, 2022).
A common mistake is pulling the lid too early — at 15 minutes instead of 20. The loaf looks like it is already big, so bakers assume it is done expanding. It is not. Give it the full 20 minutes with the lid on before you touch it.
How a Loaf Pan Works — and When It Wins
A loaf pan does one thing well: it holds the loaf in a rectangle.
That sounds simple, but it matters for a specific category of bread. Sandwich loaves need even slices. Banana bread batter is pourable and has no structure on its own. Brioche dough is so enriched with butter and eggs that it would spread into a flat disk without support.
For these breads, a Dutch oven is the wrong tool. The shape is wrong. The high heat is wrong. And the lack of a steam problem means the Dutch oven’s main advantage does not apply.
I bake my weekly sandwich loaf in a 9×5-inch metal loaf pan every time. I want uniform slices for toast and sandwiches. A Dutch oven boule gives me beautiful bread, but I cannot cut even slices from a round loaf, and the crust is too thick and crackly for a good sandwich.
Loaf Pan Materials: Glass vs Metal vs Ceramic
The material of your loaf pan changes the result more than most bakers realize.
Metal (aluminum or aluminized steel): The best option for most loaf pan baking. Metal conducts heat fast, browns the bottom and sides well, and gives you a consistent bake. I use USA Pan 1-lb loaf pans for sandwich bread. (America’s Test Kitchen, 2024) rated them the top performer in loaf pan testing.
Glass (Pyrex-style): Glass heats slowly and holds heat longer. This can over-brown the bottom before the interior is done. If you use glass, reduce oven temperature by 25°F/15°C and check the loaf 5 minutes early.
Ceramic: Similar behavior to glass — slow to heat, slow to release. Good for recipes that bake at lower temperatures (quick breads, banana bread). Less reliable for yeasted loaves.
Which Breads Belong in Each Vessel
Breads That Need a Dutch Oven
Sourdough boules and bâtards: These are the Dutch oven’s specialty. High hydration, long fermentation, open crumb — none of this works without the steam environment the Dutch oven creates. Every sourdough I have baked without a Dutch oven since discovering this method has come out flatter and with a thinner crust.
Artisan white bread (no-knead style): The no-knead method by Jim Lahey (popularized in The New York Times, 2006) was designed specifically for a Dutch oven. The wet dough has no structure without the vessel holding it. Drop it in, lid on, and the steam and heat do the work.
Rustic whole wheat and rye loaves: These doughs tend to be dense. They need maximum oven spring to open up. The Dutch oven gives them the best shot.
Ciabatta: A flat loaf needs steam to develop its open, irregular crumb. A Dutch oven works here if you have a wide, oval one. Otherwise, a covered roasting pan does the same job.
Breads That Need a Loaf Pan
Sandwich bread: This is the loaf pan’s home. Standard white or wheat sandwich dough is lower hydration, enriched with milk or butter, and designed to hold its rectangular shape. Bake it in a covered Pullman pan for the flattest top, or an open loaf pan for a rounded crown.
Brioche: Enriched with butter and eggs, brioche dough is soft and slack. A loaf pan (or the classic fluted brioche mold) holds it together and gives it that tall, pillowy rise.
Banana bread, zucchini bread, and quick breads: These are batter-based — no structure whatsoever. They go in a loaf pan. Full stop.
Milk bread (shokupan): Japanese milk bread is specifically designed for a Pullman loaf pan. The soft crust and cloud-like crumb are a result of the enclosed bake, not a Dutch oven steam method.
Temperature and Timing Differences
Dutch oven baking runs hot: 450°F to 500°F (230°C to 260°C). The high heat is what drives the dramatic oven spring in the first phase. Preheat the Dutch oven inside the oven for at least 30 minutes before you load the bread.
Loaf pan baking runs cooler: 350°F to 375°F (175°C to 190°C) for enriched breads, and up to 425°F (220°C) for lean doughs like sandwich bread. You do not need to preheat the pan.
Total bake times are similar — 40 to 50 minutes for most loaves. But the temperature curve is different:
| Phase | Dutch Oven | Loaf Pan |
|---|---|---|
| Preheat | 30+ min at 450°F/230°C | Not required |
| First phase | 20 min, lid on, 450°F | N/A |
| Second phase | 20-25 min, lid off | 35-45 min, full bake |
| Target internal temp | 205-210°F/96-99°C | 190-200°F/88-93°C (enriched) |
The lower internal temperature target for enriched breads (brioche, sandwich bread) is intentional. These doughs contain fat and eggs that keep the crumb moist even at slightly lower doneness. Lean doughs need the higher temperature to drive off excess moisture and set the open crumb structure (The Fresh Loaf, 2021).
Cast Iron Dutch Oven vs Other Materials
Not all Dutch ovens are equal for bread baking.
Cast iron: The best material for bread baking. It holds heat at the level a deck oven does. Lodge and Le Creuset are the two names I have used most. Lodge is half the price and performs the same. The only advantage of enameled cast iron (Le Creuset, Staub) is that it does not need seasoning and is easier to clean.
Enameled cast iron: Excellent. The enamel coating means you can add a splash of water to the bottom without worrying about rusting the pot. I do not do this — the moisture from the dough is enough — but some bakers prefer it.
Ceramic Dutch ovens: These work, but they are slower to heat. You need a longer preheat. They also crack more easily under the thermal shock of cold dough hitting a hot surface, so be careful.
Stainless steel or aluminum Dutch ovens: These do not hold heat well enough for professional-quality bread. Avoid them for this purpose.
One size note: for a standard 900g to 1kg loaf, a 5-quart or 5.5-quart round Dutch oven is ideal. Go smaller and the loaf will touch the sides. Go larger and the steam disperses too much.
Common Mistakes — and How to Fix Them
Dutch Oven Mistakes
Loading cold dough into a cold pot. You must preheat the Dutch oven. A cold pot gives no initial burst of heat, and the loaf sits there steaming without the oven spring that only comes from immediate contact with extreme heat. Preheat at 450°F/230°C for 30 minutes minimum.
Skipping the score. The score (the cut on top of the loaf) is not decorative. It controls where the loaf opens during oven spring. Without it, the crust cracks randomly and the shape is unpredictable. Use a sharp bread lame or a razor blade. A serrated knife drags the dough.
Pulling the lid off too early. I mentioned this above, but it bears repeating. Twenty minutes. Do not go by how it looks. Set a timer.
Using a Dutch oven that is too small. The loaf expands 30-50% during oven spring. Give it room.
Loaf Pan Mistakes
Not greasing the pan properly. Butter alone is not enough for a loaf pan. Use butter and flour, or use a spray with flour (like Baker’s Joy). A stuck loaf is a broken loaf.
Overfilling the pan. Loaf pan dough should fill about two-thirds of the pan before the final rise. It will expand to the rim during proofing and then rise above it in the oven. Overfill it and the dough spills over the sides and bakes onto the oven floor.
Not checking doneness with a thermometer. The tap-the-bottom test (“it sounds hollow”) is unreliable. Use an instant-read thermometer. Enriched bread at 190°F/88°C is done. Lean bread at 205°F/96°C is done. Guessing costs you loaves.
Using glass at the wrong temperature. Glass and high heat do not get along well. If you are baking sandwich bread at 400°F or above in a glass loaf pan, the bottom will over-brown. Drop to 375°F and check early.
My Personal Go-To Method for Each Bread Type
After 15 years of baking — in restaurant kitchens, a bakery stage in Lyon, and my own home kitchen — here is exactly what I reach for and why.
Weekend sourdough: 5.5-quart Lodge cast iron Dutch oven, preheated to 500°F/260°C, lid on for 20 minutes, lid off for 22 minutes at 450°F/230°C. This is the best bread I make. The crust shatters when you tap it. The crumb is irregular and open. There is no loaf pan version of this bread that comes close.
Weekly sandwich loaf: USA Pan 9×5 metal loaf pan, 375°F/190°C for 38 minutes. I want soft crust, even slices, good toast. The Dutch oven cannot give me that.
Banana bread: A cheap non-stick loaf pan, 350°F/175°C for 60-65 minutes. No steam, no drama. Just the right temperature and a good recipe.
Focaccia: A rimmed half-sheet pan with olive oil. Neither Dutch oven nor loaf pan. Different tool entirely.
Dinner rolls: A 9×13 metal baking pan, so the rolls touch and pull apart soft from each other. Again, not the subject here, but the principle is the same — the vessel shapes the outcome.
The Dutch oven is the vessel I reach for when I want to make the most impressive bread possible. The loaf pan is the vessel I reach for when I want consistent, practical bread for the week.
Both matter. Neither replaces the other.
Frequently Asked Questions About Dutch Oven Bread vs Loaf Pan
What is the main difference between baking bread in a Dutch oven vs a loaf pan?
A Dutch oven creates a steamy, enclosed environment that drives maximum oven spring and produces a thick, crackly crust. A loaf pan holds the dough in a rectangular shape and produces a softer crust — but it provides no steam. The two vessels are designed for different types of bread and different results.
Can I bake sourdough in a loaf pan instead of a Dutch oven?
Yes, but the result will be different. Without the steam environment a Dutch oven creates, your sourdough will have a thinner crust, less oven spring, and a tighter crumb. It will still taste good, but it will look and feel more like a sandwich loaf than an artisan boule. If you want that open crumb and crackly crust, the Dutch oven is the right tool.
Do I have to preheat my Dutch oven for bread?
Yes. Preheating is not optional. The initial burst of heat from a 450°F cast iron surface is what creates oven spring in the first minutes of baking. A cold Dutch oven will not produce the same result. Preheat for a minimum of 30 minutes before loading the bread.
What size Dutch oven is best for a standard loaf?
A 5-quart or 5.5-quart round Dutch oven fits a standard 900g to 1kg boule with room to expand. For a bâtard (oval loaf), use a 7-quart oval Dutch oven. Going too small traps the loaf against the walls; going too large allows steam to disperse before it does its job.
Can I use a loaf pan inside a Dutch oven?
Some bakers do this for pan loaves that still need steam. Place a greased loaf pan inside the preheated Dutch oven, put the lid on for the first 15-20 minutes, then remove the lid to finish. It works, but it is an extra step that only makes sense if you specifically want a rectangular loaf with an artisan crust — a narrow use case.
Which is easier for beginner bakers — a Dutch oven or a loaf pan?
A loaf pan is easier to start with. There is no preheating a heavy pot, no risk of burning yourself dropping dough into a 500°F vessel, and no scoring required. The shape is controlled by the pan. Dutch oven baking has a learning curve: you need to manage a hot, heavy pot and time the lid-on and lid-off phases correctly. Start with a loaf pan, then move to the Dutch oven once you are comfortable with dough handling.
How do I know when my bread is done, regardless of which vessel I use?
Use an instant-read thermometer. Lean doughs (sourdough, artisan white, baguettes) are done at 205-210°F/96-99°C. Enriched doughs (sandwich bread, brioche, milk bread) are done at 190-200°F/88-93°C. The color of the crust is a guide, but internal temperature is the only reliable indicator of doneness (America’s Test Kitchen, 2023).
What if I do not own a Dutch oven? Is there a substitute?
Yes. A large oven-safe pot with a tight lid works. A covered roasting pan works for wider loaves. Some bakers use an upside-down metal bowl placed over the loaf on a baking stone — this traps enough steam to approximate the Dutch oven effect. The result is not quite the same as cast iron, but it is much better than an uncovered bake.
Key Takeaways
- The Dutch oven creates steam, drives oven spring, and produces the crackly crust and open crumb of artisan bread. It is the right tool for sourdough, boules, and rustic loaves.
- The loaf pan controls shape, supports slack or enriched doughs, and gives you consistent, sliceable results. It is the right tool for sandwich bread, brioche, and quick breads.
- Always preheat your Dutch oven for at least 30 minutes before baking. Never skip this step.
- Bake with the lid on for 20 minutes (steam phase), then lid off for 20-25 minutes (browning phase).
- Use an instant-read thermometer to check doneness: 205-210°F/96-99°C for lean doughs, 190-200°F/88-93°C for enriched doughs.
- For Dutch ovens, cast iron is the best material — Lodge for budget, Le Creuset or Staub for premium.
- For loaf pans, metal (aluminum or aluminized steel) gives the most consistent results for yeasted breads.
- Both vessels belong in a serious baker’s kitchen. They are not competitors — they solve different problems.

I’m Mossaraof, a trained chef and the founder of OvenInsights.com. I spent years cooking at Larrupin’ Cafe and in kitchens across Chicago and Seattle. Now I test kitchen gear for a living. I moved to North Acton, London, and I test every tool I write about. I use real meals and real heat. No brand deals. No shortcuts. I cover 12 kitchen types and hundreds of recipes. I believe this: the right tools matter as much as the recipe.




