
Hey there! If that big metal box in your kitchen feels like a locked vault, you are not alone. I still remember the mix of fear and joy when I first learned how to use an oven for the first time in a busy professional kitchen. It can be tricky, but once you master the basics, you will unlock a world of great food. This guide will help you feel at ease with every dial and rack. Ready to start cooking? Let’s dive into this Ultimate Guide to Oven Basics and turn that heat on!
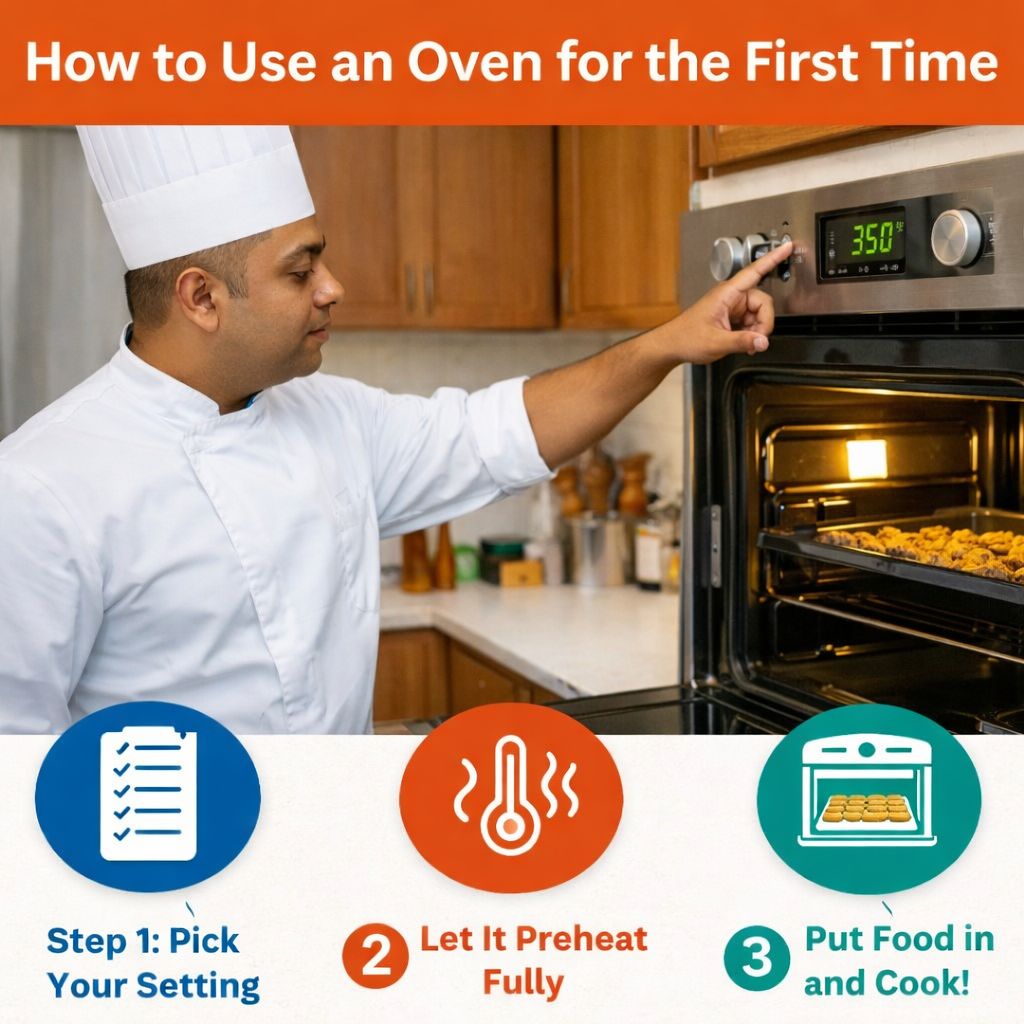
🔥 Understanding Oven Controls and Settings
Before you bake, broil, or roast anything, you’ve got to understand what the oven is telling you. Those buttons and dials? They’re the roadmap to your dinner.
🔧 Common Oven Controls in U.S. Homes
The first time I saw a “Broil” button, I thought it meant “grill.” Spoiler: I was very wrong.
Most ovens in U.S. homes—whether GE, Whirlpool, or Frigidaire—have a few standard settings:
- Bake: This is your go-to. It heats from the bottom and cooks food all the way through. Think casseroles, cookies, pizza.
- Broil: Heats from the top only. It’s great for melting cheese or crisping chicken skin—but it’s easy to burn food if you’re not watching.
- Convection: Uses a fan to move hot air. It cooks faster and more evenly but might mess with baking times if you’re not used to it.
- Warm: Keeps food hot without cooking it more. Great when dinner’s ready but no one’s home yet.
- Timer vs. Cook Time: Timer is like a kitchen clock—it beeps. Cook Time shuts the oven off after a set time. Don’t confuse the two (I’ve made that mistake).
📌 Most ovens in the U.S. have settings like Bake, Broil, Convection, and Warm. Learn these first before your first cook.
🔥 Bake vs. Broil — What’s the Difference?
Here’s how I explain it to friends who are new to cooking:
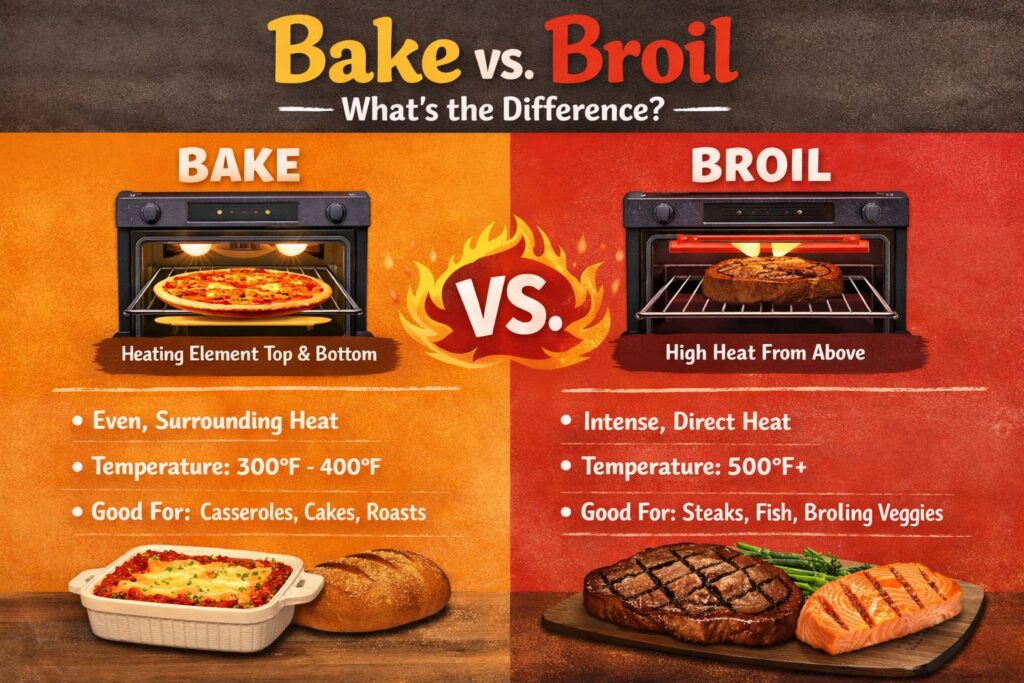
- Bake = even heat from below. It’s slower, gentler, and better for full cooking.
- Broil = intense heat from above. It’s fast and fierce, like a blowtorch from the ceiling.
So if you’re learning how to use an oven for the first time, start with Bake. It’s safer and more predictable. I once tried to broil garlic bread my first week and ended up with black toast and a smoky kitchen.
📌 Use “Bake” when cooking for the first time—it heats evenly and is easier to control than “Broil.”
🌬️ What Convection Means (And If You Should Use It)
“Convection” sounded fancy to me at first. But here’s the deal: it just means there’s a fan inside the oven blowing hot air around.
That airflow helps food cook faster and brown more evenly. Sounds good, right? It is—but only once you know what you’re doing.
If you’re baking for the first time, I suggest turning off convection. Recipes often assume regular bake settings. With convection, things might cook too fast, or worse, unevenly if you’re not rotating pans.
📌 Beginner advice: For your first oven use, skip the convection setting. Stick with standard Bake to avoid overcooking or drying things out.
⏱️ How to Preheat Your Oven the Right Way
The first time I skipped preheating, I ended up with undercooked chicken and burnt edges. I thought turning the oven on while the food was inside would save time. It didn’t.
If you’re learning how to use an oven for the first time, preheating is a step you don’t want to miss. It’s not just a fancy warm-up—it’s the key to making sure your food cooks right from the start.
🔥 Why Preheating Matters for Cooking and Baking
Here’s the quick answer: Preheating lets your food cook evenly and properly.
Ovens don’t heat instantly. If you pop your dish in too soon, parts of it will start cooking while the rest lags behind. That’s how you get soggy bottoms or weirdly raw centers.
Baking a pizza? You want the crust to crisp at the same time the cheese melts. Roasting veggies? That quick blast of full heat helps them caramelize instead of steaming. Cookies? They rise better when the heat hits them all at once.
📌 Preheating helps food cook evenly, gives better texture, and prevents soggy or raw results.
⏳ How Long Preheating Usually Takes
Most ovens need 10 to 15 minutes to fully preheat, but it depends on the type:
- Electric ovens: Take a little longer to heat—usually closer to 15 minutes—but they stay steady once hot.
- Gas ovens: Preheat faster (sometimes under 10 minutes), but may have hot spots or less even heat.
Older ovens might need extra time. Newer models from brands like GE or Frigidaire often show a preheat light or beep when ready—but even that isn’t always perfect.
📌 Most ovens take 10–15 minutes to preheat. Gas is usually faster, electric more even.
🚨 How to Know When Your Oven Is Actually Ready
Here’s a trick I’ve used in every kitchen I’ve worked in: don’t trust the beep alone.
Ovens can beep before they’ve reached full, stable heat—especially older models. That beep means the sensor thinks it’s hot, but the air and walls might not be there yet.
A cheap oven thermometer ($5 at most stores) gives you the truth. Just hang it from the middle rack. Once it hits your set temp—and stays there for a minute or two—you’re ready to cook.
📌 The oven’s “preheat beep” isn’t always accurate. Use an oven thermometer to confirm the real temperature before cooking.
🍳 Choosing Safe Cookware and Rack Position
The first time I put a plastic-handled skillet in the oven, the smell hit before the food was done. Trust me—not every pan belongs in there. When you’re learning how to use an oven for the first time, the tools you choose matter as much as the recipe.
🥘 What Cookware Is Safe for Oven Use
Here’s a quick guide to what can go in the oven without melting, cracking, or causing a kitchen disaster:
- Metal pans (like stainless steel and aluminum): These are safe and great for baking, roasting, or broiling.
- Glass dishes (like Pyrex): Oven-safe glass is fine, but check the label. Don’t go from freezer to oven—glass can shatter with sudden temp changes.
- Cast iron: Heavy, reliable, and perfect for roasting or baking. I use my cast iron for everything from cornbread to chicken thighs.
- Ceramic dishes: Most are safe, especially for casseroles or baked pasta. Just avoid cheap ones with painted finishes that may not handle high heat.
📌 Use oven-safe metal, glass, ceramic, or cast iron cookware for best results and safety.
❌ What NOT to Put in the Oven
Some things look fine—until they melt, smoke, or ruin your food. Here’s what to keep out:
- Plastic handles or knobs: Even if the pan is metal, plastic parts can warp or melt.
- Lids that aren’t oven-safe: Some glass lids or rubber-sealed tops can crack or release chemicals when heated.
- Takeout containers: Cardboard, foam, or plastic containers are never safe in the oven—even if they came hot.
- Thin foil trays: They bend too easily, spill, and don’t distribute heat well.
I once baked lasagna in a flimsy foil tray. It collapsed in the oven, sending cheese straight to the bottom rack. Huge mess. Never again.
📌 Beginner tip: Avoid cookware with plastic parts, non-oven-safe lids, or takeout trays—they can melt, smoke, or spill.
📏 Best Rack Positions for Beginners
Rack placement changes how your food cooks. Most ovens have at least three levels—each with a purpose:
- Middle rack: This is your safe zone. It’s perfect for cookies, casseroles, or anything that needs even heat.
- Top rack: Best for broiling or getting that nice browned top on a dish. But be careful—it’s close to the heat.
- Bottom rack: Use this for pizza or anything where a crispy base matters. Just know it might brown faster underneath.
In most U.S. kitchens, the middle rack is the default—and for good reason. It gives you the best balance for beginner baking or roasting.
📌 Quick tip: Use the middle rack for most meals. Top rack is for broiling; bottom rack is for crispier bottoms like pizza crust.
🍗 What to Cook First in Your Oven (Beginner-Friendly Foods)
Your first oven meal shouldn’t be fancy. It should be simple, forgiving, and hard to mess up. The kind of meal that gives you a win—something hot, golden, and done without drama. That first success builds real kitchen confidence.
✅ Easy First Foods That Rarely Fail
If you’re just learning how to use an oven for the first time, start here. These are foods I’ve cooked a hundred times, even when I was tired, rushed, or distracted:
- Frozen pizza: Just unwrap, place it on the middle rack or a baking sheet, and follow the box. No prep, no stress.
- Sheet-pan chicken: Toss chicken thighs or drumsticks with oil and seasoning. Roast until the skin’s crispy and juices run clear.
- Roasted veggies: Carrots, broccoli, or potatoes with olive oil and salt—spread them out, roast, stir once.
- Biscuits or cookies: Store-bought dough works great. Pop them on a tray and bake. Your kitchen will smell amazing.
📌 Frozen pizza, roasted veggies, and sheet-pan chicken are easy, reliable meals for first-time oven users.
🧠 Why These Foods Are Great for Learning
These meals show clear cooking signs—you can see, smell, and feel when they’re done.
- Frozen pizza gets crispy edges and bubbling cheese.
- Veggies brown and shrink a bit.
- Chicken smells rich and savory when it’s cooked through.
- Cookies turn golden around the edges and lift cleanly off the tray.
They also cook in under 30 minutes, and cleanup is simple. No fancy tools, no multi-step processes—just real food and real results.
📌 Beginner insight: Start with meals that show obvious doneness. That builds trust in your oven—and your skills.
📝 Simple First-Time Cooking Tips I Always Follow
Here are the little habits I still use today—and they made all the difference when I was starting out:
- Use a timer: Even for frozen pizza. Ovens can cook faster than you think, especially if they run hot.
- Check early: Peek in a few minutes before the timer goes off. Trust your eyes and nose.
- Rotate pans halfway: Especially in older ovens. It helps everything brown more evenly.
I still do all three of these in my own kitchen—and I’ve worked with commercial ovens and home ranges alike. These tips are small, but they help you feel in control, even when you’re just starting.
📌 First-timer tip: Set a timer, check early, and rotate the pan. These habits help you learn your oven fast—and avoid burned dinners.
⚠️ Safety Tips Every First-Time Oven User Should Know
Ovens are safe when you use them right. But small slips—like bare hands or loose paper—can turn into big problems fast. A little care goes a long way in your first few cooks.
🔥 Burn Prevention and Hot Surface Awareness
Quick answer: everything near the oven gets hot, even parts that don’t look hot.
The door glass, the rack, and even the handle can burn you. I’ve seen people grab a pan with a towel and drop dinner when the steam hits. Use thick oven mitts and slow, steady moves.
Also, pull racks out halfway before lifting heavy dishes. It keeps your arms away from heat and helps you stay balanced.
📌 Oven doors, racks, and handles can all burn you—always use oven mitts and move slow.
🚫 Fire Safety Basics
Here’s the simple rule: keep anything that can burn away from the oven.
That means paper towels, pizza boxes, grocery bags, and loose sleeves. If food starts to smoke, leave the door closed and turn the oven off. Most small flames die when the heat stops.
Never toss water on an oven fire. It can spread grease and make things worse. If smoke gets heavy, open a window and step back.
📌 Keep flammable items away, turn off the oven if food smokes, and never use water on oven flames.
🧯 When to Turn the Oven Off and Call for Help
Some smells are normal. These are not.
If you smell strong gas, burning wires, or the oven keeps shutting off mid-cook, stop using it. Turn it off and unplug it if you can. In rentals or dorms, call maintenance right away.
I tell new cooks this: if your gut says something feels wrong, trust it. Food can wait. Safety can’t.
📌 Turn off the oven and call for help if you smell gas, burning wires, or the oven keeps shutting down.
🔗 Gas vs Electric Ovens — What First-Time Users Should Know
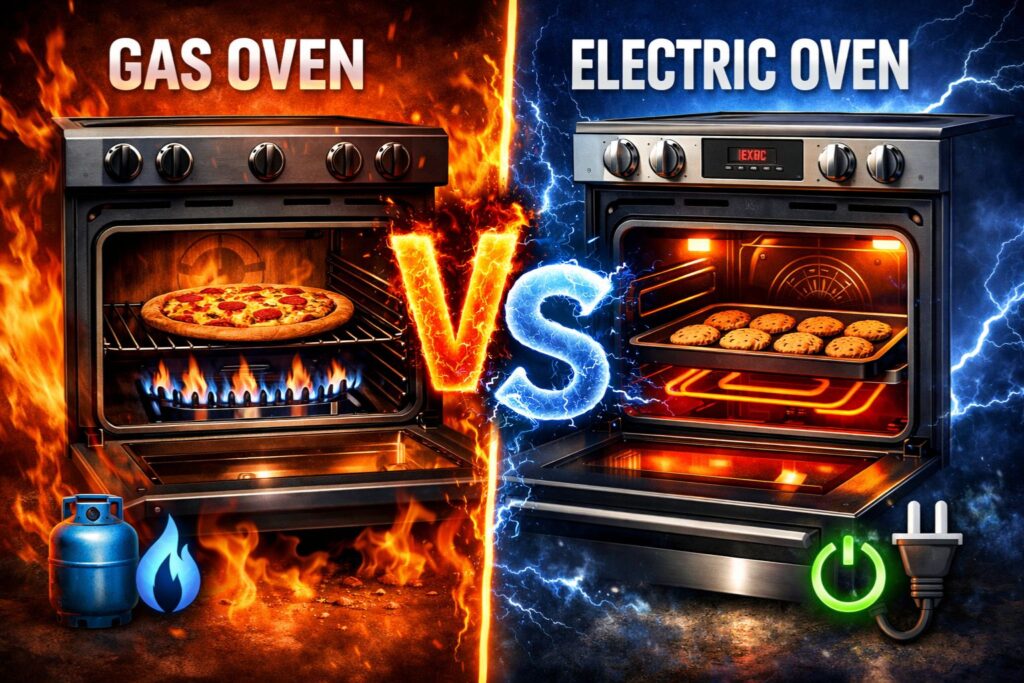
The first oven I used was gas. The next was electric. I had no idea they’d cook so differently. One browned too fast, the other too slow. If you’re using an oven for the first time, knowing the type you have helps you avoid burned bottoms or half-cooked dinners.
🔥 How Gas Ovens Heat Food
Gas ovens use a flame—yep, a real one—to create heat. That flame gives off moist heat, which cooks fast but uneven if you’re not ready for it.
- Heats up quickly, usually under 10 minutes.
- Great for roasting, thanks to the moist heat that keeps things juicy.
- Prone to hot spots, especially near the bottom.
- Common in older homes, rentals, and small apartments.
👨🍳 Real-life story: In my first apartment, I baked a cheesy casserole. The bottom was bubbling and brown, but the top looked like it hadn’t even started. That’s classic gas-oven behavior—heat rises fast from below, so food cooks unevenly if it’s not centered right.
📌 Gas ovens heat fast and cook with moist heat, but watch for hot spots—especially near the bottom.
⚡ How Electric Ovens Heat Food
Electric ovens don’t use flames. They heat up metal coils that warm the air. It’s dry heat, and more even across the oven.
- Slower to preheat (15+ minutes), but stays stable.
- More even heating, great for baking cookies or bread.
- No open flame, so fewer hot spots.
- Standard in most newer U.S. homes.
👨🍳 My second oven was electric, and I remember my first pizza in it—no burned crust, no weird bubbles, just a crisp base and perfect cheese. It felt like cheating compared to the old gas one.
📌 Electric ovens heat more evenly and are great for baking—especially for beginners.
🧠 Which Is Easier for First-Time Users?
Honestly, electric ovens are more forgiving. You set a temp, wait, and cook—no sudden flare-ups or uneven zones to stress over. Gas reacts quicker, which can be good for roasting, but it also takes more practice.
- Electric = easier baking, steadier heat.
- Gas = faster response, but trickier hot spots.
👨🍳 My advice? Don’t worry too much about which one you’ve got. Learn how it behaves. Roast something, bake something, and pay attention. How your oven cooks matters more than what powers it.
📌 Beginner tip: Electric ovens are great for beginners. But with practice, gas works just as well. Learn your oven’s quirks—that’s the real secret.
🔗 How to Read Oven Symbols and Icons
The first time I saw those little pictures on the oven dial, I froze. A fan with squiggly lines? Two bars? Snowflake? I had no idea what meant what. But once I learned them, everything about using the oven felt way less scary.
These icons are like a map—and most ovens in the U.S. (GE, Whirlpool, Frigidaire, etc.) use the same ones. Learn the basics once, and you’re good in almost every kitchen.
🔘 Most Common Oven Symbols Explained
Here’s a simple cheat sheet I wish I had sooner:
- Two lines (top and bottom) → Bake
This means heat from both the top and bottom. It’s your go-to for most meals. - Single top line → Broil
Heat from the top only. Think melting cheese or getting a crispy finish. - Fan with lines → Convection Bake
Adds air circulation to Bake. Faster, more even cooking—great once you’ve practiced. - Light bulb → Oven Light
Just turns the light on. I check this a lot when baking cookies. - Snowflake → Defrost Mode
Gently warms without cooking—useful for frozen meat or leftovers.
👨🍳 Real tip: Once I knew the bake and broil symbols, I stopped second-guessing every recipe. My confidence shot up overnight.
📌 Most oven symbols are simple—two lines means Bake, one top line means Broil, and fan icons mean Convection.
🌀 What the Fan Symbol Really Means
That little fan symbol? It means your oven is using convection mode—a fan is blowing hot air around inside. This makes food cook faster and brown more evenly.
Sounds great, right? It is, but only once you understand how it changes cooking. With convection, cookies might brown quicker. Roasted veggies can get crispier. But recipes written for “regular bake” might need lower temps or shorter times.
👨🍳 My advice: if your recipe doesn’t mention convection, turn the fan off. Start with regular Bake mode and level up once you’re comfortable.
📌 Beginner tip: If a recipe doesn’t call for convection, use regular Bake instead. It’s more forgiving and matches most instructions.
❗ When in Doubt, Use “Bake”
Seriously—if you’re not sure what all those icons mean, just go with Bake. It’s the most beginner-friendly setting and works for almost anything.
Here’s the simple method I follow:
- Select Bake
- Set the temp the recipe says
- Let it preheat fully
- Use the middle rack
That alone will get you through cookies, pizza, chicken, veggies—just about every first-time meal.
📌 When unsure, use Bake—it’s safe, reliable, and perfect for learning how to use an oven for the first time.
🔗 Oven Cleaning Tips After Your First Few Meals
After your first few oven meals—pizza, roasted veggies, cheesy casseroles—you’ll start to notice grease splatters, crumbs, and maybe a smoky smell. That’s totally normal. What matters is how soon you clean it. Trust me, a two-minute habit now saves you from a burnt, smoky mess later.
🧽 Easy Daily Cleaning Habits
Here’s my quick clean-up routine after every couple of cooks. It’s fast, simple, and keeps the oven fresh:
- Wipe spills once the oven cools — Not when it’s warm. Just grab a damp cloth and swipe up any drips or crumbs.
- Shake out the bottom drawer — If your oven has a pull-out drawer, it collects crumbs. I shake mine into the trash every week.
- Clean the racks if something dripped — Use warm soapy water in the sink if sauce or cheese stuck to them.
👨🍳 Real story: I used to ignore these until one night a cookie fell off the tray and burned into ash at the bottom. The smell ruined the next meal. Lesson learned.
📌 Wipe spills after cooking and clean racks when needed—this prevents smells and keeps your oven cooking clean.
🧼 When to Use the Self-Clean Setting (And When Not To)
Ah, the self-clean button. It sounds magical, but it comes with heat—and smoke.
Here’s when it’s useful:
- The oven is really grimy (like after roasting meat that splattered)
- You can open windows or turn on a vent fan (because it gets hot and smoky)
Here’s when I skip it:
- I just need a light clean
- I’m in a small apartment where smoke alarms go off too easily
👨🍳 Personal tip: I’ve used self-clean maybe twice a year—max. Most of the time, a wipe-down does the job. And I avoid setting it before guests come over—learned that the hard way.
📌 Use self-clean only when the oven is really dirty—and only if you can ventilate the kitchen.
🌿 Simple Manual Cleaning That Works
You don’t need harsh chemicals or special sprays. Here’s my go-to gentle method:
- Baking soda paste — Mix baking soda and water into a paste. Spread it on stuck spots and let it sit for 20–30 minutes. Then scrub with a soft sponge.
- Warm water + dish soap — For light grease, just use a sponge and dish soap. It works fine on most surfaces.
- Avoid metal scrubbers — These can scratch your oven walls and ruin coatings.
👨🍳 I once used steel wool on an old oven and scratched the enamel. The spot rusted over time and cooked unevenly after that. Don’t make my mistake.
📌 Use baking soda paste and a soft sponge for safe, effective manual oven cleaning—no harsh smells, no damage.
😬 Common Beginner Mistakes (That I’ve Definitely Made)
If you mess up, you’re not alone. I’ve made every one of these mistakes—and maybe twice. Learning how to use an oven for the first time comes with trial, error, and a little smoke now and then.
❌ Skipping Preheat
One time, I threw a tray of chicken in the oven the second I turned it on. Big mistake. The outside dried out before the inside even got warm.
Here’s the thing: ovens don’t heat instantly. If you skip the preheat, your food starts cooking unevenly.
📌 Skipping preheat can lead to undercooked centers and burnt edges.
Always let the oven reach the right temp first. That 10-minute wait? It’s the secret to juicy chicken, crispy cookies, and evenly baked pizza.
❌ Using the Wrong Pan
I once put a non-stick pan with plastic handles in the oven. About 15 minutes in, I smelled it. Burnt plastic. Dinner ruined, pan ruined, and my kitchen smelled awful.
Not all pans are oven-safe—even if they look sturdy.
📌 Oven-safe cookware must handle heat without melting or breaking.
Check for labels. Avoid anything with plastic, wooden parts, or glass that’s not labeled as oven-safe.
❌ Overcrowding the Oven
I’ve tried to cook everything at once—chicken, veggies, rolls—all packed into the oven like a game of Tetris. What came out? Soggy everything.
When air can’t move around, heat can’t do its job. Your food steams instead of roasting.
📌 Too many pans in the oven block heat and airflow, causing soggy or uneven cooking.
Space things out. Use two racks if you must, and leave room between dishes. Your dinner will thank you.
👃 Why New Ovens Smell and What to Do
That weird chemical smell the first time I turned on my oven? I thought something was burning. I even checked if I left plastic inside. But it turns out—that smell is totally normal.
If you’re learning how to use an oven for the first time, that first-use odor can be unsettling. But it’s expected. Here’s what’s behind it, and how to deal with it safely.
🏭 Factory Coatings Burning Off
New ovens come with protective layers from the factory—things like oils, insulation dust, and heat-resistant coatings. These help keep the oven safe during transport and storage.
Once heated, those materials start to burn off.
📌 That odd smell in a new oven comes from protective coatings burning off—it’s normal during first use.
You might see a bit of smoke too. It’s not dangerous, but it smells like something’s gone wrong. Just open a window and let it clear.
👨🍳 I remember lighting my oven for the first time and running around with a dish towel, waving smoke toward the window. My neighbors probably thought I burned dinner—before I even cooked anything.
🔥 How to Do a First Burn-In Safely
To get rid of that factory smell before you cook anything, do a “burn-in.” It’s like a warm-up for your oven.
Here’s the method I use every time I get a new oven:
- Take everything out (racks, manuals, anything inside).
- Set the oven to 400–450°F (or the hottest Bake setting).
- Let it run empty for 30–60 minutes.
- Open windows or turn on a fan to air things out.
📌 Beginner tip: Before cooking, run the oven empty at high heat for 30–60 minutes with windows open to burn off factory residue.
Once the smell fades, you’re good to go. The oven won’t stink again—unless your casserole spills over (and even then, that’s your fault, not the oven’s).
🚨 When Smells Are NOT Normal
Some smells are part of the break-in. But others? Big red flag.
If you smell anything like:
- Burning plastic
- Electrical wires melting
- Sharp chemical odor that doesn’t fade
📌 Safety tip: If your new oven smells like plastic or burning wires, stop using it and call for help.
Unplug the oven if possible. Don’t risk it. These could be signs of a faulty wire or something left inside during shipping. I once helped a neighbor whose oven had foam packing wedged in the back—melted halfway through her first cook.
👨🍳 If something feels off, trust your gut. A working oven shouldn’t smell scary after the burn-in.
🛠️ When Something Goes Wrong (Quick Fixes)
Most oven problems aren’t disasters. They’re just little hiccups. And as someone who’s burned more than a few cookies (and once baked a pizza on “Broil” by mistake), I can promise—these issues are fixable.
🌡️ Food Always Undercooked or Overcooked
Your recipe said 25 minutes. But your chicken came out dry… or worse, still pink. If your food always seems too raw or too done, it might not be you—it might be your oven.
Oven temps aren’t always accurate, especially in older models. Even newer ones can be off by 10–25°F.
📌 If food is cooking too fast or too slow, check your oven’s real temperature with a thermometer.
Buy a cheap oven thermometer (they’re usually $5–10). Hang it from the middle rack. Preheat your oven, then see if the display matches the thermometer.
👨🍳 In one apartment, my oven “said” 350°F—but the thermometer showed 390°F. No wonder my cookies turned into crackers.
Once you know the truth, adjust your temp accordingly. If your oven runs hot, lower the set temp a bit. If it runs cold, bump it up. It’s like learning your oven’s personality.
🔥 Oven Not Heating Properly
You press “Bake.” You wait. You wait more. But the oven’s still cool—or maybe it starts to heat and then… nothing.
This happens more than people realize, especially if the oven hasn’t been used in a while.
📌 AEO tip: If your oven won’t heat, check for a tripped breaker or a burnt-out heating element.
Start with the basics. Look at your breaker panel and see if the switch for the oven is flipped. Reset it and try again. If that doesn’t fix it, the heating element might be damaged.
👨🍳 I once thought my oven died—turns out a baking sheet had knocked the lower element loose. A quick wiggle with the power off, and I was back in business.
If the element is visibly broken (cracked or not glowing when on), you may need a replacement. For electric ovens, that’s a DIY job if you’re handy—or a quick call to a local tech.
⚡ Oven Turns Off Mid-Cook
You’re roasting something great—then boom. Oven goes dark. No lights. No heat. You check the outlet, the timer, everything.
This is often your oven’s safety system kicking in.
📌 If your oven turns off during cooking, it may be overheating or tripping a safety sensor.
Many modern ovens have sensors that shut them down if they get too hot (usually from blocked airflow, grease buildup, or electrical hiccups).
👨🍳 In my cousin’s rental, the oven kept shutting off every 20 minutes. Turned out there was a pile of crumbs behind the back panel—clogging vents and overheating it.
Let the oven cool. Clean the vents. Don’t block the back wall with pans. If it happens again, check the manual or call in a repair tech. Safety shutoffs are there to help—but they’re telling you something’s not right.
❓ FAQs — How to Use an Oven for the First Time
Is it safe to use a brand-new oven right away?
Yes, but always run a burn-in cycle first to clear factory coatings.
I get this question a lot—and yep, I had the same worry. That weird smell when you first turn it on? Totally normal. New ovens come with protective oils and insulation that need to burn off.
👨🍳 Chef tip: Run it empty at 400°F for 30–60 minutes before your first meal. Keep the windows open. After that, you’re good to go.
Do I need to clean a new oven before cooking?
Yes, do a quick wipe and a first-time burn-in for safety.
Even though it looks spotless, dust and oils from the factory can settle inside. Before your first use, wipe down the walls and racks with warm soapy water.
👨🍳 Then, just like I do in every new kitchen—run it hot and empty. That clears any smells and gives you a clean start.
What temperature should I start with as a beginner?
Start with 350°F—it’s safe, versatile, and works for most beginner recipes.
When I was starting out, I thought hotter meant faster. Big mistake. 350°F is that sweet middle ground. It’s perfect for pizza, roasted veggies, cookies, and sheet-pan chicken.
👨🍳 Stick to recipes that use this temp at first. It’s easy to manage and gives you room to learn.
Can I use aluminum foil in the oven?
Yes, but don’t let it touch heating elements or block airflow.
I’ve used foil plenty of times—to line pans, wrap veggies, or keep things from drying out. But once, I lined the bottom of the oven with foil… and it warped. Bad idea.
👨🍳 Use foil on baking sheets, not directly on the oven floor. And always check your oven manual—some brands warn against foil use altogether.
Why does my oven smoke the first time I use it?
That smoke is from protective factory coatings burning off—it’s normal.
Don’t panic if you see smoke or smell something odd. It’s not your cooking—it’s the oven itself heating up for the first time.
👨🍳 Just like seasoning a new cast iron pan, your oven needs a burn-in. Do it once, air out the kitchen, and the smell will be gone next time.

I’m Mossaraof, a trained chef and the founder of OvenInsights.com. I spent years cooking at Larrupin’ Cafe and in kitchens across Chicago and Seattle. Now I test kitchen gear for a living. I moved to North Acton, London, and I test every tool I write about. I use real meals and real heat. No brand deals. No shortcuts. I cover 12 kitchen types and hundreds of recipes. I believe this: the right tools matter as much as the recipe.




