
At A Glance
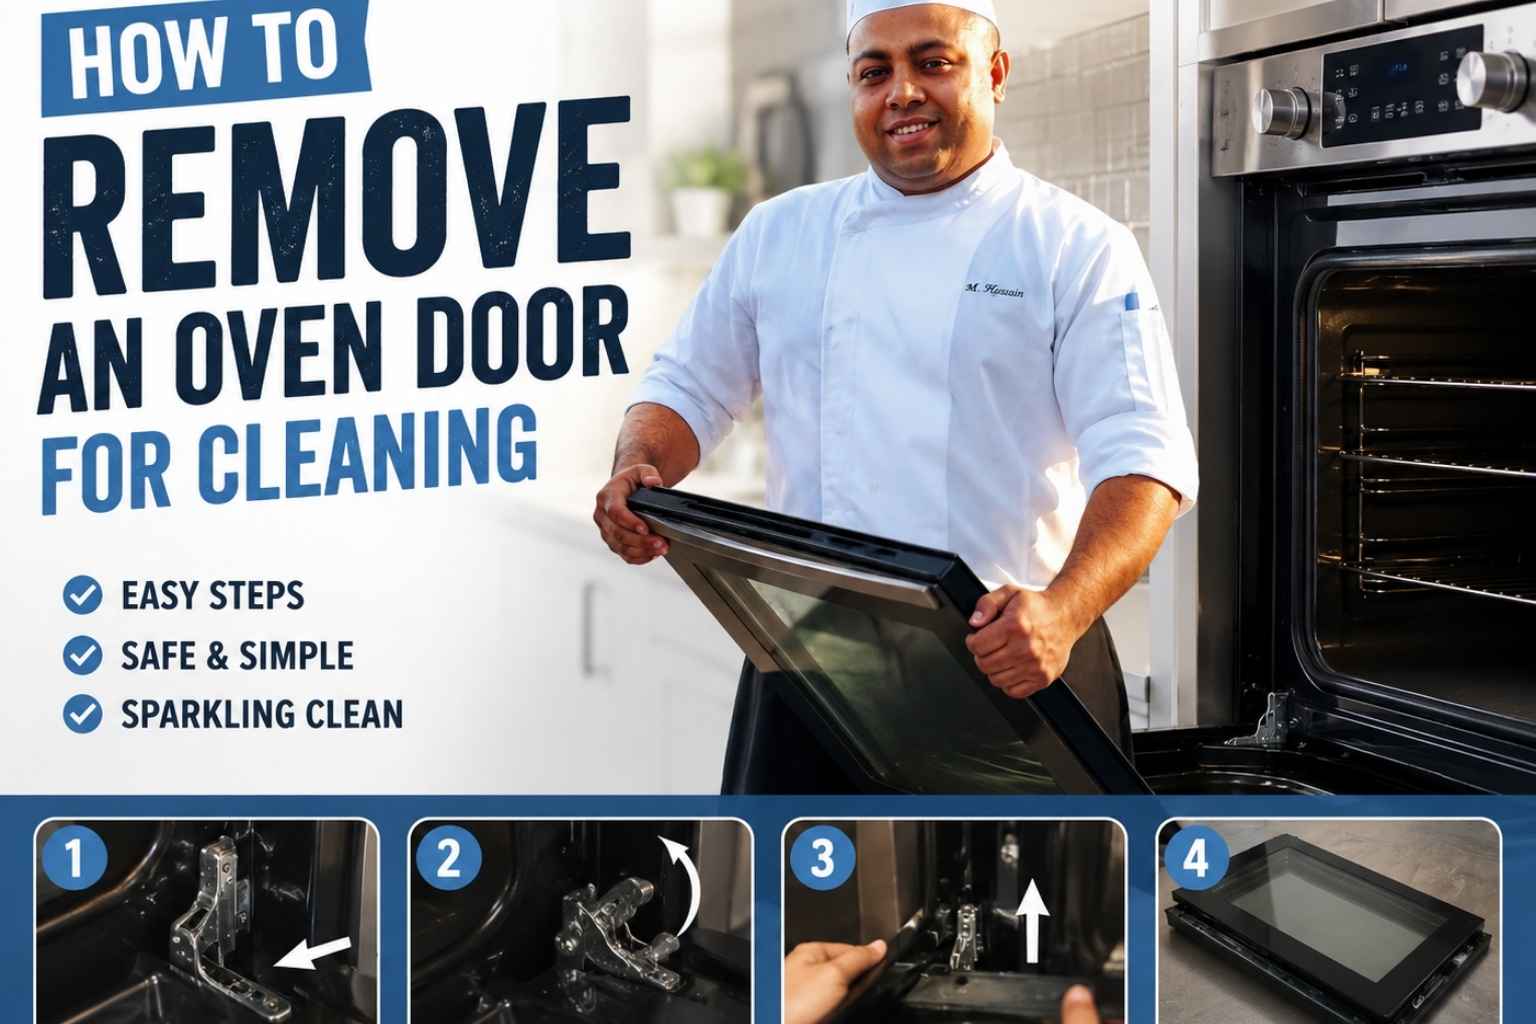
- Most standard freestanding and slide-in ovens have removable doors — you unlock two hinge arms, lift, and pull straight out.
- Removing the door gives you full access to the glass panels, hinge slots, gasket, and frame corners that a sponge can never reach while the door is attached.
- French door and some wall ovens use a different mechanism — some detach entirely, others only open for limited cleaning access.
- Never force a hinge that won’t lock open. If it resists, stop and check the manual before you snap a spring.
- After 15 years in professional kitchens, I clean my oven door completely off the unit every single time. It takes 10 minutes and saves an hour of frustration.
I used to ignore the grease baked onto my oven glass until it looked like a dark, cloudy night. Last week, I finally learned how to remove an oven door for cleaning, and it changed everything. Trust me, if a busy cook like me can flip those tiny hinge locks and slide the heavy glass right off, you can too. Let us walk through the quick steps together so you can get a sparkling kitchen view today.
Why Removing the Oven Door Changes Everything
If you’ve ever tried to clean an oven door while it’s still attached, you know the problem. You’re contorting your wrist around a half-open door, dragging a cloth across glass you can’t see properly, and missing every corner where grease actually hides.
Taking the door off the oven takes less time than you think – usually under five minutes for a standard unit. And once it’s off, you have a flat panel you can lay on a towel on your kitchen floor, clean every square inch of, and inspect clearly before you reinstall.
I started doing this in the first professional kitchen I worked in, where the head chef had a strict rule: deep clean means the door comes off. I’ve never gone back to the awkward half-open-door method. The difference in cleanliness is not subtle.
The door also gets heavy. A typical residential oven door weighs between 15 and 25 pounds (GE Appliances, 2024). Cleaning it while it’s fighting gravity the whole time is just unnecessary work.
Quick Reference: Oven Door Removability by Type
| Oven Type | Door Removable? | Removal Method | Special Notes |
|---|---|---|---|
| Standard freestanding (electric) | Yes | Hinge arm flip + lift | Most common; works on GE, Whirlpool, Frigidaire |
| Standard freestanding (gas) | Yes | Same hinge arm method | Confirm gas is off before any cleaning |
| Slide-in range | Yes | Same as freestanding | Check for hidden hinge cover panel on some models |
| Built-in wall oven | Usually yes | Hinge arm or screws depending on brand | Bosch and Miele use slightly different locking tabs |
| French door oven | Both doors removable on most models | Each door removes independently | Lift angle is shallower – follow manual closely |
| Double oven | Upper and lower remove separately | Standard hinge method per door | More weight; have a helper for the larger door |
| Self-cleaning oven | Yes, but only when cool | Same method | Never remove during or immediately after a self-clean cycle |
| Compact/countertop oven | Rarely | Usually screws if removable | Check the manual – many are not designed for removal |
How Oven Door Hinges Actually Work
Before you touch anything, it helps to know what you’re working with. Most residential oven doors attach at two hinge arms – one on the left side, one on the right. These are spring-loaded mechanisms that sit inside hinge slots cut into the bottom of the oven frame.
When the door is in normal use, the hinge arms are locked into a downward position that keeps the door attached. To remove the door, you flip a small locking tab or lever on each hinge arm to the open position. This locks the spring in a compressed state, which is what lets you lift the door straight up and out without fighting the spring tension.
Here’s what most guides skip: the hinge arm itself pivots. When you flip the locking tab, the arm can now move to a near-vertical angle. That angle – roughly 75 to 90 degrees from horizontal – is what allows the hinge to clear the slot and come free. If you try to lift the door while the arms are still at a shallow angle, you will feel resistance. That resistance is the hinge slot walls catching the arm ends.
The locking tab looks different across brands. On GE and Whirlpool models, it’s a small flat lever you flip forward with your finger (GE Appliances, 2024; Whirlpool, 2023). On Bosch models, it’s a clip you press inward. On older Frigidaire units, it’s sometimes a wire bail. If you can’t identify the tab, look at the hinge from the front with the door open about 90 degrees – it’s always visible from that angle.
Step-by-Step: Removing a Standard Oven Door
This process works on the vast majority of freestanding and slide-in ranges. Allow 5 to 10 minutes.
What You Need Before You Start
- A clear, flat surface padded with an old towel or blanket (to set the door on)
- A helper, ideally, for ovens with heavier doors
- The oven must be completely cool – wait at least two hours after use
Step 1: Open the Door to the Broil Stop Position
Open the door all the way to fully horizontal (the position it sits when you’re loading a pan). Then lift it slowly until it stops at a higher angle – this is the “broil stop” or “hinge-lock” position, usually around 45 degrees from horizontal. You’ll feel a slight click or resistance when it hits that stop.
This position exposes the hinge arms and gives you access to the locking tabs.
Step 2: Flip the Hinge Locking Tabs to the Open Position
Look at each hinge arm, near where it disappears into the oven frame. You’ll see a small tab or lever. Flip it forward (toward you) or press it down, depending on your model. Do both sides before moving on.
Important: Both tabs must be locked open before you attempt to lift. If only one is flipped, the door will pull unevenly and you risk bending a hinge arm.
Step 3: Grip the Door Firmly on Both Sides
Place one hand on each side of the door, fingers wrapped around the outer edge. Do not grip just the handle – the weight needs to be distributed. Position your feet shoulder-width apart. You’re about to lift something between 15 and 25 pounds.
Step 4: Lift Straight Up and Pull Toward You
With both hinge tabs locked open, lift the door straight up. As the hinges approach the top of their slots, angle the door slightly away from the oven – the bottom of the door moves forward as the hinge arms clear the slots.
The door should come free cleanly. If you feel hard resistance before the arms reach the top of the slots, stop. Do not force it. The tabs may not be fully locked, or you may be at the wrong angle.
Step 5: Set the Door on Your Padded Surface
Lower the door glass-side up onto your prepared towel or blanket. This is where you’ll do all your cleaning.
Cleaning Between the Glass Panels: Single, Double, and Triple Pane
This is the part most people don’t know you can do – and it makes an enormous difference in how the oven looks when you’re done.
Single-Pane Doors
These are rare on modern ovens. Cleaning is straightforward: one glass surface, accessible from both sides once the door is removed.
Double-Pane Doors
Most residential ovens built after 2010 have double-pane doors. There is a gap between the outer and inner glass, and grease steams up into that gap over time. Cleaning this requires disassembling the door itself.
To get between the panes, remove the screws along the inner door panel – usually two to four Phillips head screws hidden along the top or sides of the inner liner. Once those are out, the inner door panel lifts away and exposes both inner glass surfaces. Clean them, then reassemble before reinstalling the door.
Do not use a razor blade on the inner glass. The coating on some inner panes scratches more easily than the outer surface. A paste of baking soda and water, left for 20 minutes, handles most baked-on grease without any scraping (This Old House, 2025).
Triple-Pane Doors
These are common on higher-end models from brands like Bosch, Miele, and Wolf. The process is similar to double-pane, but there’s a middle glass that usually slots out from the top once the inner panel is removed. Bosch publishes specific disassembly diagrams for each model on their support site (Bosch, 2024). Check there before you start – the clips vary by model year.
Special Cases: When Your Door Doesn’t Remove the Standard Way
Doors That Don’t Detach at All
Some compact ovens, certain older built-in wall ovens, and a handful of European models do not have removable doors by design. Forcing a non-removable door is the most common mistake people make – and it’s how hinge arms get bent.
If you open the door, look at the hinges, and see no locking tabs at all, the door does not come off. Full stop. Clean it in place using a long-handled brush and a flexible cleaning cloth. It’s not ideal, but it’s far better than a $200 service call to repair a bent hinge.
French Door Ovens
French door ovens – where two narrower doors open from a center seam rather than one door hinging from the bottom – each remove independently. The hinge mechanism on each door is the same spring-arm design, just scaled to a smaller, lighter door.
The key difference is the lift angle. Because the doors are narrower, the hinge slots are shorter, and the angle at which the arm clears is more precise. If a French door feels stuck when you’re lifting, lower it back to the broil stop and recheck that the hinge tabs are fully in the locked position (Whirlpool, 2023).
Self-Cleaning Ovens
You can remove the door on a self-cleaning oven, but only when the oven is completely cold. Self-cleaning cycles run at temperatures up to 900°F (Consumer Reports, 2025). The door locks automatically during the cycle. After the cycle ends, the door lock releases once the oven drops below about 300°F – which can take two to three hours.
Remove the door for cleaning before you run a self-clean cycle, not after. The high heat bakes on carbon deposits that are easier to wipe away before they go through that kind of heat again.
How to Reinstall the Oven Door Correctly
This step gets rushed, and a poorly seated door is a safety issue. An uneven door can damage the gasket and reduce the oven’s efficiency by letting heat escape (Consumer Reports, 2025).
Step 1: Hold the Door at the Same Angle It Came Off
Grip the door on both sides again, hold it at roughly 45 degrees, and align the two hinge arm ends with the two hinge slots on the oven frame. Both arms should point in and slightly down.
Step 2: Lower the Arms into the Slots Simultaneously
Slide both hinge arms into their slots at the same time. If one goes in before the other, you risk cross-threading the alignment. Lower the door until the hinges are fully seated – you’ll feel them drop into place.
Step 3: Open the Door to the Broil Stop and Flip the Tabs Back
Before you lower the door to fully closed, open it back to the broil stop position (45 degrees). Flip both locking tabs back to their original closed position. If you skip this step, the door will feel loose or fall away from the oven when you open it.
Step 4: Test the Door Movement
Lower the door to fully open, then close it fully. It should move smoothly and close flush against the oven frame with even pressure across the gasket. If one side sits higher than the other, repeat the reinstall from Step 1.
When to Call a Technician Instead of DIYing
Most door removals are safe to do yourself. Call a technician if:
- The hinge arm is visibly bent or cracked – a damaged hinge won’t lock properly and can let the door fall.
- The door glass is cracked or chipped – thermal stress can cause cracked oven glass to shatter during use.
- Your oven is still under warranty and disassembly would void it – check the terms first.
- The door sat crooked before you started – there may be a deeper alignment issue that cleaning won’t fix.
- You hear a loud snap during removal – you may have broken a hinge spring, which is a repair job, not a cleaning job.
For anything under warranty, GE Appliances recommends contacting the manufacturer’s service line before attempting door removal on models less than one year old (GE Appliances, 2024).
Common Mistakes When Removing Oven Doors – and How to Avoid Them
Mistake 1: Forcing a door that won’t budge. This usually means the hinge tabs aren’t fully locked, or the door isn’t at the right angle. Forcing it bends the hinge arm, which is a $150 to $300 repair. If it resists: stop, lower the door, and start over.
Mistake 2: Removing the door while the oven is warm. The glass is under thermal stress when warm. Sudden temperature changes during cleaning – cold water, cold surfaces – can crack it. Always wait two hours minimum after the last use.
Mistake 3: Setting the door glass-side down on a hard surface. Even a small piece of grit between the glass and the counter can scratch the outer surface or, worse, crack the glass under the weight of the door. Towel on the counter, always.
Mistake 4: Only cleaning the outer glass. The inner glass surface – the one that faces the oven cavity – collects the most grease. Most people clean only what they can see from outside. Once the door is off, clean both surfaces.
Mistake 5: Not resetting the hinge tabs before closing the door. If you reinstall the door without flipping the hinge tabs back to the locked position, the door won’t close properly and may fall open unexpectedly. It’s a small step that’s easy to forget.
Mistake 6: Over-tightening screws when reassembling the door panels. The inner door liner panels are usually thin metal or plastic. Stripping the screw holes means the panel won’t sit flush, which affects the door seal. Snug is enough – you don’t need to torque them.
My Cleaning Routine for the Oven Door (As I Actually Do It)
I want to be specific here because most guides give you vague advice. Here is exactly what I do, in order, every time I do a proper kitchen deep clean.
Before I start: I check that the oven has been off for at least two hours. I set a large beach towel on the kitchen floor – not the counter, the floor, so I’m working at a comfortable height and there’s no risk of the door sliding off.
Step 1 – Door off in under 3 minutes. Broil stop position, both tabs flipped, straight lift out. I’ve done this probably 200 times. It gets fast.
Step 2 – Outer glass. I spray it with a 50/50 mix of white vinegar and warm water, wait 3 minutes, and wipe. For anything baked on, I use a plastic scraper (never metal on glass) at a shallow angle. I finish with a dry microfiber cloth to avoid streaks.
Step 3 – Disassemble the door panels. On my home GE range, this is four Phillips screws along the inner panel top. The inner liner lifts away and I have full access to both inner glass surfaces. I use the baking soda paste method here – apply, wait 20 minutes, wipe clean.
Step 4 – Gasket. I clean the door gasket with a damp cloth and a small amount of dish soap. No harsh chemicals on the gasket – they degrade the rubber and compromise the seal (This Old House, 2025). I check for any tears or flat spots while I’m there.
Step 5 – Door frame and hinge arms. I wipe down the metal door frame and the hinge arms themselves with a degreaser on a cloth. Grease buildup on the hinge arms affects how smoothly they move in the slots.
Step 6 – Reassembly and reinstall. Panels back on, screws snug. Door back on the oven, tabs reset, motion check.
Total time: 35 to 45 minutes including the baking soda wait. The oven looks new every time.
Frequently Asked Questions About Removing an Oven Door for Cleaning
How do I know if my oven door is removable?
Open the door to about 45 degrees and look at each hinge arm where it connects to the oven frame. If you see a small flip-tab or locking lever on each arm, your door is removable. If there are no tabs – only fixed metal arms – your door is likely not designed for removal. Check your owner’s manual under “door removal” or “cleaning” to confirm (GE Appliances, 2024).
Can I remove the oven door by myself, or do I need help?
Most standard residential doors can be removed solo, but a helper makes it significantly easier and safer, especially for wall ovens with heavier doors. The risk when working alone is losing your grip during the lift – a 20-pound door hitting a tile floor is a problem. For anything you’d describe as a “heavy” door, get a second set of hands.
What do I clean the oven door glass with?
For the outer glass, a vinegar-water spray handles most grease. For baked-on residue, a baking soda paste (baking soda mixed with just enough water to form a thick consistency) applied for 15 to 20 minutes loosens almost anything. Avoid oven cleaner sprays on the glass – many contain sodium hydroxide, which can damage glass coatings over time (Consumer Reports, 2025).
How often should I remove the oven door to clean it?
In a home kitchen with normal use, once every three to four months is enough for a full door removal and panel disassembly. Do a light outer glass wipe-down monthly. In a more active cooking household – or if you do a lot of high-heat roasting – once every six to eight weeks is more realistic.
What if the hinge tabs won’t flip?
If the tabs feel stuck, the door is almost certainly not at the right angle. Lower it back to fully open, then raise it slowly until you feel it stop at the broil position. The tabs should flip freely from that position. If they still won’t move after repositioning, the hinge may be damaged or the mechanism may have a different design than the standard flip-tab – consult the manual or a technician.
Can I put an oven door in the dishwasher?
No. Do not put an oven door in a dishwasher. The sustained heat and moisture can warp the door liner, damage the gasket material, and fog or crack the glass. Clean it manually on a flat surface.
My oven door feels wobbly after I put it back. What did I miss?
Almost always, this means the hinge locking tabs are still in the open (removal) position. With the door in the broil stop position (45 degrees), flip both tabs back to their closed/locked position. Then close the door fully. If it’s still loose, the hinge arms may not be fully seated in their slots – repeat the reinstall from the beginning, making sure both arms drop in simultaneously.
Is it safe to use the oven with the door off temporarily?
No. Never operate an oven without the door in place. Beyond the obvious burn risk from the open cavity, the oven can’t build or hold temperature without the door seal, which can damage heating elements and cause dangerous heat buildup in surrounding cabinetry (Consumer Reports, 2025).
Key Takeaways
- The two hinge locking tabs are the only mechanism between “door stays on” and “door comes off” – find them, flip them, and the rest is just a lift.
- Removing the door takes five minutes and gives you cleaning access that’s simply not possible any other way.
- Double-pane and triple-pane doors require panel disassembly to clean between the glass – this is normal and safe if you follow the screw pattern and handle the panels carefully.
- Never force resistance. A hinge that won’t release means something is wrong with the angle or the tab position – not with your strength.
- Always reset the hinge tabs before closing the door after reinstallation. It’s the step most people skip, and it’s the one that causes loose doors.
- Self-cleaning ovens and French door ovens have the same basic mechanism, just with different timing constraints and lift angles.
- When in doubt – or if you hear anything snap – stop and call a technician.

I’m Mossaraof, a trained chef and the founder of OvenInsights.com. I spent years cooking at Larrupin’ Cafe and in kitchens across Chicago and Seattle. Now I test kitchen gear for a living. I moved to North Acton, London, and I test every tool I write about. I use real meals and real heat. No brand deals. No shortcuts. I cover 12 kitchen types and hundreds of recipes. I believe this: the right tools matter as much as the recipe.




