Hey, I’m Mossaraof — a professional cook and food blogger.
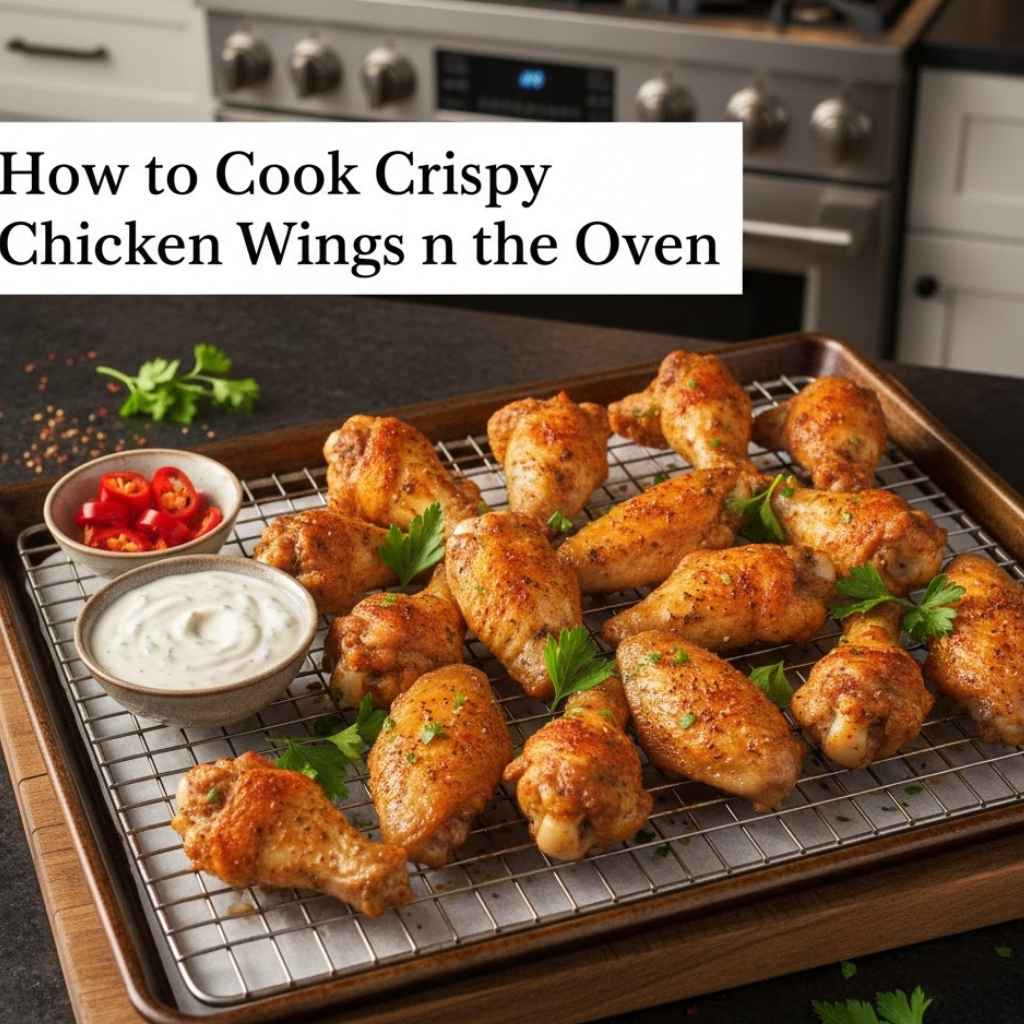
If you have ever asked How to Cook Crispy Chicken Wings in the Oven and still ended up with soft skin, I feel your pain. I have baked wings for game nights and family dinners, and I learned that high heat, dry skin, and the right rack spot make that golden crunch. In this guide, I will show you the best oven temp, how long to bake chicken wings, and simple tips to get crispy oven baked wings without frying.
And before you start, read my The Complete Guide to Using an Oven so your oven works with you, not against you.
The Science Behind Crispy Oven-Baked Chicken Wings
There’s a reason crispy wings don’t happen by accident. It comes down to a few things I wish I knew earlier.
Moisture: The Skin’s Worst Enemy
If the skin’s wet, you’re setting yourself up for flop city. I learned this the hard way when I rushed things and skipped the pat-dry step.
Even if the wings are fresh from the store (especially if they’re vacuum-sealed), they’ll carry surface moisture that ruins crispiness.
Here’s what helps:
- Pat them dry with paper towels
- Let them sit uncovered in the fridge for a few hours or overnight (air-drying helps)
- Don’t salt too early—salt draws out moisture too
It’s honestly like letting them sunbathe. Give them time, and the skin tightens up before it even hits the oven.
Heat: It’s Not Just “Hot = Crispy”
I used to think blasting the oven to 500°F would do the trick. Nope. That just cooked the outside too fast and left me with rubbery skin underneath.
What worked?
- Preheat to 425°F (not 450°F)
- If you’ve got convection mode, use it—it circulates air and dries the skin faster
- Start on the middle rack, move higher to broil at the end if needed
In my GE convection oven, I noticed the skin got golden faster than in a standard electric one. But I also had to reduce the time by a few minutes.
Fat: You’ve Already Got Enough
Wings are naturally fatty. That’s what makes them magical.
I used to toss them in oil before baking, thinking it would help. But all that did was make the pan greasy and the wings less crisp.
Now I skip the oil and do this instead:
- Light dusting of baking powder (yes, powder—not soda)
- A pinch of kosher salt
- Optional: garlic powder, smoked paprika, or lemon pepper
The baking powder is wild. It changes the pH level of the skin and helps it dry out and blister in the oven—crispy, golden, beautiful.
Tools That Help You Bake Extra Crispy Wings
If there’s one thing I’ve learned after years in both restaurant kitchens and home setups — tools make a huge difference. I’ve baked wings in everything from a tiny toaster oven in a Chicago apartment to a full-blown convection wall oven in a Scottsdale rental. Not all gear is created equal.
My Go-To Gear for Oven-Fried Wings
This section isn’t about buying fancy gadgets. It’s about what’s worked for me—reliably—batch after batch.
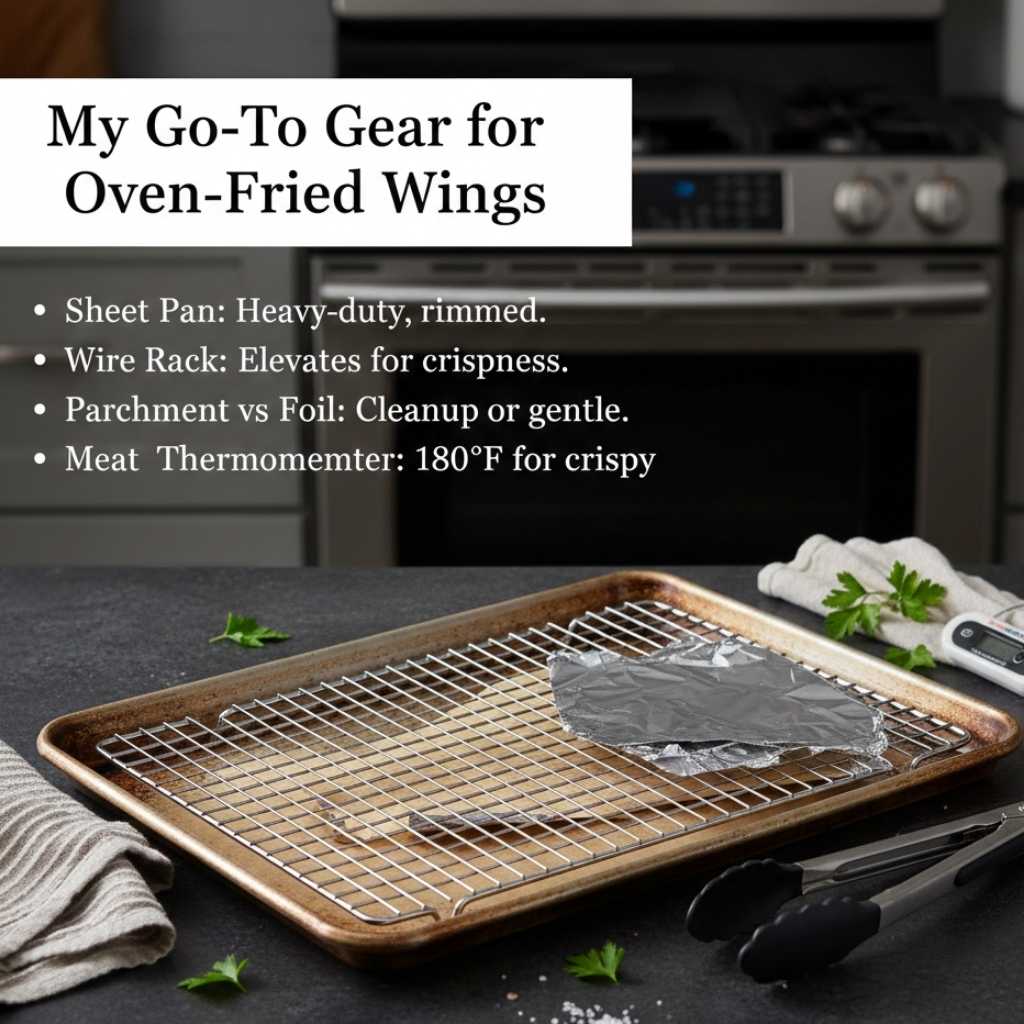
- Sheet Pan
I lean toward heavy-duty, rimmed Nordic Ware aluminum pans. They hold heat well and don’t warp under high temps.
Pro tip: Darker pans brown wings faster, but they also overcook easily if you’re distracted. Ask me how I know. - Wire Rack
Absolute must. I use a Checkered Chef cooling rack that fits right over my sheet pan.
Elevates the wings so the hot air hits all sides. Otherwise? You’re basically steaming the bottom half. - Parchment vs Foil
I switch depending on the mood.- Foil = less cleanup, but can stick if not sprayed
- Parchment = gentler and keeps seasoning intact
On lazy nights (or after a long shift), I just slap on foil and spray it down. Done.
- Tongs
I used to flip wings with a spatula. Bad idea. Use silicone-tipped tongs for control and so you don’t tear the skin. - Meat Thermometer
I keep a ThermoPro digital probe on hand. 165°F is safe, but I like to let wings hit around 180°F for crisp skin and juicy meat.
Convection vs Conventional: Which One’s Better?
This part surprised me. I always assumed convection was the holy grail, and it can be—if you know what you’re doing.
My Frigidaire Convection Oven (Midwest Winter)
- Pros: Baked wings fast, browned evenly
- Cons: Skin crisped too fast if I didn’t rotate the pan
On a snowy evening in Wisconsin, I cranked the convection to 425°F and got golden wings in under 40 minutes. But the back row cooked faster than the front. Learned to rotate halfway.
My Samsung Wall Oven (Arizona Heat)
- Pros: Retained heat like a champ
- Cons: Needed broil at the end for deep color
Arizona’s dry air helped too. Those wings sizzled the moment they went in. If you’re cooking in a desert climate, keep an eye on them—they dry fast.
My Toaster Oven (Old Chicago Apartment)
Yes, I tried wings in my Breville Smart Oven Air when I lived downtown. The apartment had a rental stove from… I don’t know, 1982?
- Pros: Amazing for small batches
- Cons: Needed babysitting — hotspots galore
One side would brown fast, the other not at all. But for six wings on a weeknight? Not bad.
Do You Really Need a Wire Rack?
Yes. Let me repeat that: Yes.
Without it, the bottom of the wings sits in its own fat. That turns into sog.
With it, fat drips down and heat circulates. You get that crispy all-over feel like it came from a fryer—without touching oil.
But… I’ve also had nights when the wire rack was dirty in the sink. (It happens.) In that case:
- Use crumpled foil under the wings to elevate slightly
- Or flip them more often — every 15 mins
Is it perfect? Nope. But it works well enough when you’re tired and hungry and out of patience.
The 3-Day Test That Changed My Wing Game
This wasn’t part of some plan. It started on a Tuesday when I had wings thawing in the fridge and too much curiosity. I decided to test different methods three days in a row — and the results were honestly wild.
Day 1: The Wet Wing Disaster
I was tired. I didn’t pat the wings dry. I tossed them straight from the pack onto a foil-lined tray, gave them a quick salt sprinkle, and popped them in the oven at 400°F.
The smell was good. The look was promising. But that first bite?
No crunch. Just soft, steamed skin with a weird rubbery pull.
My mistakes:
- Didn’t dry the wings
- Skipped the rack (lazy, I know)
- No baking powder, no seasoning rub
- Didn’t rotate the tray mid-bake
It felt like biting into disappointment. I still ate six.
Day 2: Almost There — But Not Quite
This time, I tried to be better.
I dried the wings. Used the wire rack. Bumped the oven to 425°F (conventional, not convection). No sauce, just a light dusting of salt, pepper, and paprika.
They looked great. And when I bit in—crunchy on the outside, but still not fully crisp all over.
Better, but not perfect. The backs weren’t crisp, and some seasoning stuck to the rack and came off with the flip.
What I changed:
- Dried the wings, but not long enough
- No baking powder
- Used basic seasoning only
The flavor was solid. The crisp factor? Maybe a 6 out of 10.
Day 3: Finally, That Golden Crunch
Okay, this was the big one.
That morning, I left the wings uncovered on a plate in the fridge. Just air-drying for about 8 hours while I worked. By dinnertime, they felt dry and a bit tacky—exactly what I wanted.
I preheated my convection oven to 425°F, lined my sheet pan with foil, set the wire rack on top, and got to work.
Here’s what I did:
- Tossed wings with baking powder, salt, garlic powder, and a touch of cayenne
- Laid them out in a single layer — no crowding
- Flipped at 25 minutes
- Baked another 25
- Broiled for 3 minutes at the end
And oh my god. That crackle when I bit into the first one?
That’s what I had been chasing.
Even the undersides were golden. The skin puffed slightly in spots, blistered in others — like a proper oven-fried wing should look.
I dipped one in ranch. My wife took another and said, “These don’t even need sauce.”
I swear that was a moment of pride I didn’t expect to feel over chicken.
How to Prep Chicken Wings for Oven Crispiness
I used to rush the prep and wonder why my wings weren’t crispy. Now? I give it time, and it pays off every single bite.
This part isn’t complicated, but it’s where most of my early mistakes came from.
Step 1: Choose the Right Wings (Not All Are Equal)
When I shop at Publix or Kroger, I’m picky. Not in a snobby way—but because I’ve learned a few things.
- Fresh > frozen, always (if you’ve got the choice)
- If using frozen, thaw them fully in the fridge overnight
- Go for split wings (flats and drums separated) — they cook more evenly
I once bought whole wings on sale and thought I’d save a buck. Ended up with uneven cooking and raw spots near the joints. Never again.
Also, I skip “pre-seasoned” wings at grocery delis. That stuff burns fast in high heat.
Step 2: Dry Them (Seriously, Don’t Skip This)
This is where the real crispy magic starts.
Here’s what I do:
- Pat each wing dry with paper towels
- Place them on a plate or tray (uncovered)
- Let them chill in the fridge 8–24 hours
If I’m short on time, even 1 hour helps. But if I’ve got the time? Overnight drying changes everything. I call it “the crisp bank”—you invest time, you cash out later.
If you live somewhere humid (looking at you, Florida), don’t skip this. That moisture in the air will undo your hard work if you don’t give the wings time to dry properly.
Step 3: Season Like You Mean It
I used to think seasoning was just about flavor. Turns out, the texture depends on it too.
Here’s what I mix in a bowl for 2–3 pounds of wings:
- 1 tablespoon aluminum-free baking powder
- 1½ teaspoons kosher salt
- 1 teaspoon garlic powder
- ½ teaspoon smoked paprika
- A pinch of cayenne (optional)
Why baking powder? It raises the pH level on the chicken skin, helping it brown and crisp better in the oven.
⚠️ Important: Use baking powder, not baking soda.
I’ve made that mistake before—it gives the wings a metallic aftertaste you won’t forget.
Step 4: Use a Wire Rack or Improvise
My wire rack is always ready now, but I’ve been in situations where it was dirty or I didn’t pack one while traveling.
If that happens, here are quick fixes:
- Crumple strips of foil and rest wings on top to lift them
- Flip wings more often—every 15 minutes or so
- Use a cast iron pan (like my Lodge 12″) if you want deeper browning—just flip and drain halfway
Is it as good as the rack? No. But it gets close.
How to Bake Chicken Wings in the Oven Crispy
This is the exact method I use now—whether I’m cooking for myself, a game-day crowd, or just testing a new rub. I’ve baked these in four different ovens, at least three climates, and too many late-night cravings to count.
It works. And it’s not hard.
Ingredients (U.S. Grocery Friendly)
Most of these are pantry staples—nothing fancy or hard to find.
- 2–3 pounds of split chicken wings, thawed
- 1 tablespoon aluminum-free baking powder
- 1½ teaspoons kosher salt
- 1 teaspoon garlic powder
- ½ teaspoon smoked paprika
- Pinch of cayenne pepper (optional)
- Cooking spray or oil for the rack
- Optional: Ranch or hot sauce for serving
Note: I skip oil on the wings. They’ve got enough natural fat to crisp up beautifully.
Instructions: My Crispy Oven Wing Method
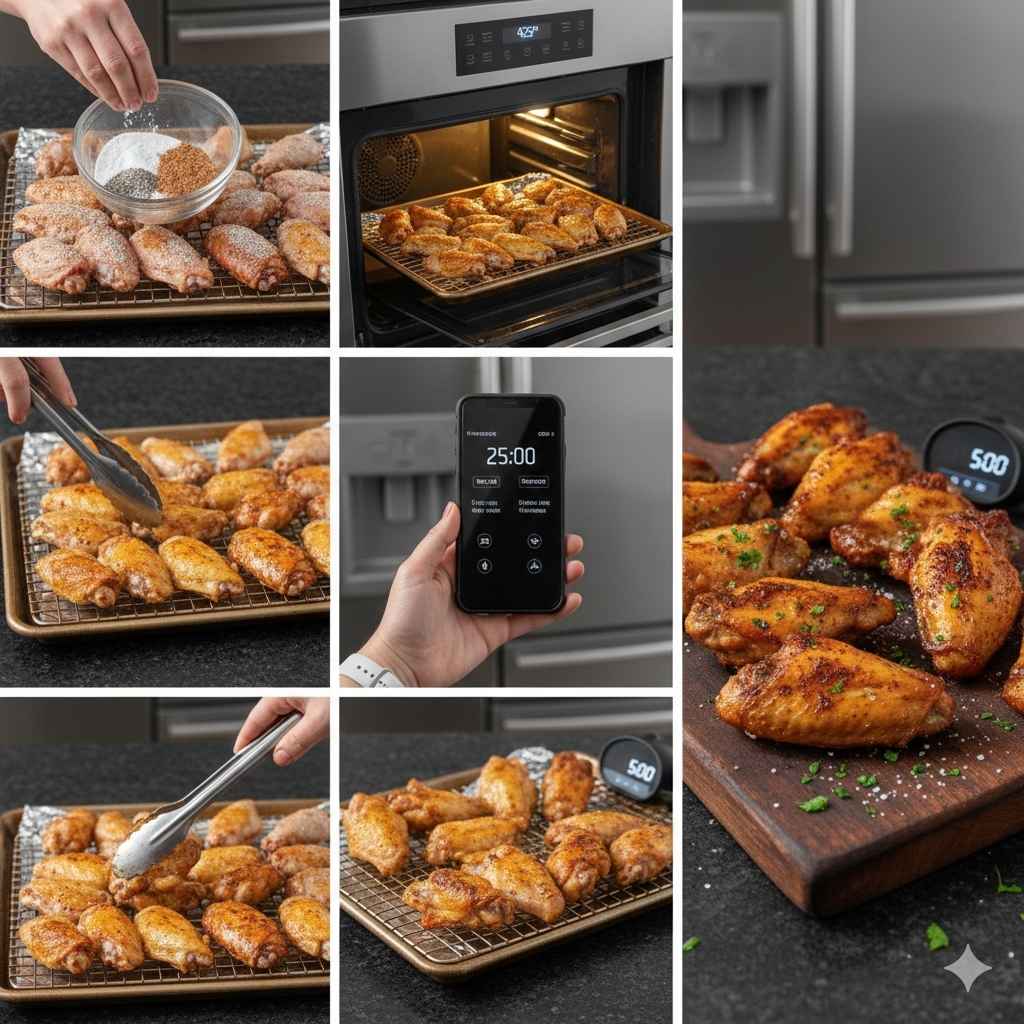
- Preheat your oven to 425°F.
If you’ve got a convection setting, use it. It speeds up browning and helps dry the skin. - Line your baking sheet with foil, then place a wire rack on top.
Spray the rack with a little oil so the wings don’t stick.
(Yes, they still might stick a little. That’s okay.) - Mix the dry seasoning.
Combine baking powder, salt, garlic powder, paprika, and cayenne in a small bowl. - Dry the wings again, even if they’ve been sitting in the fridge.
Then toss them in the seasoning mixture until every piece is lightly coated. - Arrange the wings on the rack in a single layer.
Don’t crowd them. I’ve done that in a hurry and ended up with soggy spots. - Bake on the middle rack for 25 minutes.
The skin will start to tighten and crisp. - Flip each wing with tongs, then bake another 25 minutes.
If you’re using convection, check around 40 minutes total. It cooks faster. - Optional: Broil the wings for 2–4 minutes.
I do this when I want that deep golden color and blistered edges.
Just don’t walk away—broilers are fast and mean. - Let them rest for 5 minutes.
This is the hardest part, I swear. But that short rest lets the juices settle and the skin firm up even more.
My Notes from the Oven Trenches
- Gas ovens (like Whirlpool) tend to run cooler in the back. Rotate the tray halfway.
- Electric ovens (like GE) stay hotter longer—watch out when broiling.
- Dry climate? They crisp faster.
- Humid kitchen? Give ‘em more time.
One time, I made these in the dead of winter in a drafty Illinois kitchen. The oven held heat fine, but the ambient moisture was low, and the wings came out perfect without broiling.
Contrast that with a summer weekend in Florida—my convection fan had to work overtime to keep the skin from staying soft.
How to Get Chicken Wings Crispy in the Oven Without Baking Powder
There was a day—right before a playoff game—when I realized I had no baking powder. And the store? Packed. I wasn’t about to battle cart traffic for one ingredient.
So, I experimented. Turns out, there are a few solid ways to still get crispy chicken wings in the oven—even without the baking powder trick.
Method 1: High Heat + Patience (No Coating Needed)
This is the simplest method I’ve used, especially when I want to keep the wings plain.
- Preheat oven to 450°F (don’t go lower than 425°F)
- Dry wings thoroughly and let them air-dry in the fridge if possible
- Skip oil — go in dry with just salt and pepper
- Use a rack to keep airflow around the wings
- Flip at 25 minutes, then roast another 20–25
This method works best in dry U.S. climates. In humid places like Florida, I found the skin still stayed a little soft unless I finished with a broil.
Method 2: Cornstarch Coating
Cornstarch doesn’t crisp wings quite like baking powder, but it gets close—and it’s pantry-friendly.
Here’s what I do:
- Mix 1 tablespoon cornstarch per pound of wings
- Add kosher salt, paprika, garlic powder
- Toss wings until lightly coated
- Bake same way (425°F, rack, flip halfway)
The result? Lighter crunch, almost like fried chicken skin. Not flaky, but crisp and golden.
I use this method when I want oven-fried chicken wings crispy, especially for dry rubs.
Method 3: Salt-Only Dry Brine (24 Hours)
If you’ve got time but no starch? Let salt do the work.
- Salt the wings lightly
- Leave them uncovered in the fridge overnight
- Bake high and dry the next day
The skin tightens naturally.
I’ve used this on party trays in Arizona where baking powder wasn’t an option due to dietary restrictions, and the skin came out papery and crisp with zero coating.
What Didn’t Work (At Least for Me)
I’ll keep it honest—some “hacks” floating around didn’t pan out for me.
- Oil + high heat = too greasy, soft skin
- Flour coatings = clumpy and uneven
- Pre-saucing before baking = guaranteed sog
Unless you’re going for sticky wings (like BBQ or teriyaki), always bake first, sauce later.
The Best Seasonings and Sauces for Crispy Oven Wings
Let’s be honest—crispy wings are awesome, but it’s the flavor that keeps people coming back to the tray for seconds (or thirds). I’ve had wings so crispy they could sing when you bit into them… but they still felt flat without the right seasoning or sauce.
When I finally nailed the crunch, I started playing with flavors—and that’s when things got really fun.
My Favorite U.S.-Inspired Wing Flavors
These are my ride-or-die combos. All of them work great on crispy wings, baked the way we’ve covered.
🔥 Buffalo-Style (Classic Game Day Favorite)
- Melted butter + Frank’s RedHot
- Toss wings after baking
- Serve with celery and ranch (Midwest-style, baby)
I use this one for Sunday games. No matter what state I’ve lived in, someone always asks for Buffalo.
🍋 Lemon Pepper Dry Rub
- Garlic powder
- Cracked black pepper
- Zest of 1 lemon
- Pinch of kosher salt
This one hits especially well on hot days. Bright, tangy, peppery—it’s a winner for outdoor cookouts in the South or Southwest.
🍯 Sweet & Sticky BBQ
- Mix BBQ sauce + a spoonful of honey
- Warm slightly before tossing on wings
- Best if wings are extra crispy (so they don’t turn soggy)
I usually pull the wings out of the oven, rest them 5 minutes, then toss in this sauce while still warm. Perfect for family dinners or cookouts where kids want something mild.
When to Add Sauce (Timing = Everything)
I ruined some really great wings early on by adding sauce too soon. Trust me—timing makes or breaks the crunch.
Here’s what works best:
- For dry rubs → Toss before baking
- For wet sauces → Add after baking
- Want a sticky glaze? Bake the wings plain, then broil for 2–3 mins after saucing
One time I brushed BBQ sauce on before baking (trying to be efficient), and the sugar in the sauce burned to the rack. The wings were edible, but I spent longer cleaning the pan than enjoying dinner.
Other Flavor Ideas That Work Great
When I want to mix things up, I go for:
- Garlic Parmesan → Toss with melted butter, grated parm, and garlic paste
- Cajun dry rub → Smoked paprika, cayenne, thyme, onion powder
- Honey mustard glaze → Dijon + honey + a splash of apple cider vinegar
Most of these I build from spices already in my pantry. No need for bottled marinades—they just get in the way of crisp.
Reheating Leftover Wings: How to Keep Them Crispy
I’ll be real—leftover wings used to make me sad. I’d pull them from the fridge all excited, pop them in the microwave, and boom… chewy, soggy skin. No more crisp, just rubber and regret.
But after a few experiments (and some trial-and-error reheats on hangover mornings), I found a way to bring those wings back to life.
My Go-To Reheat Method (Crisp Restored)
This method works like a charm—no oil needed, no weird textures, no re-saucing.
Here’s what I do:
- Preheat oven to 375°F
- Place wings on a wire rack over a foil-lined sheet pan
- Bake for 10–12 minutes
- If needed, broil for the last 1–2 minutes to restore crisp
If the wings are already sauced (Buffalo, BBQ), you can still reheat them this way. Just don’t crank the broiler too long—sugar-based sauces burn fast. I learned that one the smoky way.
What Not to Do (Speaking From Experience)
These might sound convenient, but they destroy your crispy dreams:
- Microwaving — even with a paper towel, it turns the skin to rubber
- Foil-wrapped reheating — traps steam, softens everything
- Tossing in more sauce before reheating — it clings and burns before the wing’s even warm
I used to think “just heat it quick” was enough. But now I treat crispy wings like pizza crust—you’ve got to revive it with dry heat, not zap it into submission.
Bonus: Reheat in a Toaster Oven
When I lived in a small Chicago apartment, my toaster oven saved my leftovers.
Here’s what I did:
- Set toaster oven to 400°F
- Use the baking tray or rack
- Reheat for 7–8 minutes
- Broil briefly if needed
It wasn’t just fast—it kept the skin crisp while warming the inside.
How Long Do Oven Wings Stay Good in the Fridge?
In my house? Maybe two days.
But officially, I’d say:
- 3–4 days max in a sealed container
- Keep them dry — don’t store in extra sauce if possible
- Line the container with a paper towel to soak up moisture
I once tossed wings in sauce and stored them overnight—next day, they were swimming in liquid and completely soft. Lesson learned.
My Favorite Side Dishes to Serve With Crispy Chicken Wings
When the wings come out sizzling and golden, everyone hovers around the tray. But let’s be real—no matter how crispy they are, wings don’t feel like a meal without something next to them. And I’ve learned over the years which sides actually hold up to crispy wings without stealing the spotlight.
Some pairings cool the heat. Some ride the crunch wave. And some are just… tradition in my house.
Cooling Sides for Spicy Wings
Buffalo wings hit hard—especially with extra cayenne. I usually balance them with something that calms things down a bit.
Here’s what I serve when the heat level’s high:
- Ranch Slaw
I shred cabbage and carrots, toss them with buttermilk ranch and a squeeze of lemon. Crunchy, creamy, perfect contrast. - Celery & Carrot Sticks
Old-school, yes. But on a hot day, cold veggie sticks with ranch dip just feel right. - Mac and Cheese
I keep this one creamy, not baked. Stirred stovetop with lots of cheddar. It softens the heat like a charm—and U.S. guests always go for seconds.
There was a time I brought spicy oven wings to a friend’s backyard party in Georgia. I paired them with chilled coleslaw and a pitcher of sweet tea. We were all sweating, but no one complained.
Crunch-On-Crunch Combos
I love texture. So when I want the whole plate to snap and crunch, I go double crispy.
- Oven-Baked Potato Wedges
Tossed in olive oil, garlic powder, and rosemary. Baked on the rack beneath the wings so they catch the drippings (yes, really). - Cornbread (Savory or Sweet)
I use a cast iron skillet for extra crust. Serve it warm with honey butter for BBQ wings or plain with lemon pepper ones. - Baked Onion Rings
If I’ve got the energy, I coat sliced onions in panko and bake them with the wings. It’s like crispy overload, in the best way.
When I made this combo on a cold Friday night in Chicago—wings, cornbread, onion rings—I remember biting in and just… smiling. It was loud. It was messy. It was exactly what I needed.
When I Keep It Simple (Weeknight Wing Nights)
Sometimes I skip the big spread and just go minimalist:
- A bagged salad kit + wings = dinner
- Sweet potato fries from the freezer aisle
- Just a bowl of rice and some soy-garlic glazed wings
No shame. Not every meal has to be impressive. Sometimes, it just needs to be hot, fast, and satisfying.
What I Still Check Before Every Batch
You’d think after cooking hundreds of wings in ovens across the U.S., I’d have it down to an exact science.
Truth? I still do one small check before I bake any new batch:
I test my oven.
Not the full calibration with thermometers (though that’s great if you’re into it). I just preheat, stand close, and see how it behaves.
- Does the oven actually hit 425°F fast?
- Does the convection fan kick on or lag?
- Is there a weird cold spot on the left side?
- Is the door seal snug or letting heat escape?
In my Scottsdale rental, I noticed the oven’s fan was super aggressive—so my wings browned in half the time. In a Michigan winter, the same recipe took an extra 7 minutes. Same method, same pan. Different oven moods.
That’s why I trust the feel more than the timer sometimes. I look for:
- Skin pulling tight around the edges
- Bubbling fat near the tips
- That light golden crackle starting to show
If I see that, I know I’m on the right track—even before I flip them.
Imperfect Batches Still Taste Great
Not every tray comes out flawless. I’ve burned a few tips. I’ve forgotten to flip. I’ve even pulled wings too early and had to pop them back in after the first bite (don’t recommend it).
But you know what? Even the imperfect ones still satisfy.
That’s the beauty of oven-baked crispy chicken wings. They’re forgiving. They’re fun. And once you’ve got your own rhythm, they’re a game-night, weeknight, any-night go-to that hits every time.
Why I Keep Coming Back to Oven Wings
I’ve fried wings in commercial kitchens, soaked oil stains into chef coats, and scrubbed fryers for hours.
But at home?
I’ll take baked wings in a hot oven with good seasoning, crisp skin, and fewer dishes.
They’ve saved me on weeknights when I needed something fast. They’ve fed friends on birthdays and football Sundays. And they’ve helped me show that you don’t need fancy gear or a deep fryer to get something crispy, flavorful, and seriously satisfying.
Just heat, patience, and the right little tricks.
FAQs: How to Cook Crispy Chicken Wings in the Oven
How do you get chicken wings crispy in the oven?
Dry the wings, coat with baking powder, and bake on a rack at 425°F. Flip halfway and broil at the end for extra crunch.
Can I make crispy chicken wings without baking powder?
Yes. Use cornstarch or dry brine overnight, then bake at high heat. These methods also help crisp the skin without frying.
How long to bake chicken wings at 425°F for crispiness?
Bake for 45–50 minutes total, flipping halfway. For deeper browning, broil the last 2–4 minutes and rest before serving.
What oven rack should I use for crispy wings?
Use the middle rack for even baking. Move to the top for a quick broil finish to get extra crispy skin without overcooking.
What’s the best way to reheat crispy wings?
Use the oven at 375°F for 10–12 minutes on a wire rack. Skip the microwave—it softens the skin and ruins the crunch.
I’m Mossaraof, a trained chef and the founder of OvenInsights.com. I spent years cooking at Larrupin’ Cafe and in kitchens across Chicago and Seattle. Now I test kitchen gear for a living. I moved to North Acton, London, and I test every tool I write about. I use real meals and real heat. No brand deals. No shortcuts. I cover 12 kitchen types and hundreds of recipes. I believe this: the right tools matter as much as the recipe.