
At A Glance
- One anchor temperature — usually 375-425°F — lets you cook protein, starch, and vegetable at the same time without babysitting three settings.
- Rack position controls heat intensity: top rack browns and crisps, middle rack cooks evenly, bottom rack speeds up dense root vegetables.
- Stagger your start times in reverse — figure out what takes longest and work backward from the time you want to eat.
- Foil tenting and a 10-minute rest after pulling protein from the oven buy you time to finish sides without anything getting cold.
- Convection mode cuts overall cook time by 20-25% and is worth using for full-oven meals if your oven has it (America’s Test Kitchen, 2024).
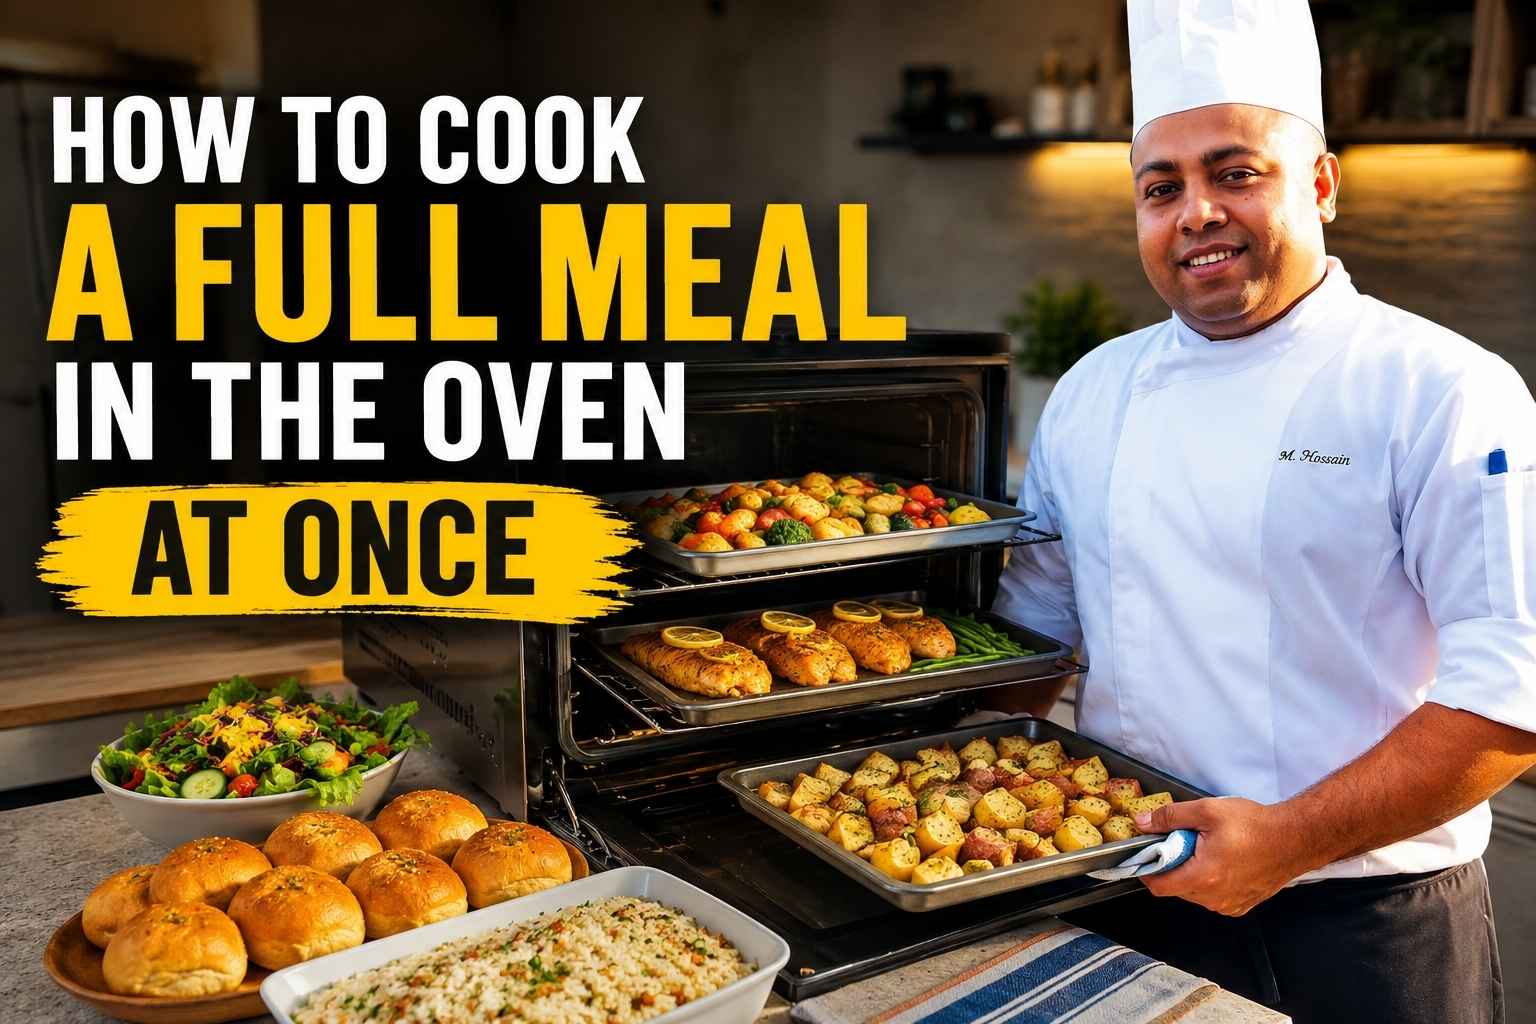
You know that feeling when dinner time hits and every burner is full? I used to fight that battle every single night. Then I found the trick to how to cook a full meal in the oven at once, and it changed my kitchen for good. I’ve spent years testing this in my own home, tweaking times and trays until it just worked. Stick with me, and I’ll show you my easy method step by step, so you can get a hot, full meal on the table with barely any fuss.
Why Cooking a Full Meal in One Oven Works
Most home cooks treat the oven like a one-dish appliance. They roast a chicken, pull it out, then scramble to cook vegetables on the stovetop while the chicken sits cooling. I did this myself in my first kitchen job. My sous chef watched me for about 30 seconds and said, “The oven has four racks. Use them.”
He was right. A hot oven is a shared environment. Every dish inside it draws from the same ambient heat, the same convection currents, and the same source of dry air. That means you can run protein, starch, and a vegetable simultaneously — as long as you understand how each one behaves.
The logic is simple. Heat rises, so the top rack is hotter than the bottom. Food near the broiler browns faster on top. Food on the bottom rack gets more direct radiant heat from the element. Air circulates around everything, so spacing matters.
Once you know those three rules, you can load a full oven and have everything land on the table at the same time. This guide covers exactly how to do that.
How to Choose an Anchor Temperature
Your anchor temperature is the one temperature that works for every dish in the meal. Pick it first. Everything else — which dishes you cook, how long you cook them, where you put each rack — follows from that single number.
Here’s how I choose it:
Start with the protein. A whole chicken needs 400-425°F. A pork tenderloin works well at 400°F. Salmon is happy at 375-400°F. Beef tenderloin wants 425°F to start, then lower. The protein sets the range.
Then check your sides. Most root vegetables (potatoes, sweet potatoes, carrots) roast well at 400-425°F. Brassicas like Brussels sprouts and broccoli need at least 400°F to get any caramelization. Asparagus and green beans roast fine at 375°F.
The overlap zone for most full oven meals is 400-425°F. That range works for nearly every combination I’ve cooked in 15 years.
The one exception: if you’re baking a grain casserole (rice, farro, lentils in liquid), those typically want 350-375°F. In that case, anchor to 375°F and accept slightly slower browning on everything else — or pull the casserole early and let it rest while you crank the oven to crisp your vegetables.
One-Oven Meal Planning Reference Table
| Meal | Protein | Sides | Anchor Temp | Total Time | Notes |
|---|---|---|---|---|---|
| Weeknight Roast Chicken | Whole chicken (4 lb) | Baby potatoes, green beans | 425°F | 60-70 min | Add beans in last 20 min |
| Pork Tenderloin Dinner | Pork tenderloin (1.5 lb) | Sweet potatoes, Brussels sprouts | 400°F | 45-55 min | Start sprouts 10 min early |
| Salmon Bake | Salmon fillets (6 oz each) | Rice casserole, asparagus | 375°F | 40-50 min | Start rice 15 min early, add asparagus last 12 min |
| Sheet Pan Steak Night | Flank steak | Baby carrots, fingerling potatoes | 425°F | 35-45 min | Sear steak on stovetop first, finish in oven |
| Sunday Leg of Lamb | Bone-in leg of lamb (5 lb) | Roasted garlic potatoes, broccolini | 400°F | 90-110 min | Add broccolini last 15 min |
| Chicken Thighs & Grains | Bone-in chicken thighs | Farro casserole, zucchini | 400°F | 50-60 min | Start farro 10 min early |
Protein and Sides Compatibility: What Cooks Well Together
Not every protein pairs well with every side in a shared oven. The issue is usually cook time mismatch or moisture conflict.
Good pairings:
Whole chicken (60-70 min at 425°F) pairs perfectly with baby potatoes or wedge-cut russets — they both want high heat and long time. Add a fast vegetable like green beans or asparagus in the last 20 minutes.
Pork tenderloin (25-30 min at 400°F) works with halved Brussels sprouts and cubed sweet potatoes. Start the sprouts and sweet potatoes 10-15 minutes before the pork goes in.
Salmon fillets (12-15 min at 375-400°F) are the most forgiving protein for multi-dish cooking because they cook so fast. Start your rice casserole and root vegetables first, then slide salmon in at the end.
Pairings to avoid:
Delicate fish with high-moisture vegetables in a crowded oven. Zucchini, tomatoes, and mushrooms release a lot of steam. That steam softens everything around them, including fish. Either roast them separately or give them their own sheet pan with space.
Bread or pastry alongside savory dishes at 400°F+. The temperature is too high and the steam from protein drippings affects the crumb structure.
A dense braise (like a whole beef chuck) alongside quick-roasting sides. The times are so different that you end up holding sides for over an hour, which ruins them.
Rack Positioning Strategy
This is the single most important skill for full-oven cooking, and most home cooks never think about it.
Here’s what I tell every cook I train:
Top rack (closest to broiler): Use for dishes that need surface browning — gratin toppings, cheese on top of a casserole, the last 5 minutes of chicken skin crisping. Intense top heat. Don’t leave delicate proteins here for the full cook.
Upper-middle rack: The default for proteins. Even heat, good air circulation, some browning on top. This is where your chicken, pork, or fish goes for most of the cook time.
Lower-middle rack: Best for dense vegetables — potatoes, sweet potatoes, carrots, beets. They need direct bottom heat to cook through without burning on the surface.
Bottom rack: Reserve for items that need crust on the bottom — bread, pizza, pies. Also good for dishes in heavy Dutch ovens that need sustained heat from below.
In a full-oven meal, I typically run: protein on upper-middle, starch on lower-middle, and vegetables on a separate sheet pan on lower-middle or bottom, rotated halfway through.
One rule that never changes: never put two sheet pans on the same rack. Block the airflow and everything steams instead of roasting.
Timing and Staggering: How to Finish Everything at Once
The key technique is reverse start timing. Work backward from your target finish time.
Here is how I do it every time:
- Write down every dish and its cook time at your anchor temperature.
- Find the dish with the longest cook time. That goes in first.
- Subtract each other dish’s cook time from the longest time. That’s when each one starts.
Example: Roast chicken dinner at 425°F, target finish at 7:00 PM
- Whole chicken: 70 minutes → in at 5:50 PM
- Halved baby potatoes: 45 minutes → in at 6:15 PM
- Green beans with olive oil: 20 minutes → in at 6:40 PM
- Everything finishes by 7:00 PM
This works because the oven is already hot when secondary dishes go in, so they pick up heat faster than if you’d put them in from the start.
For the potatoes in this example, I give them a 15-minute head start even though they technically fit under the chicken’s 70 minutes. That buffer accounts for opening the oven door repeatedly, which drops temperature by 25-50°F each time (The Food Lab by J. Kenji López-Alt, 2015).
Build 10-15 minutes of cushion into every plan. It almost always saves you.
Foil Tenting, Resting, and Holding Without Ruining Food
Foil tenting is the most under-used tool in a home cook’s kit.
After you pull a protein from the oven, tent it loosely with foil. The foil traps heat, slows surface cooling, and keeps the internal temperature climbing for another 5-10 minutes (carryover cooking). This is why pulling chicken at 155°F is safe — it’ll reach 165°F while resting (USDA Food Safety Guidelines, 2024).
That rest time is your window. While the chicken rests for 10 minutes, crank the oven to 450°F and blast the vegetables for a final 5-minute crisp. Everything finishes at the same time.
For longer holds (say, 30 minutes because dinner got pushed), wrap the protein tightly in foil, then in a clean kitchen towel. Place it in a turned-off oven with just the oven light on. This setup holds temperature remarkably well — I’ve held roast chicken for 40 minutes this way without drying it out.
For side dishes: vegetables can be pulled slightly early and spread on a warm sheet pan in the oven with just the light on. They won’t crisp further, but they won’t go cold either.
Gas vs. Electric Ovens: How Each One Affects Multi-Dish Cooking
Gas ovens run hotter at the bottom and cooler at the top. The burner is at the bottom, and the temperature gradient between the floor and the top rack can be 50-75°F in some models. This is actually useful for full-meal cooking: put dense root vegetables on the bottom rack where it’s hotter, and protein in the middle where it’s more even.
The downside of gas: moisture. Gas combustion produces water vapor, which creates a slightly humid oven environment. This slows browning. If your oven is gas and you’re struggling to get crispy skin on chicken, try adding a 5-minute blast at 450°F at the end, or move the protein to the top rack for the last 10 minutes.
Electric ovens heat from both top and bottom elements. The temperature is more even across the oven, which makes multi-rack cooking more predictable. The drawback is they respond to temperature changes more slowly than gas — so when you open the door and the temperature drops, it takes longer to recover. Open the door as little as possible.
Electric ovens with true convection (a third heating element around the fan) are the gold standard for full-oven meals. Even heat everywhere, faster cooking, and better browning on all surfaces simultaneously (Serious Eats, 2023).
Convection Mode for Full-Meal Cooking
Use convection whenever you are cooking more than one dish at once. That’s my rule. No exceptions.
Convection circulates hot air with a fan, which does three things: equalizes temperature across all racks, removes the steam that builds up around food, and speeds up surface browning. All three are exactly what you want when the oven is loaded with multiple dishes.
Temperature adjustment for convection: Reduce your target temperature by 25°F, or reduce total cook time by 20-25%, or do a bit of both. I typically drop the temperature by 15°F and check 10 minutes early (America’s Test Kitchen, 2024).
One warning: convection dries out food faster. For a rice casserole or anything cooked in liquid, cover it tightly with foil for most of the cook time and only uncover for the last 10 minutes if you want a browned top.
If your oven has a convection roast mode (fan plus the top element), use that for proteins. It gives the best skin and crust results in a loaded oven.
3 Complete Sample Meal Plans
Meal Plan 1: Roast Chicken + Baby Potatoes + Green Beans
Anchor temp: 425°F | Total active time: 20 min prep | Oven time: 70 min
- 5:50 PM – Whole 4 lb chicken (cavity seasoned, skin rubbed with butter) goes on upper-middle rack in a roasting pan.
- 6:15 PM – Halved baby potatoes tossed in olive oil and salt go on a sheet pan on the lower-middle rack.
- 6:40 PM – Green beans tossed in olive oil and garlic go on a second sheet pan. Slide it onto the bottom rack.
- 7:00 PM – Pull chicken (internal temp 155°F+), tent with foil. Crank oven to 450°F. Blast potatoes and beans 5 more minutes. Slice chicken while they finish.
Rack setup: Protein – upper-middle. Potatoes – lower-middle. Beans – bottom.
Meal Plan 2: Pork Tenderloin + Sweet Potatoes + Brussels Sprouts
Anchor temp: 400°F | Total active time: 15 min prep | Oven time: 55 min
- 6:05 PM – Cubed sweet potatoes and halved Brussels sprouts (on separate sheet pans, or opposite ends of one large pan) go into the oven. Sprouts on upper-middle, sweet potatoes on lower-middle.
- 6:20 PM – Pork tenderloin (seared 2 min per side on stovetop first) goes on upper-middle rack beside the sprouts, or swap sprouts to bottom rack.
- 7:00 PM – Pork hits 140-145°F internal. Pull and tent. Sprouts and sweet potatoes are caramelized and done. Rest pork 10 min, slice, serve.
Note: Pre-searing the pork on the stovetop cuts oven time by about 10 minutes and adds better surface color than oven roasting alone (The Food Lab by J. Kenji López-Alt, 2015).
Meal Plan 3: Baked Salmon + Rice Casserole + Asparagus
Anchor temp: 375°F | Total active time: 20 min prep | Oven time: 50 min
- 6:10 PM – Rice casserole (1.5 cups rice, 3 cups broth, garlic, lemon zest, covered tightly with foil) goes on lower-middle rack in a baking dish.
- 6:35 PM – Asparagus (trimmed, oiled, seasoned) goes on a sheet pan on upper-middle rack.
- 6:45 PM – Salmon fillets (seasoned, skin-side down on an oiled sheet pan) go on the upper-middle rack. Move asparagus to bottom rack.
- 7:00 PM – Salmon is done (internal temp 125-130°F for medium). Pull everything. Uncover rice, fluff, and serve.
Note: Cover the rice casserole for the full cook except the last 5 minutes if you want a slightly crisp top layer.
Common Mistakes When Cooking a Full Oven Meal
Overcrowding the oven
Two full sheet pans on the same rack block airflow. Food steams instead of roasting. You get soft, pale results instead of browned, caramelized surfaces. Fix: use a maximum of two sheet pans per oven in separate rack positions, at least one slot apart.
Steam buildup from high-moisture vegetables
Zucchini, mushrooms, cherry tomatoes, and fresh corn release significant moisture. In a full oven, that steam affects everything around them. Fix: roast high-moisture vegetables on the top rack near the heat source so the moisture evaporates quickly, or cut them into smaller pieces to expose more surface area.
Uneven rack loading
Putting a heavy Dutch oven on the same rack as a light sheet pan means the heavy pan absorbs more heat from below, creating uneven temperatures. Fix: give heavy, dense cookware the bottom rack where heat comes from the element directly below. Keep light sheet pans on middle racks.
Skipping the temperature buffer
Every time you open the oven door, you lose heat. In a full-oven meal where you’re opening it 3-4 times to add dishes, that loss adds up. Fix: assume your actual cook times will run 5-10% longer than stated. Build that time into your reverse start schedule.
Pulling protein too early to “make room”
I’ve seen home cooks pull their chicken out 15 minutes early to clear space for something else. The chicken then sits, overcooks from carryover heat, and dries out. Fix: use foil tenting and a turned-off oven to hold protein safely without pulling early. Plan your rack positions before anything goes in.
My Personal Full-Meal Oven Routine
I’ve cooked hundreds of full-oven dinners. Here’s how I do it every time, exactly as I would in my own kitchen.
First, I preheat for at least 30 minutes — not 15, not “until the light goes off.” Oven thermostats are notoriously inaccurate. I use a dedicated oven thermometer clipped to the middle rack and I don’t trust the dial (Consumer Reports, 2023).
Second, I prep everything before anything goes into the oven. Every dish ready to go, every sheet pan lined and oiled, every seasoning measured. A full-oven meal doesn’t forgive mid-cook scrambling.
Third, I write the stagger schedule on a sticky note and put it on the oven door. Something like: “Chicken in at 5:50. Potatoes at 6:15. Beans at 6:40. Eat at 7.” I’ve been cooking professionally for 15 years and I still write it down. Memory is a liability when you’re also managing three other things.
Fourth, I set a timer for every stage — not just the final pull. A timer when the potatoes go in, another for when the beans go in. My phone has three alarms running simultaneously during a full-oven dinner. That’s normal.
Fifth, I rest everything. Even vegetables benefit from 3-4 minutes off the pan. The carryover heat finishes cooking, and everything tastes better.
Frequently Asked Questions About Cooking a Full Meal in the Oven
What temperature should I use to cook a full meal in the oven at once?
The best range is 375-425°F for most full-oven meals. Pick a single anchor temperature based on your protein’s requirements, then choose sides that cook well at that same heat. Most roasted proteins, starches, and vegetables overlap in the 400-425°F range.
Can I cook on all four racks at once?
Technically yes, but two racks is the practical limit for most home ovens. With four pans stacked close together, airflow is too restricted for anything to brown properly. Two racks — one for protein, one for sides — gives the best results.
How do I keep food from getting cold while I wait for everything to finish?
Tent protein loosely with foil and let it rest off the heat. Place finished side dishes on the back of the stovetop over low heat, or in a turned-off oven with the light on. Both methods hold food at a safe temperature for 15-20 minutes without quality loss.
Does convection mode make full-oven cooking easier?
Yes, noticeably. Convection circulates air evenly across all racks, which reduces the temperature difference between the top and bottom of the oven. It also speeds up browning by moving humid air away from food surfaces. Drop your temperature by 25°F or check 10-15 minutes early to avoid overcooking (America’s Test Kitchen, 2024).
Can I cook two different proteins at the same time?
Yes, as long as their temperatures align. Two chicken-based proteins at 425°F work fine. A whole chicken and a salmon fillet do not — the salmon cooks in 15 minutes while the chicken needs 70. In that case, stagger them so the salmon goes in during the last 15 minutes of the chicken’s cook time.
Why does food sometimes come out pale and soft instead of browned?
Usually two causes: overcrowding and steam. Too many pans in a tight space trap moisture, and food steams instead of roasting. Spread dishes out, give each pan room on its own rack, and use high-moisture vegetables in smaller batches.
How far in advance can I prep a full-oven meal?
Everything can be prepped up to 24 hours ahead. Season proteins and store them uncovered in the fridge overnight — the dry air tightens the skin on chicken and helps it brown better in the oven (Serious Eats, 2023). Cut and store vegetables in airtight containers. Mix casserole bases and refrigerate covered. Pull everything out 30 minutes before cooking so it comes closer to room temperature.
How do I know when everything is done without constant checking?
Use a probe thermometer for protein — it removes all guesswork. For vegetables, set timers based on size: cubed 1-inch pieces roast in 25-30 minutes at 400°F, halved pieces in 35-40 minutes. Check once near the end, not repeatedly throughout. Every door opening drops oven temperature and extends cook time.
Key Takeaways
- Choose one anchor temperature (usually 375-425°F) that works for every dish in the meal, and build your entire menu around it.
- Use rack position deliberately: protein on upper-middle, dense starches on lower-middle, fast vegetables on the bottom or top for the last stretch of cooking.
- Write a reverse start schedule before anything goes into the oven — find the longest cook time and work backward from your target meal time.
- Open the oven door as rarely as possible; every opening drops temperature by 25-50°F and extends overall cook time.
- Tent resting protein with foil to keep it hot while you finish sides — a 10-minute rest is not wasted time, it is the window you use to finish everything else.
- Convection mode is the best upgrade for full-oven meals — reduce temperature by 25°F or check food 10-15 minutes early when using it.
- Write your timing schedule on a sticky note and put it on the oven door. Every professional kitchen runs on written schedules. Your home kitchen should too.

I’m Mossaraof, a trained chef and the founder of OvenInsights.com. I spent years cooking at Larrupin’ Cafe and in kitchens across Chicago and Seattle. Now I test kitchen gear for a living. I moved to North Acton, London, and I test every tool I write about. I use real meals and real heat. No brand deals. No shortcuts. I cover 12 kitchen types and hundreds of recipes. I believe this: the right tools matter as much as the recipe.




