
At A Glance
- Most “slow ovens” are not broken. They are just off by 25-50 degrees, and you can find out in ten minutes with a five-dollar oven thermometer (America’s Test Kitchen, 2025).
- The three biggest culprits I see in real kitchens are a miscalibrated thermostat, a worn door seal, and overcrowded racks that block airflow.
- The dollar-bill test tells you in under a minute if your door seal is leaking heat.
- A failing heating element usually shows visible damage – a blister, a bare spot, or a spot that stays dark while the rest glows red.
- Most fixes below cost nothing or under $20. Call a pro only for gas smells, sparking, or a control board that won’t respond.
It is so sad when a meal takes hours and still stays cold. I have felt that same stress in my own kitchen when things did not go as planned. You might ask, why my oven takes so long to cook food when you are hungry and tired. I will help you find the cause so you can eat well and fast. Check out this Ultimate Guide to Oven Basics and let’s fix your heat!
Broken Oven or Misused Oven? Here’s the Real Difference
A broken oven has a failed part: a dead heating element, a stuck igniter, a shot thermostat sensor. It needs a repair or a part.
A misused oven works fine but is fighting you. You’re overcrowding the racks. You’re opening the door every four minutes to check on things. You’re using a dark, heavy pan that soaks up heat instead of passing it to your food.
I’ve run kitchens for over 15 years, and I’d guess three out of four “my oven runs slow” complaints are the second kind. The oven isn’t sick. The habits around it are the problem.
The fix is the same either way: test, don’t guess. Below is my full diagnostic routine, the one I use on a rental unit I’ve never met before a dinner service.
Diagnostic Reference Table: Common Causes of a Slow Oven
| Cause | How Common | Quick Test | Fix |
|---|---|---|---|
| Miscalibrated thermostat | Very common | Oven thermometer test (below) | Recalibrate via the control panel or offset dial |
| Worn door seal / gasket | Common | Dollar-bill test | Clean it, reseat it, or replace the gasket ($15-$40) |
| Overcrowded racks | Very common | Visual check – can air move around every pan? | Cook in batches, use smaller pans |
| Wrong rack position | Common | Check where food sits vs. the heating element | Move to the center rack for most baking |
| Old or failing heating element | Occasional | Visual inspection while element is on | Replace element (DIY on most electric models) |
| Frequent door-opening | Very common | Track how often you open it during one bake | Use the oven light and window instead |
| Not preheating fully | Common | Check if you start cooking the moment it beeps | Wait 10-15 extra minutes past the beep |
| Dark or glass bakeware | Occasional | Check pan material and color | Switch to light aluminum for faster, even heat |
| Altitude or cold kitchen | Situational | Compare cook times to sea-level recipe notes | Add 15-25°F or extra time at altitude |
| Convection fan not used or broken | Occasional | Listen for the fan; check if convection is turned on | Turn on convection setting, or call a tech if fan is silent |
How to Test Your Oven’s Real Temperature
This is the single most useful thing you can do before you touch a single screw or call a repair tech.
Step 1: Get a mechanical oven thermometer
Skip the oven’s built-in display. It only reads the temperature near its own sensor, which sits in a fixed spot that may not match the center of the oven, where your food actually sits (America’s Test Kitchen, 2025). A basic dial thermometer from a brand like Taylor Precision Products costs under $10 and does the job well.
Step 2: Place it in the center of the middle rack
Don’t clip it to the door or push it to the back corner. Center rack, center of the rack, same spot your food would sit.
Step 3: Set the oven to 350°F and preheat fully
Wait for the oven to signal it’s ready. Then wait five more minutes. Ovens often beep before they’ve actually stabilized.
Step 4: Read the thermometer, then check again 10 minutes later
Write down both numbers. A well-functioning oven should hold within about 15-25°F of the target through a cook (America’s Test Kitchen, 2025). Bigger swings than that point to a control or sensor problem.
Step 5: Repeat at 400°F
Some ovens drift more at higher heat. Testing two temperatures gives you a clearer picture than one.
If your readings are consistently 25°F or more off the dial setting, you’ve found your answer. Move to the recalibration section below.
Thermostat Drift: The Most Common Cause of “Slow” Cooking
Here’s the thing nobody tells home cooks: thermostat drift is normal. Every oven drifts over time as the sensor ages and the control board’s calibration slips. I’ve tested rental kitchen ovens that ran 40°F cold and home ovens that ran 30°F hot, both with owners who had no idea.
A drifting thermostat doesn’t announce itself. It shows up as chicken that needs 20 extra minutes, or bread that never quite browns. Most people blame the recipe.
How to recalibrate
Most ovens built after 2010 have a hidden calibration menu. The steps vary by brand, but the general pattern is:
- Press and hold the “Bake” and “Broil” buttons together (or check your manual for the exact combo)
- Look for a temperature offset screen, usually showing “0”
- Adjust up or down in 5-10°F increments based on your thermometer test
- Save and re-test
GE’s official support documentation confirms most models allow an adjustment of up to 35°F in either direction through the control panel, and recommends a full preheat cycle before testing any change (GE Appliances, 2026). If your model has no digital offset, older dial ovens often have a small calibration screw behind the temperature knob. That one is fiddly. If you’re not comfortable pulling the knob off, this is worth a service call.
Door Seal Problems: How Heat Escapes Without You Noticing
A worn gasket is the silent killer of oven performance. Heat leaks out continuously, so the oven runs its heating element more often, and yet the interior temperature still lags. Food takes longer, and the kitchen gets warmer, which is a strange but telling clue.
The Dollar-Bill Test
- Open the oven door and close it on a dollar bill, letting a few inches stick out
- Position the bill at one corner of the door seal
- Gently pull the bill out
- Note the resistance. A tight seal grips the bill firmly
Repeat this at both top corners, both bottom corners, and the middle of each side. If the bill slides out with no resistance at any point, you’ve found a leak.
What to do about it
- Dirty gasket: Wipe it down with warm water and mild soap. Grease buildup alone can stop a seal from closing tight.
- Compressed or cracked gasket: Order a replacement using your oven’s model number, found on a label inside the door frame. Most gaskets snap or clip into a channel, and swapping one takes under an hour with no tools beyond a screwdriver.
- Warped door: This is rarer, but if the door itself doesn’t sit flush, that’s a job for a technician.
I once spent 20 minutes trying to figure out why a banquet oven wouldn’t hold 425°F for a big roast job. The gasket had a two-inch gap from grease buildup near the hinge. Wiped it clean, reseated it, done. No parts, no tech, no delay.
Overcrowding and Blocked Airflow
Here’s a mistake I see constantly, even from cooks who should know better: cramming four sheet pans into an oven built for two, or lining the bottom with a pan of water and calling it “steam.”
Hot air needs to circulate around every pan for even, efficient cooking. When you block that path, the oven has to work far harder to reach and hold temperature, and the food closest to the walls or the element cooks faster than the food in the middle.
Signs of overcrowding
- Pans touching each other or the oven walls
- A full sheet pan on every rack at once
- Food on the bottom rack directly blocking the lower heating element
The fix
Leave at least an inch of space around each pan. If you’re batch-cooking, stagger it: run two smaller batches instead of one packed oven. Your total time might feel longer on paper, but each batch actually finishes on schedule instead of both batches finishing late and unevenly.
Rack Position Mistakes and Uneven Heat
Rack position changes cook time more than most people expect. The center rack is the safest default for almost everything, since it sits roughly equal distance from the top and bottom elements.
Common rack mistakes
- Baking cookies on the bottom rack: bottoms burn before centers set
- Roasting a whole chicken on the top rack: skin scorches while the inside stays underdone
- Broiling on the wrong rack: broiling needs the top rack, close to the element, not the middle
If food near one side of a tray finishes before the other side, that’s not always a “slow oven.” It’s often just an uneven hot spot, which is normal in older ovens without a convection fan. Rotating the pan halfway through solves it without touching a single setting.
Gas vs. Electric Ovens: Which One Runs Slower
I’ve cooked professionally on both, and the honest answer is: it depends on what “slow” means to you.
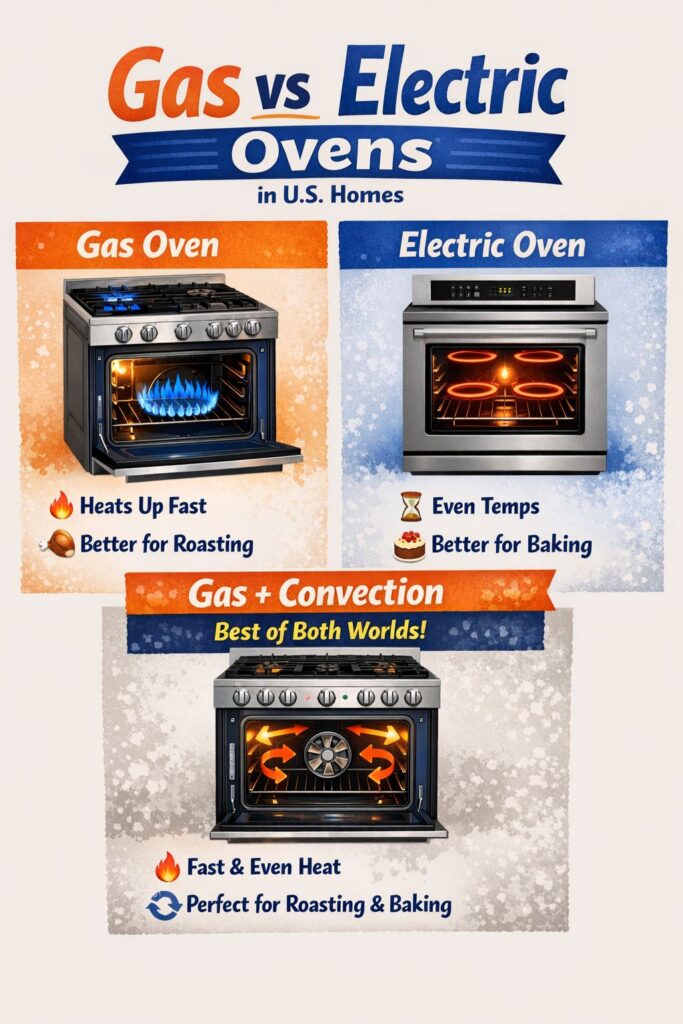
Gas ovens heat up faster because a flame produces heat instantly, with no coil that needs to warm first. But gas ovens also tend to have more temperature swings during a cook, since the thermostat cycles the flame on and off to hold temperature, and that cycling creates small dips.
Electric ovens preheat slower but usually hold a steadier, more even temperature once they get there. This is part of why so many professional pastry kitchens prefer electric or convection-electric ovens for delicate baking.
Neither type is inherently defective if it’s “slower” than the other. If you switched from gas to electric (or vice versa) and now feel like everything takes longer, you’re likely just noticing a real, normal difference in how the two heat sources behave, not a malfunction.
Convection vs. Conventional: The Fan Factor
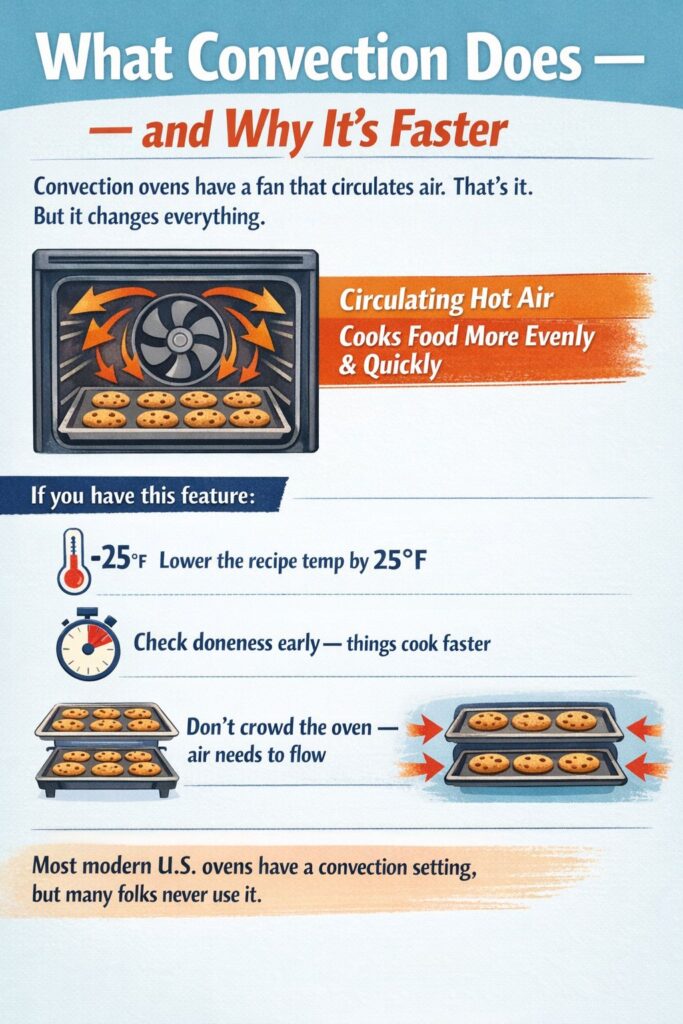
A convection oven uses a fan to circulate hot air, which strips away the thin layer of cooler air that normally clings to food. That’s why convection recipes usually run 25°F lower or 20-25% faster than conventional ones.
Two convection problems that cause slow cooking
- You’re not using the convection setting at all. Many ovens default to conventional bake unless you manually select convection or “true convection” each time. If you assumed it was always on, you’ve been cooking conventional the whole time.
- The fan has failed. A convection fan that hums but doesn’t spin, or doesn’t run at all, leaves you with all the heat but none of the circulation benefit. Listen for the fan during preheat. Silence, when the oven is set to convection, is a clear sign something’s wrong.
A failed convection fan motor is a repair job, not a DIY fix on most built-in wall ovens. It sits behind the back panel, next to live electrical connections.
Old or Failing Heating Elements: DIY or Call a Tech?
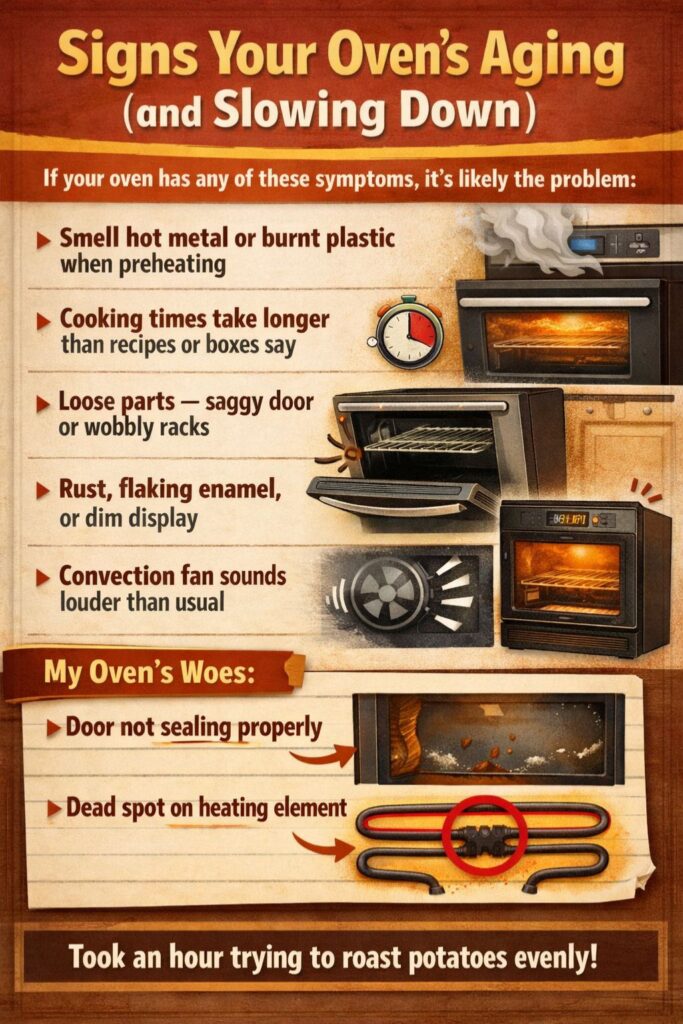
Electric ovens have a bake element on the bottom and a broil element on top. When either fails partially, cooking slows down and unevenness follows.
Signs of a failing element
- Visible damage: a blister, a split, or a bare spot where the metal coating has worn through
- Uneven glow: parts of the element glow bright orange-red, other sections stay dark
- No glow at all on one element while the oven still reaches some heat from the other
DIY or call a pro?
Replacing a bake or broil element on most freestanding electric ranges is one of the more approachable DIY appliance repairs. You unplug the oven, remove two or four screws holding the element in place, disconnect the wire terminals, and swap in a new part matched to your model number. It typically runs $30-$60 for the part.
Gas oven igniter issues are a different story. If your gas oven takes longer than 90 seconds to ignite, or you smell gas at any point, stop and call a professional (GE Appliances, 2026). Gas line and ignition work isn’t a place to improvise.
Altitude and Ambient Kitchen Temperature: The Overlooked Factors
If you live above 3,000 feet, your oven isn’t slow. Physics is working against you. Lower air pressure means water boils at a lower temperature and moisture evaporates faster, which changes how baked goods rise and set. Most high-altitude baking guides recommend raising oven temperature by 15-25°F and adding a few minutes of cook time to compensate.
Ambient kitchen temperature matters too, more than people assume. A freezing kitchen in winter, or a drafty spot near an exterior door, pulls extra heat out of the oven every time the door opens, and can slightly slow a full preheat cycle. This isn’t a defect. It’s physics doing what physics does.
Habits That Secretly Add Cook Time
I’ve watched home cooks fight their oven for years without realizing the oven wasn’t the problem. Here are the habits I see most.
Opening the door too often. Every time you open that door, you lose a meaningful chunk of heat, and the oven has to spend energy and time recovering it. Use the window and the interior light instead. If you must check, keep it under five seconds.
Using dark or glass bakeware. Dark metal and glass both absorb and hold heat differently than light aluminum. Dark pans can cause over-browning on the outside while the inside lags behind, which reads as “slow” even though the surface is technically done first.
Starting with cold ingredients straight from the fridge. A cold casserole dish or a cold cut of meat pulls down the surrounding oven air temperature the moment it goes in, and it takes real time for the oven to recover that heat. Let dense items sit at room temperature for 20-30 minutes first when food safety allows it.
Skipping the extra preheat time. The beep means the sensor hit its target, not that the whole cavity, walls, and racks have caught up. I always give an extra 10-15 minutes past the beep for anything that needs precise, even heat, like bread or delicate pastry.
Quick Fix vs. Call a Professional: How I Decide
I use a simple filter in my own kitchen, and I’d recommend the same one to you.
Try it yourself if:
- The fix involves cleaning, recalibrating through the control panel, or swapping a simple part like a gasket or a visibly damaged bake element
- The oven is unplugged and cool before you touch anything
- You can clearly see and reach the part
Call a professional if:
- You smell gas at any point
- You see sparks, smoke, or a burning smell that isn’t food
- The control board is unresponsive or shows an error code you can’t clear
- The fix involves the gas line, the convection fan motor, or anything wired directly into the control board
- Your oven is under warranty (a DIY repair can void it)
Consumer Reports’ 2021 member survey found that most owners who attempt oven repairs still end up hiring a professional for the job, largely because so many internal parts are sealed and carry a real shock risk (Consumer Reports, 2024). That tracks with what I’ve seen. Simple parts, do it yourself. Anything behind a sealed panel, call someone.
My Personal Troubleshooting Routine
This is the exact order I run through, whether it’s my own kitchen or a stranger’s rental oven the night before a big dinner.
- Thermometer test first, always. Ten minutes tells me more than any amount of guessing.
- Dollar-bill test on the door while the thermometer is doing its job. Two tests, one preheat cycle.
- Visual check on both elements if it’s electric. I’m looking for dark spots, blisters, or anything that doesn’t glow evenly.
- Check the rack position and load against what I’m actually cooking. Center rack, room to breathe, every time, unless the recipe says otherwise.
- Recalibrate on the spot if the thermometer showed drift, using the offset menu.
- Retest after any fix. I never assume a fix worked. I run the thermometer test again before I trust the oven with real food.
This routine takes about 20 minutes total, and it has saved me from ruining more than one dinner service on unfamiliar equipment.
Key Takeaways
- Test before you diagnose. An oven thermometer and a dollar bill solve most “slow oven” mysteries in under 20 minutes.
- Thermostat drift is common and usually fixable through the control panel’s calibration menu.
- Overcrowded racks and a worn door seal are the two most overlooked causes of slow, uneven cooking.
- Simple parts like gaskets and heating elements are reasonable DIY jobs. Gas lines, ignition systems, and control boards are not.
- Small habits, especially opening the door too often and skipping extra preheat time, add up to real minutes on every single cook.
Sources : America’s Test Kitchen, “
The Best Oven Thermometers of 2025,”
GE Appliances, “Why Is My Oven Not Heating?”
Consumer Reports, “Should You Repair or Replace Your Broken Range?”
✅ FAQ
Why does my oven take so long to heat up?
Old elements, bad sensors, or dirty seals can delay preheating. Check your parts and give it extra time in colder U.S. kitchens.
Is it normal for food to take longer in an electric oven?
Yes, electric ovens heat slower than gas. They offer even cooking but need full preheat to avoid undercooked meals.
Does cookware affect oven cook time?
Absolutely. Glass and cast iron heat slower. Aluminum pans cook food faster and more evenly in standard U.S. ovens.
Why is my oven smoking during preheat?
Old grease or crumbs on the heating element can cause smoke. Let the oven cool and clean it before cooking again.
What’s the best rack position for faster cooking?
Middle rack is usually best, but lower racks help thicker meals cook through. Avoid crowding for better airflow.

I’m Mossaraof, a trained chef and the founder of OvenInsights.com. I spent years cooking at Larrupin’ Cafe and in kitchens across Chicago and Seattle. Now I test kitchen gear for a living. I moved to North Acton, London, and I test every tool I write about. I use real meals and real heat. No brand deals. No shortcuts. I cover 12 kitchen types and hundreds of recipes. I believe this: the right tools matter as much as the recipe.




