
At A Glance
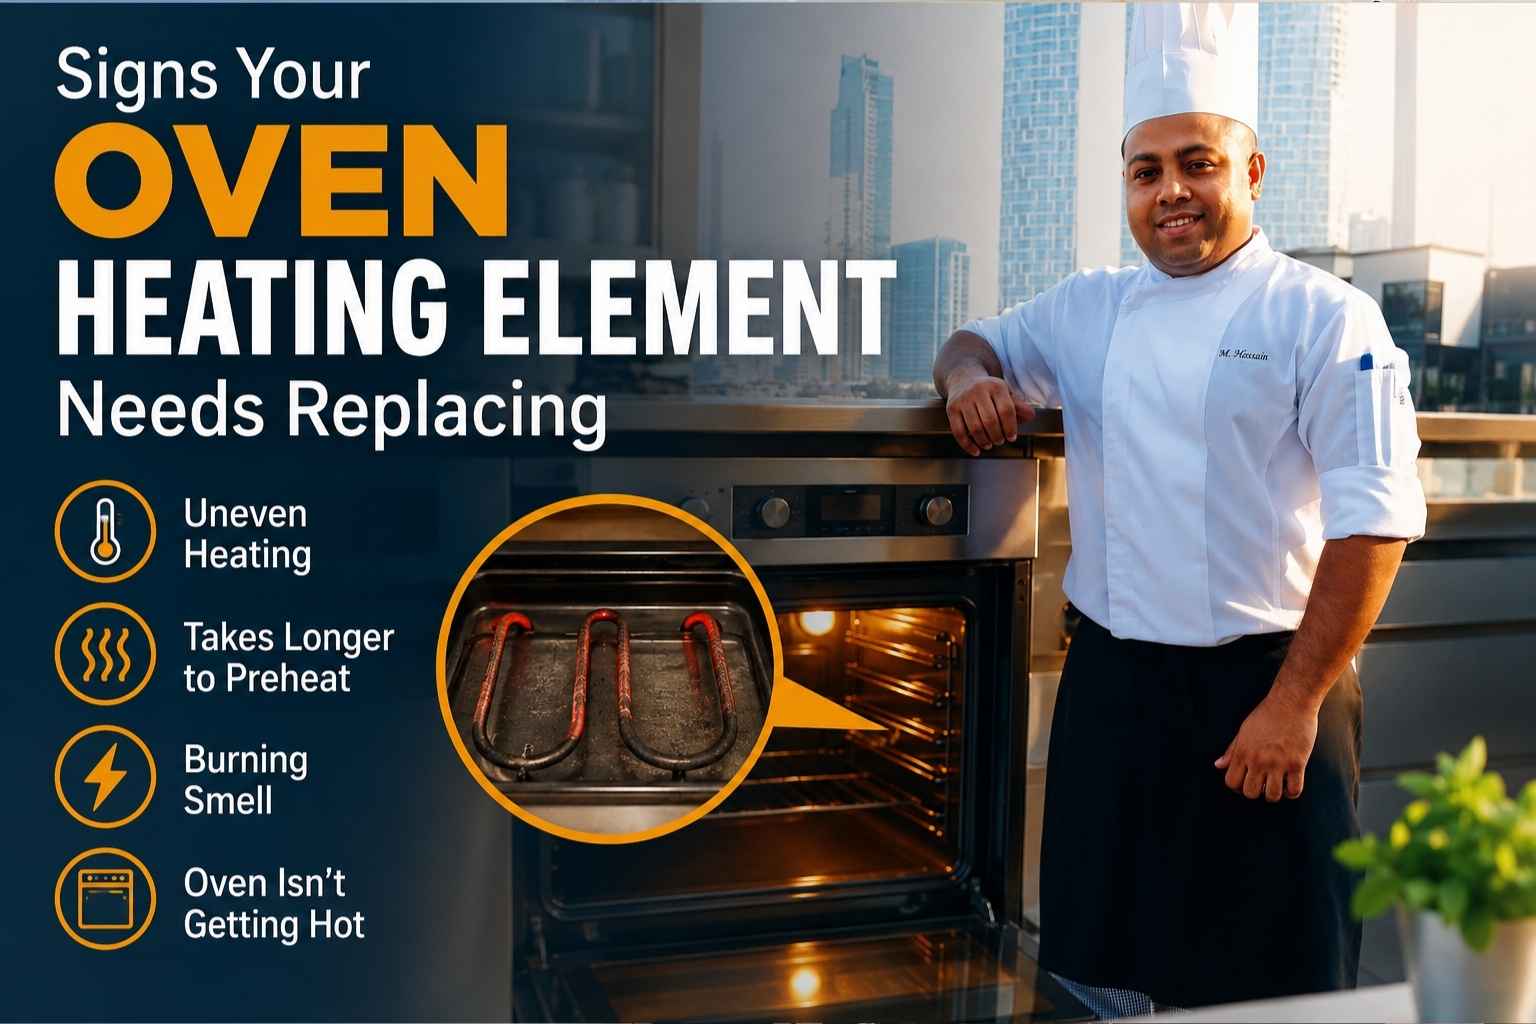
- A failing oven heating element shows up in seven clear ways: visible burn marks or blisters, uneven cooking, longer preheat times, tripped breakers, unusual smells, sparking, and food burning on one side.
- Most electric oven elements last 5–10 years; cooking habits and power surges can cut that lifespan in half (RepairClinic, 2024).
- A multimeter continuity test is the most reliable way to confirm element failure – no electrician required.
- Element replacement costs $20–$100 for parts and is DIY-safe if your oven has been unplugged for at least 30 minutes before you start.
- Gas ovens don’t have elements – they have igniters. The symptoms look similar, but the fix is different.
Ever pull out a cake that’s raw in the middle but burnt on the edges? I’ve been there, cursing my oven like it owes me money. That mess is often one of the clear signs your oven heating element needs replacing, and it trips up even good cooks. As a chef, I’ve fixed this exact problem in my own kitchen more than once. Stick with me, and I’ll show you how to spot the warning signs before dinner turns into a disaster.
What a Heating Element Actually Does
Your oven has two heating elements, and they do completely different jobs.
The bake element sits at the bottom of the oven cavity. It’s the one you use 90% of the time – it heats the oven from below and maintains temperature during cooking. When you set your oven to 375°F, the bake element cycles on and off to hold that temperature steady.
The broil element sits at the top. It runs at full blast, close heat, and is designed to brown, char, and caramelize the surface of food fast. Think of it as a built-in salamander grill.
When either one starts failing, your oven can’t regulate temperature properly. That means your roast chicken comes out raw in the middle, your cookies burn on the bottom while staying pale on top, or your oven takes 25 minutes to reach 350°F instead of 12. I’ve cooked in enough professional kitchens to recognize these patterns immediately. Most home cooks just adjust the temperature and wonder why their food never turns out right.
8 Warning Signs of a Failing Heating Element
Sign 1: Visible Damage – Blistering, Holes, or Dark Spots
Look at your bake element right now. If you see blistering, cracks, holes, or dark burn marks, that element is done. A healthy element should look uniform – consistent silver or dark grey metal with no breaks in the surface.
I found a blister on a restaurant oven’s bake element once. We kept using it for three days because service was non-stop. By day four, it had burned completely through and the oven went dead at 6pm on a Friday. Never again.
Sign 2: Uneven Cooking
Food that browns on one side and stays pale on the other is the clearest sign of a partially failed element. The element is still generating some heat, but it’s not heating evenly along its length.
A properly working bake element heats uniformly from one end to the other. When a section fails, that area of the oven floor loses its heat source – and the food directly above it cooks differently from the rest (GE Appliances, 2024).
Sign 3: Preheat Takes Longer Than Normal
Most residential ovens reach 350°F in 10–15 minutes. If yours is taking 20–30 minutes, the element isn’t generating full wattage. It may still work, but it’s degrading.
Time your preheat with a separate oven thermometer. If the oven says it’s ready but the thermometer reads 50–80°F below the set temperature, that confirms the element is underperforming.
Sign 4: Sparking or Arcing
This one is non-negotiable: if you see sparks, turn the oven off immediately. Sparking means the element has cracked and electricity is arcing through the gap. That’s a fire risk, full stop. Don’t finish the dish. Don’t try one more roast. Turn it off.
Sparking from an element is different from normal red-orange glow. It’s a sharp, bright flash, often accompanied by a popping sound. If you see it, the element needs replacing before the oven is used again (Whirlpool Support, 2024).
Sign 5: Unusual Burning Smell (Not Food)
Every oven smells a little when it’s new or hasn’t been used in a while – that’s residue burning off. But a sharp, acrid, electrical smell that shows up after the oven has been in regular use is different. It often smells like burning plastic or hot metal.
That smell can mean the element insulation is degrading, or that the element is arcing internally without visible sparks. Take it seriously.
Sign 6: The Element Doesn’t Glow Red
On a functioning electric oven, the bake element turns red-orange as it heats. If you set your oven to bake and the element stays dark – or only part of it glows – the element isn’t working.
You can check this by setting the oven to 400°F, waiting two minutes, and looking through the oven window. If the element is dark and cold, it has failed completely.
Sign 7: Food Burns on the Bottom
Burning on the bottom while the top stays undercooked points to a broil element problem, not a bake element problem. When the broil element cycles on unexpectedly during a bake cycle (a known failure mode), it pushes intense top-down heat while the bake element does its job – and the food at the bottom of the oven catches the reflected heat from both directions.
This symptom is easy to misread. I’ve seen home cooks lower their oven rack and switch pans for months before realizing the element was the issue.
Sign 8: Error Codes on Digital Displays
Modern ovens with digital controls show specific error codes for element failures. Whirlpool and Maytag ovens show F3 or F4. GE ovens show F3 or F8. Samsung models often display SE or -E- (Appliance Repair Pros, 2025).
Pull up your oven’s model number (usually inside the door frame) and search “[brand] oven error code [code you see]” – the manufacturer’s support page will tell you exactly which component it points to.
Sign 9: Circuit Breaker Trips When the Oven Runs
A failing element can develop an internal short – meaning electricity is taking an unintended path through the element’s casing. When this happens, the element draws more current than the circuit can handle, and the breaker trips.
If your oven keeps tripping the breaker but all your other appliances work fine, the element short is the most likely cause (Consumer Reports, 2023).
Diagnostic Reference Table
| Warning Sign | What It Means | Urgency | DIY or Pro? |
|---|---|---|---|
| Visible blistering or holes | Element casing has failed | High | DIY |
| Uneven cooking | Partial element failure | Medium | DIY |
| Slow preheat | Element losing wattage | Low | DIY |
| Sparking or arcing | Active electrical fault | High – stop using oven now | DIY after unplugging |
| Electrical burning smell | Insulation or internal fault | High | DIY or Pro |
| Element doesn’t glow | Complete element failure | High | DIY |
| Food burns on bottom | Broil element cycling incorrectly | Medium | DIY or Pro |
| Error codes (F3, F4, F8) | Control board flagging element fault | Medium | DIY if element confirmed |
| Breaker trips repeatedly | Internal short in element | High | Pro recommended |
How to Visually Inspect Your Heating Element Safely
You don’t need any tools for this part – just your eyes and common sense.
Step 1: Unplug the oven or turn off the breaker. Don’t skip this. There is no inspection that’s worth working around live current. Wait five minutes after switching off before you put your hands inside.
Step 2: Remove the oven racks. Set them aside so you have a clear view of the element.
Step 3: Look at the bake element at the bottom of the oven floor. Check the full length of the coil for cracks, burn marks, blistering spots, or any section that looks darker or more discolored than the rest.
Step 4: Check the broil element at the top of the oven cavity. Same inspection – look for breaks, dark patches, or sections where the metal looks swollen.
Step 5: Check the element terminals. These are the connection points where the element plugs into the back wall of the oven. Look for burn marks, discoloration, or corrosion around those connection points.
If you see any of the above, you’ve confirmed a visual failure. If everything looks fine but the oven still isn’t working right, move on to the continuity test.
The Continuity Test: How to Use a Multimeter (Non-Technical Version)
A multimeter (also called a volt-ohm meter) is a handheld tool that measures electrical properties. You can get one at any hardware store for $15–$25. You don’t need an expensive one for this job.
A continuity test checks whether electricity can flow through the element without interruption. If it can, the element is functional. If it can’t, the element is broken somewhere you can’t see.
What you need: Multimeter set to the continuity or resistance (Ω) setting, and your unplugged oven.
Step 1: Remove the element from the oven. There are usually 2–4 screws holding it to the back wall. Once unscrewed, the element slides forward and the two terminal prongs pull free from their sockets.
Step 2: Set your multimeter to continuity mode (it usually shows a speaker or wave icon) or to the lowest resistance setting.
Step 3: Touch one multimeter probe to each terminal prong on the element.
Step 4: Read the result. If the multimeter beeps (in continuity mode) or shows a resistance reading between 10 and 50 ohms, the element is functional. If it reads OL, 1, or shows no reading at all, the element has an open circuit – it’s broken and needs replacing.
That’s it. No electrical knowledge required beyond knowing which end of the probe to hold (RepairClinic, 2024).
Gas Oven vs. Electric Oven: Different Problem, Similar Symptoms
If you have a gas oven, you don’t have a heating element – and everything above about elements doesn’t apply to you.
Gas ovens use an igniter to light the gas burner. The igniter glows hot, and once it reaches a high enough temperature, it opens a valve that releases gas, which then catches flame.
When a gas oven igniter fails, you get the same symptoms: slow preheat, uneven temperature, or the oven won’t heat at all. You might also hear clicking with no flame, or smell gas without the burner lighting.
How to tell the difference: Open the oven when it’s off and look at the bottom. If you see a metal coil or rod attached to the back wall, it’s electric. If you see a burner tube with small holes (like a gas stovetop), it’s gas.
Igniter replacement on gas ovens is also a DIY-accessible repair, but the gas connection itself is not. If you smell gas and the igniter isn’t lighting, don’t try to fix it yourself – call your gas utility or a licensed technician. Gas leaks are not a self-repair situation.
How Long Do Heating Elements Last – and What Kills Them Early
A residential oven bake element typically lasts 5–10 years under normal use. Broil elements often last slightly longer because they’re used less frequently (Appliance Repair Pros, 2025).
Several things cut that lifespan short:
- Power surges — a strong voltage spike can burn out an element in a single event. A surge protector on your oven outlet (if accessible) is cheap insurance.
- Cleaning spills immediately on a hot element — pouring cold water or cleaning solution onto a hot element causes thermal shock. Let the oven cool before cleaning.
- Self-clean cycles — the self-clean function runs your oven at 900–1000°F. That’s punishing for the elements. Use the self-clean cycle no more than a few times per year (Consumer Reports, 2023).
- Foil on the oven floor — it traps heat directly against the element and can cause it to overheat and blister.
DIY Replacement: When It’s Safe and What It Costs
Element replacement is one of the more beginner-friendly appliance repairs. Here’s when it makes sense to do it yourself and what it will cost.
When DIY is appropriate:
- You’ve confirmed the element is the problem through visual inspection or continuity test
- Your oven is electric (not gas)
- You have 30–60 minutes and basic hand tools (screwdrivers)
- The element is the only fault – no wiring burns, no control board errors beyond element codes
What to buy: Search your oven’s model number on RepairClinic.com or PartSelect.com. Generic replacement elements run $20–$45. OEM (original manufacturer) parts run $50–$100. For ovens under 10 years old, I’d go OEM – it’s worth the extra $30 to get a part that fits exactly.
How long it takes: 20–40 minutes for most models. You’re unscrewing 2–4 screws, pulling the old element free from its terminals, sliding the new one in, and screwing it down.
The job is genuinely that straightforward for most standard ovens. Where it gets complicated is older models with non-standard wiring or element shapes. If the replacement part doesn’t match exactly, stop and call a technician.
When to Call a Professional – The Safety Red Lines
I’m all for DIY. I’ve replaced elements, igniters, oven door springs, and control board fuses myself. But there are situations where you call a pro, no questions asked.
Call a pro if:
- You see burn marks around the oven’s wiring harness (the bundles of wires running into the element terminals). That’s not an element problem – that’s a wiring problem, and running it could cause a fire.
- The breaker keeps tripping even after you replace the element. That means the short is somewhere else in the oven’s electrical system.
- You smell gas and the igniter won’t light (gas ovens only).
- The control board shows multiple error codes at once – that often means the control board itself is failing, not just the element.
- You open the oven and see charred or melted plastic anywhere inside.
The repair cost on any of those is higher, but the alternative is an oven fire. That’s not a trade-off worth making.
My Worst Element Failure Story (This One Hurt)
It was Thanksgiving 2019. I was cooking for 22 people at my sister-in-law’s house – not a commercial kitchen, a residential oven I’d never worked with before. Turkey goes in at 8am. By 10am, I notice the internal temperature is barely moving. By 11am, I’m crouched in front of the oven with a flashlight and I see it: a small, dark blister on the bake element about four inches from the left terminal.
The element was still running – partially. It was generating maybe 60% of its rated heat. Not enough for a 14-pound bird.
I pulled the turkey, finished it in a covered roasting pan on the stovetop using low, steady burner heat, and served it an hour late. It wasn’t my best work, but it was fully cooked and nobody went home hungry.
What I learned: always visually inspect an unfamiliar oven before you rely on it for something important. A 90-second check would have told me that element was degrading before I slid a turkey into it.
Frequently Asked Questions About Heating Element Failure
What are the signs that my oven heating element is bad?
The clearest signs are visible damage (blistering, cracks, or burn marks on the element surface), food that cooks unevenly, a glowing element that only lights up in spots, sparking during heating, and an electrical burning smell that isn’t coming from food residue. Any one of these warrants immediate inspection.
Can I still use my oven if the heating element is partially failing?
You can, but your food won’t cook correctly and you risk the element failing completely mid-cook. If you see visible damage or sparking, stop using the oven – those are active electrical faults. Slow preheat or uneven cooking are lower urgency but should still be addressed within a few weeks.
How much does oven heating element replacement cost?
Parts cost $20–$100 depending on whether you buy a generic or OEM element. If you do the replacement yourself, that’s your total cost. A repair technician will typically charge $150–$300 total, including labor (Appliance Repair Pros, 2025).
How do I test my oven heating element without a multimeter?
You can do a visual inspection (look for blistering, cracks, or dark spots) and a functional check (set the oven to bake at 400°F and check whether the element glows uniformly red-orange after 2 minutes). These two checks catch most failures. A multimeter continuity test is more reliable for early-stage failures that aren’t visible yet.
Why does my oven element keep burning out?
Repeated element failure usually points to one of three causes: frequent use of the self-clean cycle, power surges from your electrical supply, or food spills that weren’t cleaned before the oven was used again. A surge protector on the outlet and less frequent self-cleaning can extend element life significantly.
Is replacing an oven heating element dangerous?
Not if you unplug the oven first and wait at least 30 minutes before working inside it. The repair itself is mechanical – you’re screwing and unscrewing components and sliding terminal connectors in and out. There’s no cutting, splicing, or live wire work involved. If you’re uncomfortable with any step, stopping and calling a technician is always the right call.
What’s the difference between the bake element and the broil element?
The bake element is at the bottom of the oven and runs during all standard baking and roasting. The broil element is at the top and runs during broil cycles for high, direct heat. Both can fail independently. Bake element failure shows up as slow preheat and undercooked food. Broil element failure shows up as lack of browning or burning on the top of food.
How long does it take to replace an oven heating element?
For most standard electric oven models, the job takes 20–40 minutes. You’ll spend most of that time letting the oven cool down and locating the correct replacement part. The physical swap itself is typically under 15 minutes.
Key Takeaways
- Visual inspection takes 90 seconds and catches most element failures before they become emergencies.
- Eight signs indicate a failing element: visible damage, uneven cooking, slow preheat, sparking, electrical smell, element not glowing, bottom burning, repeated breaker trips.
- Sparking means stop immediately – that’s an active electrical fault and a fire risk.
- A $15–$25 multimeter continuity test confirms failure when visual inspection isn’t conclusive.
- Gas ovens don’t have elements – they have igniters. Symptoms overlap, but the fix is different.
- DIY replacement is safe and costs $20–$100 in parts. Most jobs take under an hour.
- Call a professional if you see burned wiring, the breaker keeps tripping after replacement, or multiple error codes appear simultaneously.
- Self-clean cycles, power surges, and cooking spills left on a hot element are the main causes of premature failure.

I’m Mossaraof, a trained chef and the founder of OvenInsights.com. I spent years cooking at Larrupin’ Cafe and in kitchens across Chicago and Seattle. Now I test kitchen gear for a living. I moved to North Acton, London, and I test every tool I write about. I use real meals and real heat. No brand deals. No shortcuts. I cover 12 kitchen types and hundreds of recipes. I believe this: the right tools matter as much as the recipe.




