
At A Glance
- Roast bone-in turkey breast at 375°F — it browns faster and stays juicier than lower temps.
- Dry brine with salt 24–48 hours ahead; it pulls more moisture into the meat than a wet brine does.
- Push herb butter under the skin before roasting — this does more for flavor and moisture than any amount of basting.
- Pull the breast at 160°F internal temp, not 165°F — carryover cooking finishes the job while it rests.
- Rest the meat 15–20 minutes before carving; skip this and you lose all the juice on the cutting board.
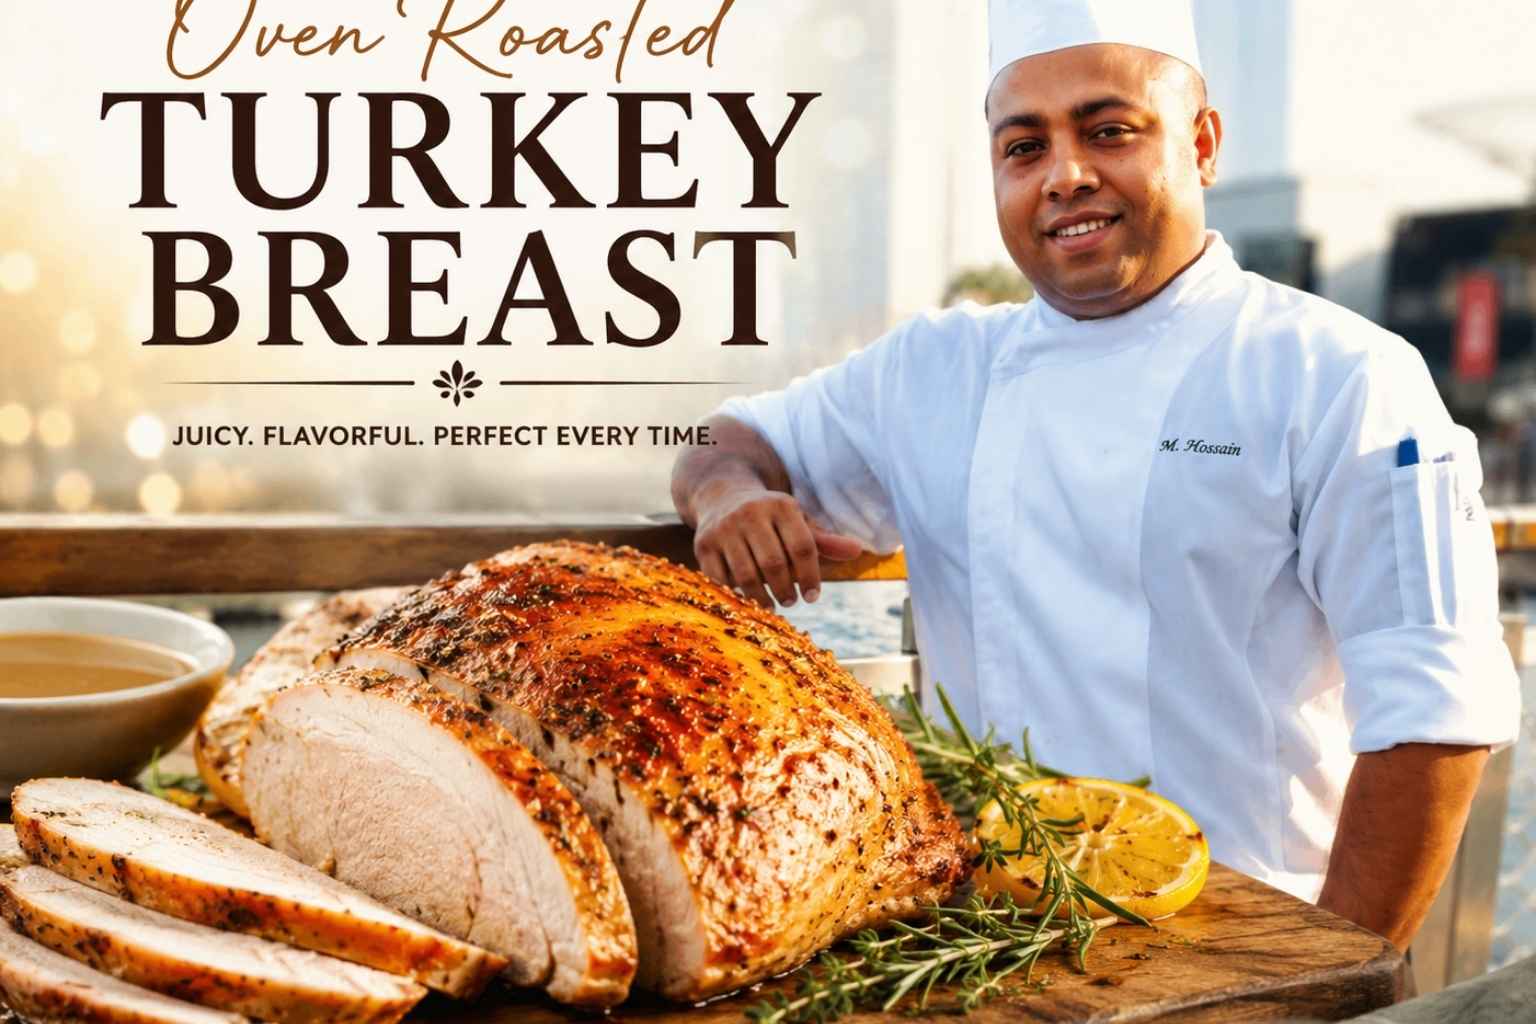
My oven roasted turkey breast recipe saved my very first Thanksgiving as a host. I panicked about cooking a whole bird, so I turned to a smaller cut instead, and it turned out juicy every time. After years of testing this in my own kitchen, I found the exact steps that keep the meat moist and the skin crisp. In this guide, I’ll walk you through my simple method, from the seasoning rub to the perfect internal temperature. Grab your roasting pan, and let’s make a turkey breast your whole table will love.
Quick-Reference Roasting Guide
| Factor | Bone-In Breast | Boneless Breast |
|---|---|---|
| Best oven temp | 375°F | 375°F |
| Cook time per pound | 15–18 min/lb | 20–22 min/lb |
| Target pull temp | 160°F | 160°F |
| Safe serving temp | 165°F (after rest) | 165°F (after rest) |
| Typical weight range | 5–8 lbs | 2–4 lbs |
| Moisture level | Higher | Lower (without brining) |
| Skin browning | Better | Good (if skin-on) |
(USDA Food Safety and Inspection Service, 2024)
Why Turkey Breast Beats Whole Turkey for Most Cooks
Turkey breast is the right call for weeknight dinners and gatherings under eight people. A whole bird is a logistical exercise. A turkey breast is a simple roast.
I’ve cooked both hundreds of times in professional kitchens and at home. The honest answer? Most diners prefer breast meat anyway. You skip the uneven cooking problem that comes with a whole bird — where the legs need more time than the breast, and the breast almost always dries out before the thighs are done.
A bone-in turkey breast runs 5–8 lbs and feeds 4–6 people with leftovers. A boneless one runs 2–4 lbs and feeds 2–4. Both roast in under two hours. Compare that to a 15-lb whole turkey at 3.5–4 hours, and the choice is obvious.
Flavor: White meat from the breast has a clean, mild flavor that takes on seasoning and fat well. The skin, when done right, crisps up and carries most of the aromatic punch.
Texture: Properly cooked turkey breast should be firm but not tight, with juice that runs clear when you carve it. If it shreds like a rope, it was overcooked.
Bone-In vs. Boneless Turkey Breast: Which Should You Buy?
Buy bone-in whenever you can. The bone conducts heat into the center of the meat, which speeds cooking and improves even doneness. The bone also contributes collagen to the surrounding meat as it roasts, which adds moisture and body. You also get a better-looking roast with real presentation value.
Buy boneless if you’re cooking for two, need shorter cooking time, or want easy slicing with no carving skill required. The downside is that boneless breast dries out faster — the bone acts as a buffer against heat. A good brine is less optional here than it is with bone-in.
One note on quality: fresh beats frozen, and a heritage breed breast (like Broad-Breasted White or Bronze) has noticeably more flavor than a standard commercial bird. If your butcher carries them, they’re worth the extra cost (National Turkey Federation, 2023).
The Oven Temperature Debate: 325°F vs. 350°F vs. 375°F
This is the question I get asked most. Here’s my definitive answer: roast at 375°F.
Here’s why the alternatives fall short:
325°F is the old standard. It’s slow, which sounds gentle, but slow roasting at low heat pushes turkey breast through the temperature range where it loses moisture the most — roughly 140°F to 165°F — over a long time. That extended dwell time dries the meat. You also get pale skin that never fully crisps.
350°F is a compromise that doesn’t fully commit to either advantage. Slightly better browning than 325°F, slightly better moisture retention, but no strong argument for it over 375°F.
375°F moves the breast through the danger zone faster, browns the skin properly, and gives you a cleaner result. America’s Test Kitchen tested this across multiple roasts and found higher finishing temps produced better browning without meaningful moisture loss when the bird was properly salted in advance (America’s Test Kitchen, 2022).
Some chefs use a 450°F blast to start, then drop to 325°F. I’ve done this. It works. But it adds complexity without a clear payoff over a steady 375°F. Keep it simple.
Dry Brine vs. Wet Brine vs. No Brine
Dry brining wins. This is not a close call anymore.
Dry Brine (My Method)
Rub the breast all over — under the skin included — with kosher salt at 1 teaspoon per pound of meat. Set it uncovered on a rack in the fridge for 24–48 hours. The salt draws moisture out initially, then pulls it back in with dissolved proteins. The surface dries out, which is exactly what you want — dry skin browns better.
J. Kenji López-Alt tested dry brining against wet brining across dozens of variables and found dry brining consistently produced better skin texture and comparable interior moisture (The Food Lab, J. Kenji López-Alt, 2015).
Wet Brine
Submerging the breast in a salt-and-water solution (about 1 cup kosher salt per gallon of water) for 12–24 hours does add moisture — but it’s water, not meat juices. The breast can turn slightly watery in texture. You also end up with wet skin that’s harder to brown. It’s not a bad method, but dry brining is better.
No Brine
Skip brining entirely and you’re relying on technique alone. Achievable, but your margin for error is smaller. If your thermometer is off by 5°F or you pull it late, you’ll feel it in the finished dish. At minimum, season the breast generously the night before and leave it uncovered in the fridge.
Herb Butter Under the Skin: The Single Most Effective Step
Basting is theater. It adds almost nothing to a roasting turkey breast because the skin is waterproof while intact — liquids roll off and evaporate (Serious Eats, 2021). What actually works is getting fat and flavor under the skin and into direct contact with the meat.
The Herb Butter Formula
For a 6-lb bone-in breast:
- 6 tablespoons unsalted butter, softened (not melted)
- 2 cloves garlic, minced to a paste
- 1 tablespoon fresh thyme, chopped
- 1 tablespoon fresh rosemary, chopped
- 1 teaspoon lemon zest
- 1/2 teaspoon black pepper
- 1/2 teaspoon kosher salt (reduce if dry-brined)
Mix everything together. Gently loosen the skin from the meat with your fingers — don’t tear it. Push the butter mixture under in an even layer across the entire breast. Rub the outside of the skin with a thin coat of olive oil or the remaining butter.
This fat layer bastes the meat from the inside as it melts during roasting. No spoon required.
Step-by-Step Roasting Method
Step 1: Prep the Breast (Day Before)
Dry brine the breast as described above. If you skipped brining, at least season it 1 hour before roasting and let it sit at room temperature. A cold breast from the fridge takes 15–20 minutes longer to cook and gives you uneven doneness.
Step 2: Apply the Herb Butter
Let the butter soften fully before mixing. Apply it under and over the skin as described above. Let the prepped breast sit at room temperature for 30–45 minutes before it goes into the oven.
Step 3: Set Up Your Pan
Place a rack inside a roasting pan. The rack keeps the breast off the pan floor so heat circulates underneath and the drippings collect below for gravy. If you don’t have a rack, a bed of roughly cut onion, celery, and carrot works — it also adds flavor to the drippings.
Step 4: Roast at 375°F — Tented First, Then Open
Preheat your oven to 375°F. Place the breast skin-side up on the rack.
- Tent loosely with foil for the first 45 minutes. The foil traps steam and slows skin browning while the interior cooks. Don’t press the foil down — keep it loose.
- Remove the foil for the last 30–40 minutes. This is when the skin browns and crisps. Watch it. If it’s getting too dark, reduce the heat to 350°F.
Step 5: Check Temp, Not Time
Time estimates are a guide, not a rule. Every oven is different. Use a instant-read thermometer. Insert it into the thickest part of the breast, not touching bone. When it reads 160°F, pull it.
The breast will carry over to 165°F (the USDA safe minimum) during the rest period (USDA Food Safety and Inspection Service, 2024). If you wait until 165°F on the oven, it’ll hit 170°F+ by the time you carve it.
Step 6: Rest for 15–20 Minutes
Tent loosely with foil again and leave it alone. Do not carve early. The rest period allows the muscle fibers to relax and reabsorb their juices. Cut into it too soon and you’ll watch all that juice run out onto the board.
How to Use a Meat Thermometer Correctly
This is where most home cooks go wrong. The thermometer is doing nothing if it’s in the wrong spot.
Where to insert it: The thickest part of the breast, horizontally from the side — not straight down through the top. You want the tip centered in the mass of meat, as far from the bone and from the pan as possible.
What temp to look for: Pull at 160°F. The center will continue cooking to 165°F while the breast rests. If you’re using a leave-in probe thermometer, set the alert at 158°F — by the time you get the bird out of the oven, you’ll be at 160°F.
Calibrate your thermometer. I do this before every major roast. Fill a glass with ice and water, insert the probe. It should read 32°F. If it reads 35°F, add 3°F to your target temps. An uncalibrated thermometer is the most common cause of overcooked turkey breast.
Why Resting Is Non-Negotiable
Resting isn’t just a nice step — it’s a structural requirement. When meat is in a hot oven, its muscle fibers contract and push moisture toward the center. If you cut it immediately, that moisture has nowhere to go except the cutting board.
Resting for 15–20 minutes gives the fibers time to relax and redistribute the moisture back through the meat. The result is a juicier slice on the plate, not a puddle on the board.
I learned this the hard way early in my career when a busy dinner service had me carving a bird 5 minutes out of the oven. The cutting board looked like a soup bowl. The guests got dry slices. I never cut a roast early again.
Common Turkey Breast Mistakes and How to Fix Them
Mistake: Roasting straight from the fridge
A cold breast hits the oven unevenly. The outside layers overshoot before the center catches up. Always let the breast sit at room temperature for 30–45 minutes before roasting.
Mistake: Skipping the thermometer
Cooking by time alone is guessing. Turkey breasts vary in shape, density, and starting temperature. A probe thermometer is a $15 tool that eliminates guessing entirely. Buy one, use it every time.
Mistake: Overcooking
Most dry turkey breast comes from cooking to 165°F in the oven rather than 160°F. The carryover window is real. Pull it at 160°F and let the rest do the work.
Mistake: Basting constantly
Every time you open the oven, you drop the temperature by 25–50°F and add 5–10 minutes to the cook time. Basting also does very little for moisture (Serious Eats, 2021). Set it, tent it, and trust the herb butter.
Mistake: Not drying the skin before roasting
Wet skin steams instead of crisping. Pat the skin completely dry before applying oil or butter. If you dry-brined and left it uncovered in the fridge, this is already handled.
Pan Drippings and Quick Pan Gravy
The drippings in the bottom of the roasting pan are some of the best cooking liquid you’ll ever work with. Don’t waste them.
Quick pan gravy method:
- Pour the drippings into a fat separator or measuring cup. Skim off most of the fat (keep 3 tablespoons).
- Heat a saucepan over medium heat. Add the reserved fat.
- Whisk in 3 tablespoons all-purpose flour and cook, stirring, for 1–2 minutes until it smells nutty.
- Pour in the defatted drippings plus enough chicken or turkey stock to make 2 cups total liquid.
- Whisk constantly over medium heat until thickened, about 5–7 minutes.
- Season with salt, black pepper, and a splash of white wine or lemon juice.
That’s it. No packets, no shortcuts. The drippings carry all the flavor from the herbs and the rendered skin fat — the gravy practically makes itself.
Storage, Reheating, and Leftover Ideas
Storage: Carved turkey breast keeps in an airtight container in the fridge for 3–4 days (USDA Food Safety and Inspection Service, 2024). Store slices in the cooking juices or a splash of chicken stock to keep them from drying out.
Reheating: The microwave is the fastest way to dry out leftover turkey. Instead, place slices in a covered baking dish with a splash of broth, and warm at 325°F for 15–20 minutes. Covered, low heat, with moisture — that’s the method.
Leftover ideas:
- Turkey sandwiches: Sliced thin on toasted sourdough with cranberry mayo and arugula.
- Turkey soup: Simmer the carcass (if bone-in) or just the drippings with carrots, onion, celery, and noodles.
- Turkey sliders: Pull the meat slightly, mix with a spoon of gravy, pile onto small potato rolls.
- Turkey grain bowl: Sliced cold over farro with roasted vegetables and a mustard vinaigrette.
My Personal Turkey Breast Routine
I’ll tell you exactly what I do, and why.
I buy a bone-in, skin-on breast from a local butcher or a reputable grocery source — never frozen if I can help it. Weight: 6–7 lbs for four people with guaranteed leftovers.
48 hours before roasting: I dry brine with 1 teaspoon kosher salt per pound, under and over the skin, then place it uncovered on a rack in the fridge.
1 hour before roasting: I mix the herb butter — butter, garlic, thyme, rosemary, lemon zest, pepper. I push it under the skin and rub oil on the outside. Then I leave the breast on the counter to come up toward room temperature.
At roasting time: 375°F oven, breast on a rack, loosely tented with foil for the first 45 minutes. I set a leave-in probe thermometer at 158°F. I don’t open the oven until the probe goes off. Then I pull the foil and let the skin brown for the last 25–30 minutes.
At 160°F: Out of the oven, foil tent back on, 18 minutes rest. Non-negotiable.
Gravy: I start it while the breast rests, using the drippings in the pan.
Carving: I slice against the grain, slightly thick — about 1/4 inch. Too thin and it dries out fast on the plate.
That’s the routine. It works every time. I haven’t changed it in years because I’ve had no reason to.
Frequently Asked Questions About Oven Roasted Turkey Breast
How long do you roast turkey breast per pound?
For bone-in turkey breast at 375°F, roast for 15–18 minutes per pound. A 6-lb breast takes roughly 90–108 minutes. For boneless breast, plan for 20–22 minutes per pound because there’s no bone to conduct heat. Always verify with a thermometer — time is an estimate, not a guarantee.
Should you roast turkey breast covered or uncovered?
Both, at different stages. Cover loosely with foil for the first 45 minutes to slow browning and let the interior cook evenly. Remove the foil for the final 30–40 minutes so the skin crisps and browns. If the skin browns too fast before the meat is done, cover it again and drop the oven to 350°F.
Can you roast turkey breast from frozen?
Yes, but it’s not ideal. According to USDA guidelines, frozen turkey can be roasted safely — it just takes roughly 50% longer than a fully thawed breast (USDA Food Safety and Inspection Service, 2024). You’ll also get uneven cooking and poor skin texture. If time allows, thaw overnight in the fridge (allow 24 hours per 5 lbs of meat).
How do you keep turkey breast from drying out?
Dry brine 24–48 hours ahead. Push herb butter under the skin before roasting. Pull the breast at 160°F internal temp, not 165°F. Rest it for 15–20 minutes before carving. Every one of those steps matters. Skip any of them and you increase the risk of dry meat.
What do you do if the skin is browning too fast?
Lay a sheet of foil loosely over the skin and reduce oven temperature to 350°F. Don’t press the foil down — just drape it. This slows surface browning without trapping steam against the skin. Check the internal temp at the same intervals.
What is the safe internal temperature for turkey breast?
The USDA sets the minimum safe temperature at 165°F (USDA Food Safety and Inspection Service, 2024). In practice, pull the breast at 160°F and let carryover cooking during the rest period bring it to 165°F. This gives you a safer result with better texture than waiting for 165°F in the oven.
How far ahead can you prep turkey breast for roasting?
You can apply the dry brine up to 48 hours ahead and leave the breast uncovered in the fridge on a rack. You can mix and apply the herb butter at the same time. The day of roasting, pull it from the fridge 30–45 minutes before it goes in the oven. Anything beyond 48 hours of salting can start to affect texture.
Can you roast two turkey breasts at the same time?
Yes. Place them on the same rack with at least 2 inches of space between them for air circulation. Add 20–30 minutes to the total roasting time because the oven has more thermal mass to heat. Check each breast separately with the thermometer — they may finish at different times depending on their size.
Key Takeaways
- Roast bone-in turkey breast at 375°F for the best combination of browning and moisture.
- Dry brine with kosher salt (1 tsp per pound) 24–48 hours ahead — it’s the single most effective prep step.
- Push herb butter under the skin, not over it. That’s where it actually matters.
- Pull the breast at 160°F internal temp and let carryover cooking finish the job during a 15–20 minute rest.
- Use a calibrated instant-read or leave-in thermometer every single time. Time estimates are not a substitute.
- The pan drippings are the foundation of a fast, excellent gravy — don’t pour them out.
- Leftovers keep for 3–4 days refrigerated and reheat best at 325°F in a covered dish with a splash of stock.

I’m Mossaraof, a trained chef and the founder of OvenInsights.com. I spent years cooking at Larrupin’ Cafe and in kitchens across Chicago and Seattle. Now I test kitchen gear for a living. I moved to North Acton, London, and I test every tool I write about. I use real meals and real heat. No brand deals. No shortcuts. I cover 12 kitchen types and hundreds of recipes. I believe this: the right tools matter as much as the recipe.




