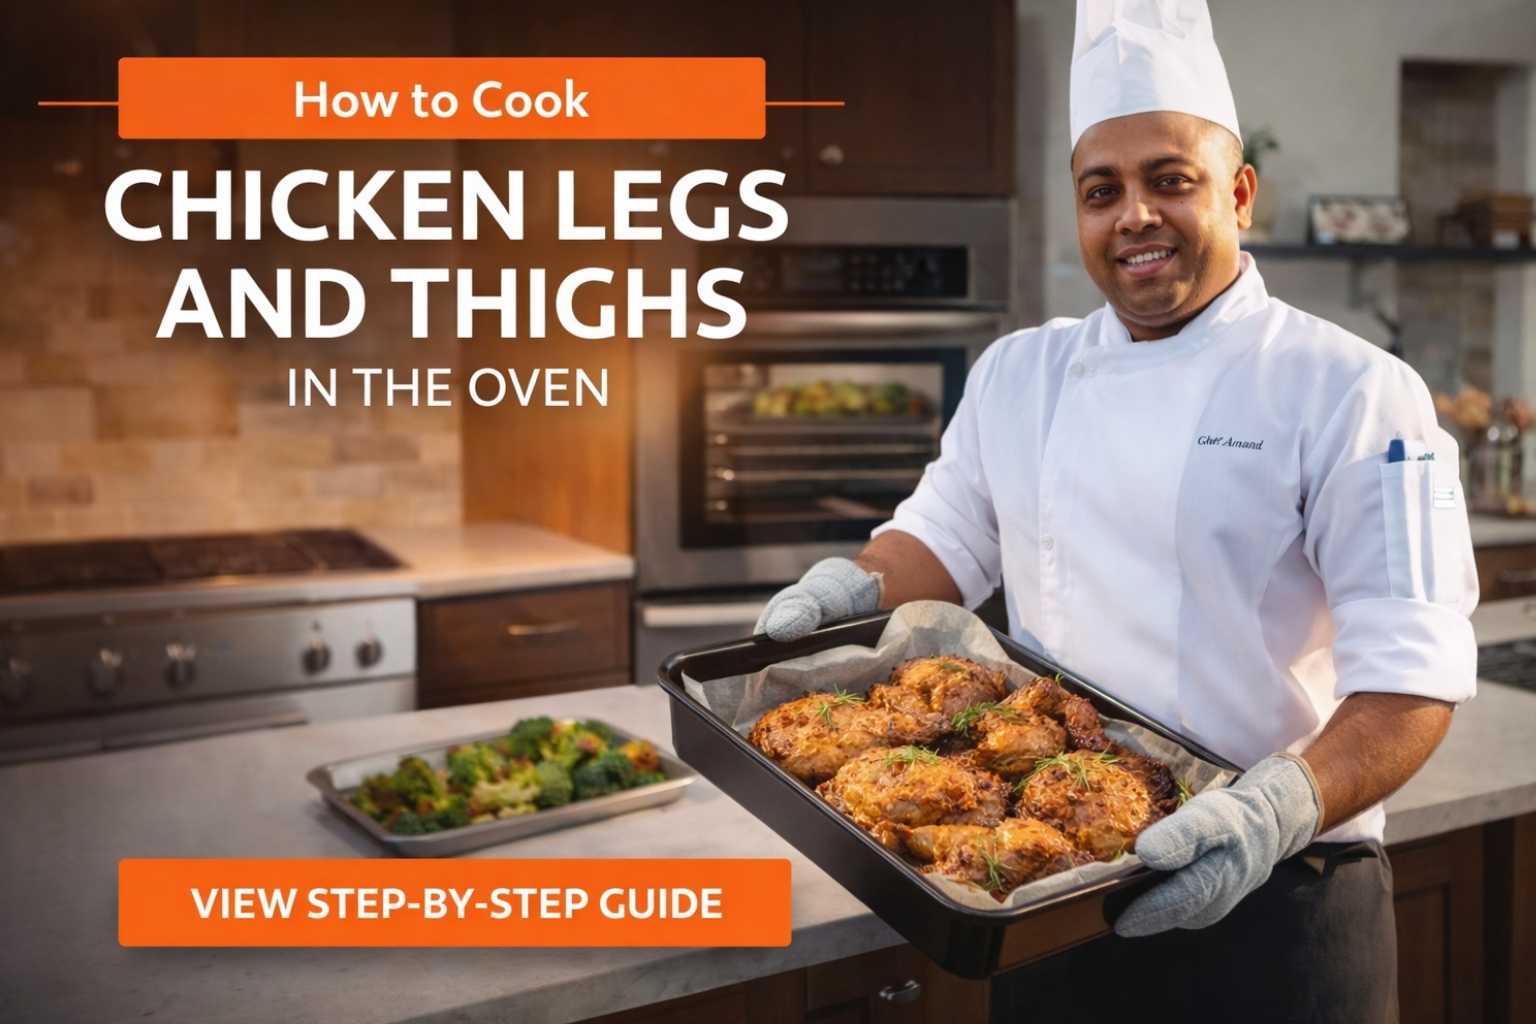
Hey, I’m Mossaraof — a professional cook and food blogger.
We all want those dark-meat cuts to have a deep, golden-brown tan while the meat inside stays incredibly succulent and falls right off the bone. I will show you how to cook chicken legs and thighs in the oven so you get a perfect, restaurant-quality snap on the skin and a rich, savory flavor that only bone-in poultry can provide.
My years in a busy Chicago kitchen taught me that starting with a high-heat roast is the true secret to rendering the fat under the skin, creating a shattered-glass crunch while keeping the heart of the meat dripping with juice. Use my Ultimate Guide to Master Your Oven to find the best rack position for even heat circulation that browns the thighs and legs perfectly without drying out the edges. Let’s grab your favorite roasting pan and start this hearty, delicious meal together right now!
Choosing the Right Chicken — Legs, Thighs, or Both?
Some nights I just want to roast drumsticks and eat with my hands. Other days, I crave the richness of thighs with a buttery glaze. Honestly? I usually go for both.
I learned early on that not all cuts roast the same. Chicken thighs and legs might sit right next to each other in the grocery aisle, but in the oven, they play by slightly different rules.
What’s the Real Difference?
Here’s how I explain it when someone’s staring blankly at a pack of chicken in the fridge:
- Chicken thighs
- Dark meat
- Higher fat
- Rich flavor
- Great for juicy, slow-roasted meals
- Chicken legs (drumsticks)
- Still dark meat, but a bit leaner
- Faster to cook
- Easier to handle (especially for kids)
- Perfect for finger-food dinners
When I’ve got guests or family coming over, I’ll roast both. Everyone picks their favorite, and I avoid the “I wanted thighs!” debate at the table.
Skin-On or Skinless?
I’ll be honest — I’m a skin-on kind of chef. The way it crisps in a hot oven is just unbeatable. That said, when I’m meal-prepping or trying to keep things a little lighter, I go skinless and lean into seasoning.
Skin-on:
- Crisps beautifully at 400°F
- Locks in moisture
- Better for high-heat roasting
Skinless:
- Lower fat
- Works well for saucy dishes or covered bakes
- Easier cleanup if you’re using a toaster oven
Fresh vs Frozen — What I’ve Learned in U.S. Kitchens
I’ve cooked chicken legs and thighs both ways — fresh from a local butcher and straight from the freezer aisle at Target. If you have time, fresh is always easier to control in terms of cook time and texture. But frozen? Totally doable.
When using frozen chicken legs and thighs:
- Thaw overnight in the fridge for best results
- If cooking from frozen, bump up the time by 50% and keep a close eye
- Always use a meat thermometer — never guess
In humid Florida, I’ve had frozen thighs thaw too fast on the counter. In icy Chicago, I once tried to roast half-thawed drumsticks… they cooked unevenly and tasted bland.
So now I just thaw them in the fridge. Easy. Reliable.
The Best Oven Temperature for Chicken Legs and Thighs
I’ve roasted chicken legs and thighs at every temp you can imagine — from a slow 325°F during a lazy Sunday to a fast 425°F when I was running late and hungry. Each one hits different.
There’s no one-size-fits-all answer here. It really depends on what you’re going for — crispy skin, tender meat, or something in between.
Here’s what’s worked in my U.S. kitchens (and what hasn’t).
When I Use 350°F (and When I Don’t)
I only go 350°F when I’ve got time. Like… real time. This low-and-slow method keeps the meat super juicy, but don’t expect the skin to crisp much unless you hit it with the broiler at the end.
- Pros: Tender, evenly cooked meat
- Cons: Takes longer, skin stays soft
- Timing: About 45–55 minutes for thighs, 40–50 for drumsticks
On rainy Midwest afternoons when I’m not in a rush, I’ll throw everything in the oven at 350°F with potatoes and call it comfort food.
Why 375°F Is My “Goldilocks” Zone
This is my go-to for a balance of crispy outside and juicy inside. The skin gets golden, the meat cooks through evenly, and I don’t feel like I’m babysitting the oven.
- Pros: Crisp edges, even cook
- Cons: Still not super-fast
- Timing: 40–50 minutes for thighs, 35–45 for legs
If you’re asking how to bake chicken legs and thighs in the oven for weekly meal prep, 375°F is the temp I recommend.
When I Want Crisp — I Crank It to 400°F
Hot and fast works when you want that chicken skin to bubble and blister. I usually do this with skin-on thighs or when cooking a smaller batch.
- Pros: Crispy skin without needing the broiler
- Cons: Easier to overcook if you’re distracted
- Timing: 35–45 mins for thighs, 30–40 for legs
Back when I was cooking in a dry Arizona kitchen, 400°F was my default. I didn’t need to dry the chicken too long — the climate helped, and the skin crisped up perfectly.
425°F — Only If I’m Watching Like a Hawk
Look, I’ve burned chicken thighs at 425°F more than once. But when I’ve got less than 30 minutes and I’m hungry now, I crank the heat and stay close.
- Pros: Fastest option
- Cons: Can dry out if you forget it’s in there
- Timing: 30–40 mins for thighs, 25–35 for legs
If you’re trying to figure out how long to cook chicken legs and thighs in oven at 400 vs 425 — go 400 if you want more wiggle room. 425 is a sprint.
Quick Tip on Preheating
I used to throw the chicken in while the oven was still warming up. Mistake. Preheating fully helps the skin render fat right away and makes timing way more predictable.
Always preheat — even with a toaster oven.
How Long to Cook Chicken Legs and Thighs in the Oven — My Timing Chart
I used to Google this almost every week: “how long to cook chicken legs and thighs in oven at 350?”
Then I started keeping notes — like a mini roast log taped to my fridge.
After dozens of batches across different ovens — gas, electric, even toaster ovens — I’ve figured out what works best for bone-in, skin-on legs and thighs. And what doesn’t.
My Real-Life Timing Chart (Conventional Oven)
| Oven Temp | Chicken Thighs | Chicken Legs (Drumsticks) |
|---|---|---|
| 350°F | 45–55 mins | 40–50 mins |
| 375°F | 40–50 mins | 35–45 mins |
| 400°F | 35–45 mins | 30–40 mins |
| 425°F | 30–40 mins | 25–35 mins |
I always check at the low end of the range. Because nothing hurts more than slicing into a gorgeous thigh… and seeing pink.
A Word About Convection Ovens
In my cousin’s Phoenix kitchen (where the convection oven actually works), I lower the temperature by 25°F across the board. The air circulates faster, so the skin crisps quicker and the inside cooks more evenly.
If you’re baking chicken legs and thighs in a convection oven:
- Set it to 375°F instead of 400°F
- Start checking for doneness 5–10 minutes earlier
The first time I forgot to adjust for convection, I ended up with overcooked drumsticks that tasted like jerky. Never again.
What About Toaster Ovens?
Toaster ovens are my lazy-day secret weapon. I use them when I don’t want to heat the whole kitchen — especially in Florida summers.
Here’s what works for me:
- Temp: 375–400°F
- Time: 30–40 mins
- Always line with foil and rotate halfway through
- Keep space between the chicken pieces — toaster ovens crowd fast
I’ve made dinner for two using just the toaster oven and a quarter sheet pan. Not bad for something that sits next to my coffee maker.
Internal Temperature: My Golden Rule
If you only take one thing from this entire article, let it be this:
Use a meat thermometer. Always.
The USDA says 165°F is safe for chicken, but for thighs and legs, I usually go to 175–180°F. It gives the collagen time to break down and makes the meat more tender — not dry, just fall-off-the-bone good.
Where I Stick the Thermometer:
- Thickest part of the meat
- Avoid touching bone (it’ll read hotter than it is)
- Pull it out of the oven 5°F before your target — it rises while resting
Tools I Use When Cooking Chicken Legs and Thighs in the Oven
I used to think I needed fancy gadgets to cook good chicken. Turns out, I just needed the right ones — and a few that could survive a Midwestern winter and a Florida thunderstorm.
Let me walk you through the gear I actually use in my U.S. kitchen — from sheet pans to thermometers — and what makes a difference when baking chicken thighs and drumsticks.
Pans That Actually Work (Not Just Look Pretty)
I’ve tried it all. The flimsy foil pans from the dollar store. The vintage glass bakeware that cracked from thermal shock (RIP). Here’s what stuck around:
- Cast Iron Skillet (Lodge or Staub)
- Great heat retention
- Cracks the skin just right at 400°F
- Heavy, but worth the arm workout
- Wire Rack + Sheet Pan Combo
- Air circulates around the chicken
- Skin gets crispy on all sides
- My go-to when making dinner for a crowd
- Ceramic Bakeware (Le Creuset, Emile Henry)
- Holds moisture — great for skinless thighs
- Doesn’t give that crisp factor, but makes for a nice serving dish
- I use this when I want something that looks fancy but feels easy
I skip glass when roasting skin-on chicken. It just doesn’t brown as well. And aluminum foil pans warp under high heat — ask me how I know (spoiler: the sound was terrifying).
Thermometers: My Non-Negotiable
I don’t cook chicken without one. Period. In fact, once I started using a thermometer regularly, I stopped asking, “how long to bake chicken legs and thighs in oven at 350?” and started asking “what temp are they at now?”
- ThermoPro digital thermometer
- Instant read
- Budget-friendly
- Durable — I’ve dropped it on tile and it survived
- MEATER (for wireless cooks)
- If I’m feeling techy or roasting outside
- Sends temp alerts to my phone
- Fun, but not essential
Don’t overthink it. Just get one that works and use it every time.
Foil vs. Parchment — When I Use Each
One day I used parchment paper in a 425°F oven and nearly started a kitchen bonfire. Lesson learned.
- Foil
- Handles high heat
- Helps with browning
- Easier cleanup
- Parchment
- Best at lower temps (under 420°F)
- Great for skinless chicken
- Keeps things from sticking, especially in ceramic dishes
I keep both in the drawer. It depends on my mood — and how lazy I feel about scrubbing later.
Step-by-Step: How I Actually Bake Chicken Legs and Thighs in the Oven
This is how I do it when I’ve got a pack of chicken, a semi-clean kitchen, and just enough energy left to make something good.
People always ask me for a “recipe” — but honestly, it’s more of a rhythm. Once you’ve done this a few times, your hands kinda remember what to do. Here’s the method I fall back on, step by step, whether it’s Tuesday night in Florida or Sunday meal prep in Chicago.
Step 1: Pat Everything Dry (Yes, It Matters)
I used to skip this. Big mistake. If your chicken is wet, the skin won’t crisp — it’ll steam.
- Grab paper towels and blot each piece
- Don’t rub — just press
- If you have time, leave the chicken uncovered in the fridge for an hour to air-dry
I’ve even done this step in a rush using paper napkins. Messy, but it still helped.
Step 2: Season Like You Mean It
I’ve gone through fancy rubs, bottled marinades, and all the trendy spice blends. But this is my go-to when I want flavor that works every time:
Basic Oven-Baked Chicken Rub:
- 1 tsp smoked paprika
- 1 tsp garlic powder
- 1 tsp onion powder
- ¾ tsp kosher salt
- ½ tsp black pepper
- Optional: pinch of cayenne or a bit of brown sugar for depth
Toss the chicken in a big bowl. Add a splash of oil (I use avocado or olive oil spray), and then rub the seasoning all over.
If I’m using skinless thighs, I marinate them for at least 30 minutes. Otherwise, I season and bake right away.
Step 3: Preheat the Oven (Don’t Skip This)
I know — it’s tempting to just throw the pan in while the oven warms up. I’ve done it on lazy nights. But when you’re aiming for crispy skin or an even bake, preheating is key.
- I set mine to 400°F most nights
- 375°F if I’m also roasting veggies
- If I’m using convection, I lower by 25°F
Toaster ovens? Always let them run hot for at least 10 minutes before adding the chicken. They lie about being “ready” — trust me.
Step 4: Arrange the Chicken on a Rack or Pan
I like using a wire rack on a sheet pan. It lets the heat circulate underneath and helps render the fat from the skin.
But if I’m just using a regular pan, I make sure to:
- Leave space between each piece (no crowding)
- Place skin-side up
- Avoid stacking or overlapping
Sometimes I even tilt a drumstick up against the edge of the pan just to keep airflow going. It looks weird — but it works.
Step 5: Bake, Don’t Peek Too Often
Set your timer based on your oven temp (from Part 4’s timing chart). But don’t be afraid to check early, especially if your oven runs hot.
- I start checking at 30 mins if I’m at 400°F
- I use a thermometer at the 35-minute mark
- If the skin needs help crisping, I’ll turn on the broiler for 2–3 minutes
The smell usually tells me more than the timer. Once that garlicky, crispy-fat scent hits the kitchen… I know I’m close.
Step 6: Rest Before Serving
Let the chicken sit for 5–10 minutes on the counter. I usually just tent it with foil or leave it on the rack.
Why? Because:
- The juices redistribute
- The temp rises a few more degrees
- The skin firms up without getting soggy
I’ve rushed this before and regretted it. One time I cut into a drumstick too fast — juice ran everywhere, and the meat dried out on the plate.
How I Make Crispy Skin on Chicken Thighs and Legs — Without Frying
I’ve had soggy skin. Rubbery skin. Weirdly chewy skin. And yeah — the occasional over-broiled, borderline-charred disaster. But I finally cracked the crispy code. No deep fryer required.
Getting crisp skin in the oven is part science, part patience. And the truth? It starts before the chicken even hits the pan.
Dry Is Everything — Like, Bone-Dry
Moisture is the enemy of crisp. I know it sounds dramatic, but seriously — you can’t get crunchy skin with wet chicken.
Here’s what I do:
- Pat with paper towels like it owes you money
- If I have time, I air-dry it uncovered in the fridge for a few hours (overnight is gold)
- No brining right before roasting — it adds moisture, not crisp
This step matters especially if you live somewhere humid like Florida. Trust me — I learned the hard way after baking chicken in 80% humidity with a broken A/C.
Use Just Enough Oil — Not Too Much
It took me a while to stop drowning the skin in olive oil. Turns out, too much oil softens it instead of helping it crisp.
What works better:
- A light brush of avocado oil (high smoke point)
- Or a quick mist with an olive oil spray bottle
- Skip the butter — it burns too fast at high temps
If I’m roasting at 400°F or above, I always stick with oils that can take the heat. Once, I used sesame oil and… let’s just say I almost learned how to use the fire extinguisher.
Rack It Up or Elevate the Chicken
This part’s simple: when the skin sits flat on a hot pan, it steams. Elevate it, and it crisps.
Here’s how:
- Place chicken pieces on a wire rack over a sheet pan
- No rack? Use thick-cut onion rings as a natural “lift” (bonus: they roast too)
- Or fold foil into coils and rest the chicken on top
I’ve even baked drumsticks hanging over the edge of a Dutch oven once, just to test it — they crisped better than expected.
Hit the Broiler — But Be Brave (and Watch Closely)
If the skin still looks pale after baking, I crank the broiler to high and leave the oven door slightly cracked.
But:
- Never walk away (seriously, set a timer for 2 minutes max)
- Rotate the pan halfway through broiling if needed
- Remove pieces individually as they crisp — not all will cook at the same pace
I’ve scorched more than one tray by broiling while texting. That chicken taught me a lesson.
Baking Chicken Legs and Thighs with Vegetables (One-Pan Magic)
When I’m tired, hungry, and don’t want to stare at more than one dirty pan, this is what I do. Chicken + veggies + oven = sanity.
One-pan meals saved my weeknight dinners more times than I can count. But — I’ll be honest — I’ve also had roasted chicken legs sitting on top of raw potatoes. Or carrots burnt to the pan while the chicken still looked pale. Timing matters. So does layout.
Here’s how I make it work.
Veggies That Play Nice with Chicken in the Oven
Some vegetables roast beautifully next to chicken. Others… don’t.
These are my top picks:
- Baby potatoes or red potatoes (cut in halves or quarters)
- Carrots (cut thicker than you think — they shrink fast)
- Brussels sprouts (halved, tossed in olive oil)
- Red onions or yellow onions (cut into wedges)
- Whole garlic cloves (leave the skin on — they roast sweet)
I avoid broccoli and cauliflower in these trays — they get mushy and bitter under juicy chicken. Learned that the hard way when I roasted thighs over broccoli and got weird green steam instead of crisp dinner.
My Layout Strategy (a.k.a. Chicken Real Estate)
This is how I lay it all out on the sheet pan:
- Spread the veggies out first, in a single layer
- Toss them in a little oil, salt, pepper — nothing fancy
- Place the seasoned chicken on top of the veggies OR on a rack above them
- Leave space between everything so nothing steams
If I want the juices to flavor the veggies, I lay the chicken right over them. If I want crispier veg, I use a rack or bake the chicken and veg separately for part of the time.
Adjusting the Timing So It All Finishes Together
This took me a few tries to figure out. Here’s what I do now:
- Hard veggies (like potatoes, carrots): I roast them solo for 10–15 minutes first
- Then I add the chicken legs and thighs
- Everything bakes together at 375°F–400°F for another 35–45 minutes
If I’m using boneless thighs, I skip the pre-roast and just toss everything in together — since they cook quicker.
Toaster oven version? I scale everything down and bake on a quarter sheet pan. It’s cozy, but it works.
Bonus Flavor Trick: Pan Sauce from the Drippings
After baking, I’ll sometimes scoop up those juices at the bottom of the tray (especially if onions and garlic are involved). I pour it over rice or serve it as-is with bread.
Once, I added a splash of balsamic to the pan juice. It was… weirdly incredible.
How I Roast Chicken Legs and Thighs for Meal Prep
Sunday nights in my kitchen look like this: two sheet pans of chicken thighs, Spotify playing something mellow, and a plan to not worry about lunch for the next four days.
Roasting chicken legs and thighs in the oven for meal prep has become my not-so-secret weapon. It’s affordable, flexible, and (unlike grilled chicken breast) doesn’t turn into cardboard by Wednesday.
Here’s how I make it work — without burning out or drying everything to death.
How Much I Prep at Once
It depends on how many mouths I’m feeding, but for solo weeks, I usually go with:
- 4–6 bone-in thighs
- 4 drumsticks
- 1–2 pans total
- Usually takes about 45 minutes, start to finish
Sometimes I go big and grab a family pack. I just split it between two pans and rotate halfway through baking.
My Meal Prep Routine (Simple, Always)
- Thaw chicken in the fridge overnight (if frozen)
- Pat dry + season (see Part 6 for my go-to rub)
- Preheat to 375°F — I use convection if I’m cooking both trays at once
- Line sheet pans with foil or parchment (foil wins when I want crisp skin)
- Use racks if I can — keeps skin crispy even after reheating
- Bake for 40–50 mins, depending on size and oven mood
- Cool completely before storing — I’ve learned the hard way about soggy lids
If I’m doing both thighs and legs, I try to keep them on separate pans. They don’t always cook at the exact same pace, and I don’t like babysitting mid-bake.
How I Store It (and What Keeps It Tasting Good)
This part matters more than I thought it would.
- I use glass containers with snap lids — keeps the skin from softening too fast
- I layer paper towels in the bottom for skin-on pieces
- Store in fridge for up to 4 days
- For freezer batches: I vacuum seal or wrap tightly with plastic + foil
Skinless thighs hold up best in the freezer. Skin-on works, but it’ll never be as crispy as Day 1 unless you reheat it right (more on that next).
Reheating Without Ruining Everything
I never microwave roasted chicken legs unless I’m truly desperate.
Here’s how I reheat:
- Oven method:
- Preheat to 350°F
- Wrap chicken loosely in foil
- Heat for 10–15 mins until warmed through
- Toaster oven method:
- 325°F
- No foil if I want the skin to re-crisp
- Check around 8–10 mins
I’ve learned to sprinkle just a few drops of chicken broth inside the foil if it looks too dry. It works like a mini steam bath — keeps it tender.
Mistakes I’ve Made — So You Don’t Have To
The first time I tried baking chicken thighs, I cooked them straight from the fridge, didn’t season them enough, and forgot to check the internal temp. The result? Bland, soggy sadness.
I’ve come a long way since then, but not without a few oven disasters and “what was I thinking?” moments. These are the mistakes I’ve made, what they taught me, and how you can dodge them in your own kitchen.
Mistake #1: Cooking Straight from the Fridge
I used to pull the chicken out, season it, and toss it in the oven immediately. No resting time. No chance for even cooking.
Why it’s a problem:
- Cold chicken = uneven baking
- Outside cooks fast, inside stays underdone
- Skin won’t render properly
What I do now:
- Let it sit at room temp for 20–30 minutes before baking
- Use that time to preheat the oven and prep sides
Mistake #2: Skipping the Thermometer
I hate guessing. But for too long, I tried to “eyeball” doneness. I’d poke it, cut into it, even shake the pan like that would tell me something.
Here’s what happened:
- Sometimes it was overcooked and dry
- Other times, it was still pink near the bone
- I lost confidence (and dinners)
Now I always:
- Use a digital thermometer
- Aim for 175–180°F for legs and thighs
- Check the thickest part, avoiding bone
Once I made the switch, everything got easier. More consistent. Less stress.
Mistake #3: Overcrowding the Pan
Oh man, this one still haunts me. I once crammed eight thighs and a pile of veggies onto one baking tray — no space between anything.
The result?
- Soggy skin
- Veggies steamed instead of roasted
- Juices pooled and turned everything pale and bland
Lesson learned:
- Leave breathing room between pieces
- Use two pans if needed
- Roast in batches or rotate halfway
It’s not just about looks. Crowding kills flavor and texture.
Mistake #4: Not Adjusting for My Oven
I used to blindly follow recipes online. “Bake at 375°F for 40 minutes.” Sounds simple, right?
Except:
- My oven ran hot
- Chicken burned on the outside
- Inside was barely cooked
Now I know my oven better than some of my neighbors. It runs about 10°F hotter than it says, so I adjust accordingly.
Tip:
If you’ve ever wondered why your chicken takes longer (or shorter) than mine — it’s probably your oven’s quirk. Use an oven thermometer once and thank yourself forever.
Mistake #5: Relying on Marinades for Crisp
I love a good marinade, but I’ve learned that wet skin = soft skin. Especially if I dump the chicken straight from a bowl of buttermilk onto the tray.
What I do now:
- Pat the chicken dry after marinating
- Roast at 400°F with good airflow
- Broil at the end if needed
It’s a little extra effort, but that crispy skin payoff is so worth it.
My Favorite Marinades and Seasonings for Oven-Baked Chicken Legs and Thighs
Some nights I’m craving smoky spice. Other nights, I just want comfort — like garlic, herbs, and that roast-chicken smell that makes the whole house feel cozy.
I’ve tested dozens of flavor combos over the years. Some were disasters (note: don’t mix soy sauce and maple syrup unless you like sticky pans), but many turned into staples in my weekly routine.
Here are the marinades and dry rubs I go back to again and again — whether I’m meal prepping in Chicago or making a fast dinner in my Florida kitchen.
Go-To Dry Rubs for Crispy Skin
When I want crispy skin and bold flavor, I skip the wet marinade and reach for spices. These rubs go on dry chicken (patted down, remember?), usually with a light oil mist first.
🔥 Cajun Kick
- Smoked paprika
- Cayenne
- Garlic powder
- Onion powder
- Thyme
- Salt + black pepper
Perfect at 400°F — gets crisp and golden, especially on drumsticks.
🍋 Lemon Pepper
- Freshly cracked pepper
- Lemon zest
- Garlic powder
- A little olive oil to help it stick
- Kosher salt
I bake this at 375°F and usually pair it with roasted asparagus or rice.
🌿 Garlic-Herb Classic
- Dried oregano
- Basil
- Garlic powder
- Crushed rosemary
- Salt + a bit of olive oil
I use this blend when I want comfort-food vibes. Feels like Sunday.
Marinades That Actually Work in the Oven
Marinades are great for flavor and tenderness — especially for skinless thighs. But not all of them translate well to the oven. Here’s what has worked for me:
🧈 Buttermilk + Hot Sauce (Overnight Favorite)
- Buttermilk
- Frank’s RedHot
- Garlic powder
- Salt
Soak thighs overnight. Pat dry, then bake at 400°F. The tangy flavor stays, and the crust is unreal.
🍯 Soy-Ginger Sweet Heat
- Soy sauce
- Brown sugar or honey
- Fresh grated ginger
- Garlic
- A splash of rice vinegar
Best baked at 375°F. Skinless thighs soak it up beautifully.
🥣 Yogurt + Lemon + Cumin
- Plain Greek yogurt
- Lemon juice + zest
- Ground cumin
- Crushed garlic
- Salt + pepper
Let it marinate 4–6 hours. I’ve used this one for both drumsticks and thighs. It’s mild but super satisfying.
My Lazy-Day Hack: Spice Blends + Oil
When I don’t have time to measure, I just grab a pre-made blend — like Trader Joe’s 21 Seasoning Salute or Cavender’s Greek seasoning — and mix it with a bit of oil and lemon juice. Boom. Done.
If I’m being honest, some of my best dinners came from “winging it” with what was in the spice drawer. That’s part of the fun.
Final Thoughts — From a Chef Who’s Burned, Nailed, and Loved Oven-Baked Chicken
I’ve made chicken legs that could win hearts… and a few that ended up in the trash. That’s cooking. That’s how we get better.
Learning how to cook chicken legs and thighs in the oven wasn’t something I mastered in culinary school. It came from weeknight meals, last-minute dinners, freezer finds, and figuring out how to make cheap cuts taste like something special.
Some weeks I roast thighs on a rack with crispy skin that snaps when you bite it. Other weeks, I throw drumsticks over carrots and hope the oven’s mood is kind. Either way — this method never really fails me.
If You’re Just Starting Out — Here’s What I’d Tell You
- Don’t stress over perfect seasoning. Salt + pepper + heat = good chicken.
- Use a thermometer. It’ll change everything.
- Leave space on the pan. Airflow is magic.
- Don’t rush the resting. It matters more than you think.
- Embrace your oven’s quirks — gas, electric, convection, toaster… they all have moods.
I’ve cooked in dry Arizona heat, Midwest blizzards, and sticky Florida kitchens where the A/C couldn’t keep up. No matter where I was — roasting chicken legs and thighs gave me a sense of control, a full plate, and something worth sharing.
Sometimes it was meal prep. Sometimes comfort food. Sometimes survival. But it always felt real.
One Last Thing
You don’t need fancy tools, a big kitchen, or even a full plan. You just need a little seasoning, a hot oven, and the willingness to try again if it goes sideways.
That’s what I do. That’s how I cook.
Thanks for sticking with me. Now go preheat that oven.
FAQs: How to Cook Chicken Legs and Thighs in the Oven
How long does it take to cook chicken legs and thighs in the oven?
It takes 35 to 45 minutes at 400°F. The meat is safe at 165°F. Use a meat tool to check the thickest part for the best results.
What is the best oven heat for legs and thighs?
Set your oven to 400°F (204°C). This high heat makes the skin very crisp. It also keeps the dark meat inside juicy and tender while it bakes.
Should I cover the pan while I cook the chicken?
No, do not cover the pan. Leaving it open lets the hot air hit the skin. This makes the outside brown and crunchy instead of soft and wet.
Do I need to flip the legs and thighs while baking?
You do not have to, but it helps. Flipping them halfway lets both sides get a nice color. It also ensures the heat hits the meat evenly.
Can I cook legs and thighs with the skin off?
Yes, you can. Without the skin, the meat may dry out faster. Use a bit more oil or a sauce to keep the chicken moist while it cooks.
I’m Mossaraof, a trained chef and the founder of OvenInsights.com. I spent years cooking at Larrupin’ Cafe and in kitchens across Chicago and Seattle. Now I test kitchen gear for a living. I moved to North Acton, London, and I test every tool I write about. I use real meals and real heat. No brand deals. No shortcuts. I cover 12 kitchen types and hundreds of recipes. I believe this: the right tools matter as much as the recipe.