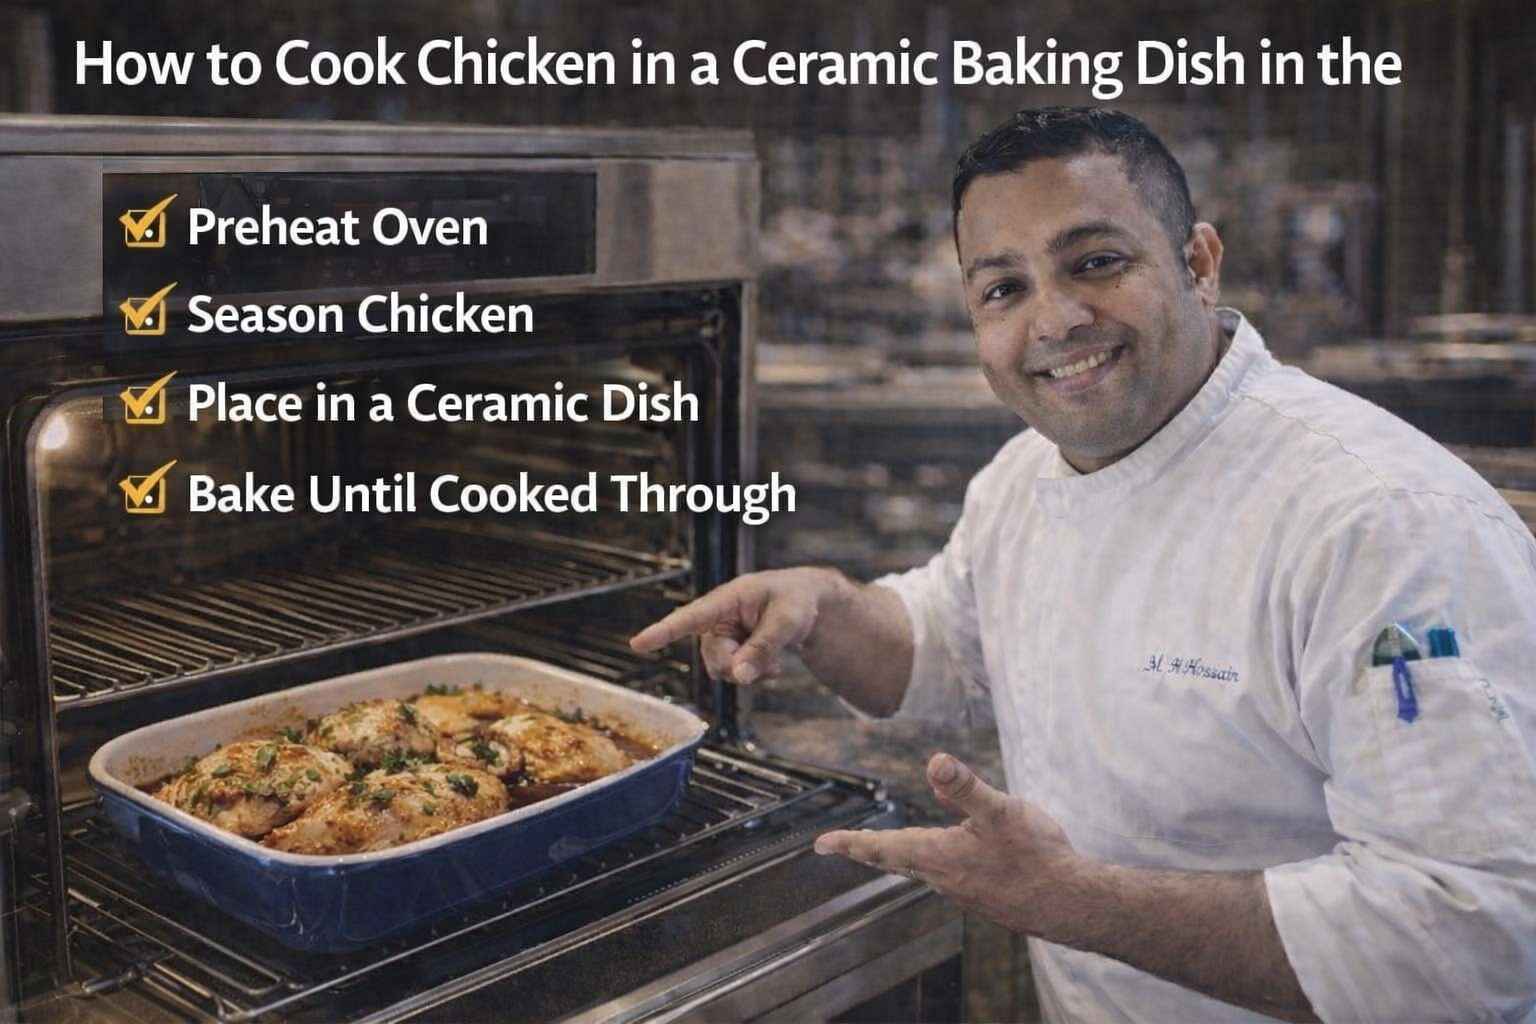
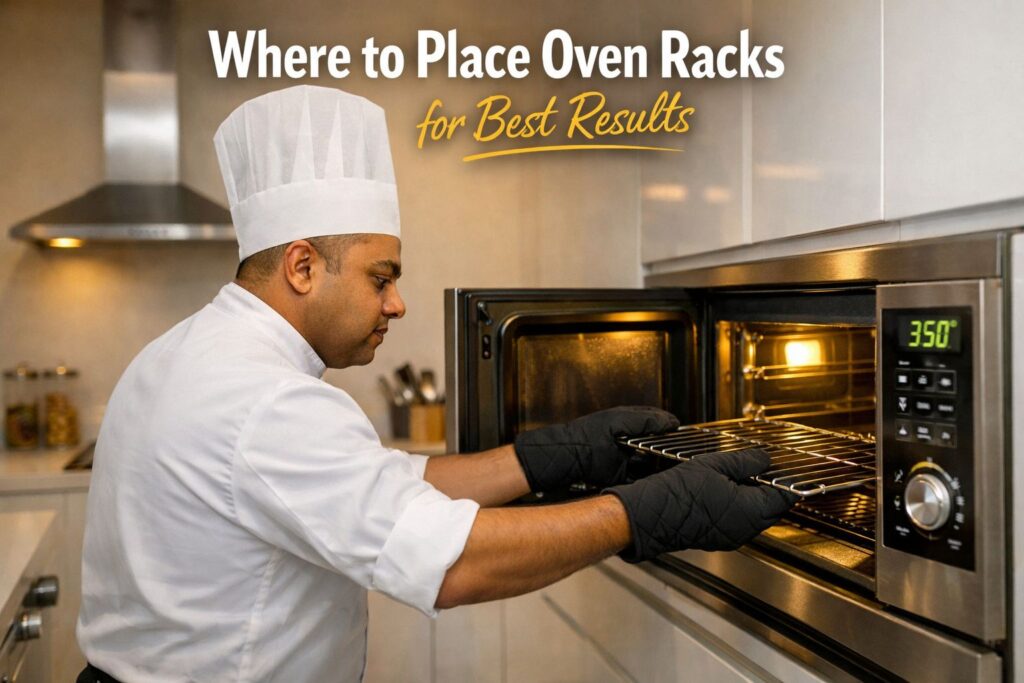
Hey, I’m Mossaraof — a cook and food blogger. I once burned a lasagna top and left the bottom raw. That’s when I learned where to place oven racks for best results really matters. I’ve tested this in real kitchens, with real ovens. If you’re just getting started, The Complete Guide to Using an Oven at Home can help you learn the basics fast.
The Secret Science of Oven Heat Zones
Every oven has “hot spots” that can ruin a good meal if you aren’t careful. Understanding these zones helps you control how your food browns and cooks.
I remember my first week in a professional kitchen. I ruined a whole tray of pastries because I put them too high. I thought “heat rises,” so higher must be better, right? Not always. Most ovens have two heat sources. One is at the top. One is at the bottom.
- The Top Zone: This is where the heat gets trapped. It is very intense. Use it when you want a crust.
- The Middle Zone: This is the “Goldilocks” spot. The air flows evenly here. It is safe for almost everything.
- The Bottom Zone: This is closest to the burner. It is great for things that need a crispy base, like pizza.
In the US, many of us use electric ovens like Whirlpool. These tend to have very dry heat. If you have a gas oven, like a Samsung, the heat might be more humid. This affects how your bread rises and how your chicken skins crisp up.
The Middle Rack: Your Kitchen’s Best Friend
The middle rack is the default spot for a reason. It offers the most even air flow and keeps food away from “danger zones.”
This is my home base. If I am tired and don’t want to think, I go for the middle. It’s the sweet spot for balance.
- Standard Cakes: Think of your favorite Betty Crocker mix. The middle rack ensures the center bakes before the edges burn.
- Sheet Pan Dinners: I love doing chicken thighs and broccoli on one tray. The middle rack cooks the meat through without drying the veggies.
- Cookies: If you bake one tray at a time, put it here. You get that soft chew and light golden edge.
- Brownies: Nobody likes a rock-hard brownie edge. The middle rack keeps them fudgy.
I’ve noticed that in many American homes, we tend to cram too much in at once. If you put a big tray in the middle, leave space around the sides. If the air can’t move, the food won’t cook right. Your oven needs to “breathe” just like you do after a big Sunday roast.
The Top Rack: The “Browning” Station
The top of the oven is perfect for things that need a golden-brown top. Heat stays trapped at the ceiling, making it a very hot area.
When I want bubbly cheese on my lasagna, I move the rack up. It is the best way to get that “restaurant look” at home.
- Broiling: This is the most common use. It’s great for steaks or charring peppers for salsa.
- Casseroles: If the inside is hot but the breadcrumbs look pale, move it up for the last five minutes.
- Puff Pastry: High heat makes the butter steam. This makes the layers “pop” and stay flaky.
- Melting Cheese: Whether it is a tuna melt or a cheesy dip, the top rack is king.
Be careful, though. I’ve burned many a garlic bread because I got distracted by a text. Things burn fast up here. Stay close. Watch the edges. If you see smoke, you’ve gone too far!
The Bottom Rack: For the Perfect Crunch
The bottom rack is closest to the main heat source. Use this when you need a lot of heat on the bottom of your pan.
I use this for my pizza nights. If you want a crust that doesn’t flop, you have to go low. It’s all about that direct heat.
- Pizzas: Use a pizza stone or a Lodge cast iron pan on the bottom rack. It mimics a real brick oven.
- Roasted Meats: A big Thanksgiving turkey or a beef roast stays juicy while the bottom sears.
- Fruit Pies: This helps bake the bottom crust. No one wants a “soggy bottom” on their apple pie!
- Crusty Breads: If you bake in a Dutch oven, the bottom rack gives the loaf a great lift.
I once tried to bake a deep-dish pizza on the top rack. It was a mess. The cheese was burnt, and the dough was raw. It was a sad dinner. Learn from my mistakes! Put that heavy pan down low.
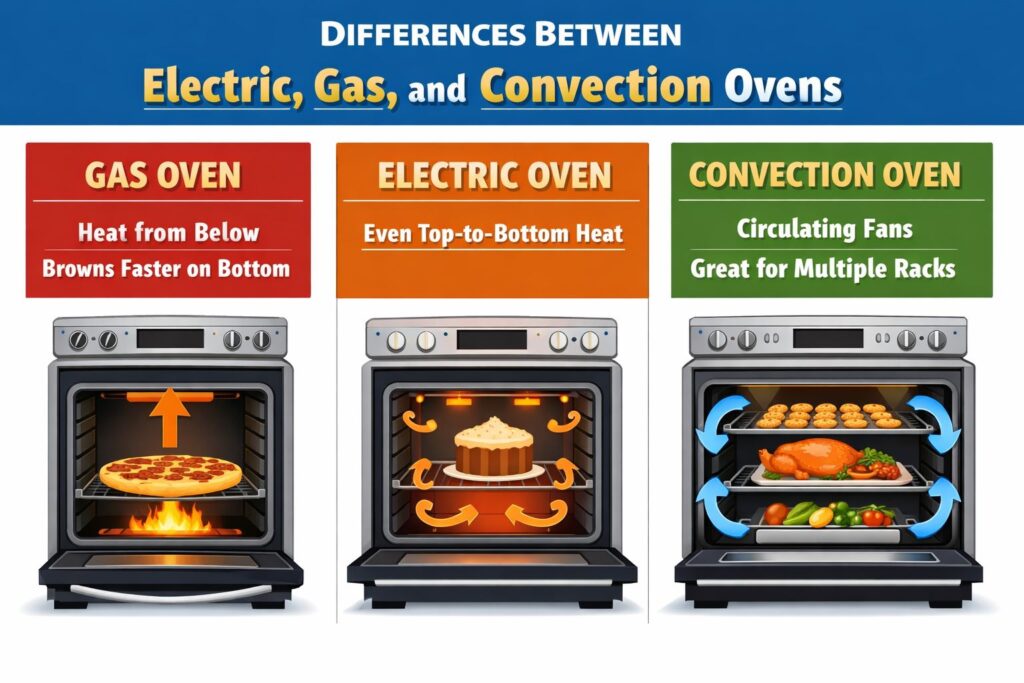
Ne5. The Convection Fan: A Game Changer for US Kitchens
Many modern American ovens, like those from Samsung or LG, now come with a “Convection” setting. This is just a fancy way of saying there is a fan in the back that moves hot air around.
In a professional kitchen, we almost always use convection. It helps cook things faster. It also makes the heat more even.
- Better Airflow: The fan stops hot air from sitting in one spot. This means you don’t have to worry as much about “hot spots.”
- Crispy Results: It is great for roasting chicken or wings. The moving air dries the skin. This makes it very crunchy.
- The Rule of Thumb: If you use convection, lower your temp by 25 degrees. Also, check your food about 10 minutes early.
I love using this for my Sunday roasts. I put the chicken in the middle. The fan does all the work. It smells amazing, and the skin gets that perfect “crack” when you bite in.
Roasting Tips: Getting the Most from Your Meat
Roasting a big piece of meat is a classic American tradition. Whether it is a Sunday pot roast or a holiday turkey, rack placement is key to juicy results.
I’ve roasted hundreds of birds in my time. The biggest mistake people make is putting the meat too high. It dries out before it cooks through.
- Big Birds: For a large turkey, use the lowest rack. This keeps the top of the bird away from the top heat. It also leaves room for the tall roasting pan.
- Beef Roasts: Use the lower-middle rack. This lets the heat wrap around the meat evenly.
- Vegetables: I like the upper-middle rack for these. It gives them a nice charred edge while they get soft inside.
- The Searing Trick: Start your roast on the bottom rack for 15 minutes. Then move it to the middle to finish. This gives you a great crust.
One time, I tried to roast a 20-pound turkey in a small oven. I didn’t move the racks first. I had to wrestle with a hot pan while the oven was screaming at me. Don’t be like me. Check your rack height before you preheat.
The Two-Tray Shuffle: Baking Like a Pro
Sometimes you have to bake two trays of cookies at once. This can be tricky because the bottom tray blocks the heat from the top tray.
In a busy bakery, we call this “shuffling.” You have to move the trays around to get an even bake. It’s like a dance, but with sugar.
- Positioning: Put one rack in the upper-middle and one in the lower-middle spot.
- The Halfway Swap: When the timer is halfway done, swap the trays. Move the top one down and the bottom one up.
- Rotate 180 Degrees: While you swap them, turn the trays around. This fixes any side-to-side hot spots your oven might have.
- Add Time: Expect your cookies to take 2 or 3 minutes longer than the recipe says. Your oven is working twice as hard!
I did this last Christmas for a big party. I had three trays of ginger snaps going. It was a lot of moving around, but every cookie came out perfect. My friends couldn’t believe they all looked the same.
Specific Advice for US Oven Brands
Every oven brand has its own personality. A Frigidaire might behave very differently than a Maytag. Knowing your brand helps you pick the right rack.
I’ve used almost every brand out there. Some are built for speed, others for precision. Here is what I’ve noticed about the big names in the US.
- GE and Whirlpool: These are the “workhorses.” They are very reliable. The middle rack is usually very accurate in these models.
- KitchenAid: These often have very strong bottom heat. If you bake cakes, you might want to move the rack up one notch from the center.
- Wolf and Viking: These are high-end. They hold heat very well. You rarely need to rotate your pans in these ovens.
- Samsung and LG: These often have “Smart” features. Some will even tell you which rack to use on the screen. Listen to them! They were tested in a lab.
If you have an older oven in a rental, buy a cheap oven thermometer. Put it on the middle rack. You might find your “350 degrees” is actually 325. This little tool saved my life when I lived in a tiny apartment in Philly.
Cleaning Your Racks: Why It Matters
Dirty oven racks don’t just look bad. They can actually change how your oven works. Built-up grease can smoke and smell.
I try to clean my racks once a month. It makes the pans slide in and out much easier. Plus, it keeps my kitchen smelling fresh.
- The Soaking Method: Put your racks in a bathtub with hot water and dish soap. Let them sit overnight. The grime will slide right off.
- Avoid the Self-Clean: Don’t leave your racks in the oven during a self-clean cycle. The high heat can ruin the finish. They won’t slide as well after that.
- A Quick Wipe: After you cook something greasy, wipe the side rails. It takes ten seconds but saves you a big headache later.
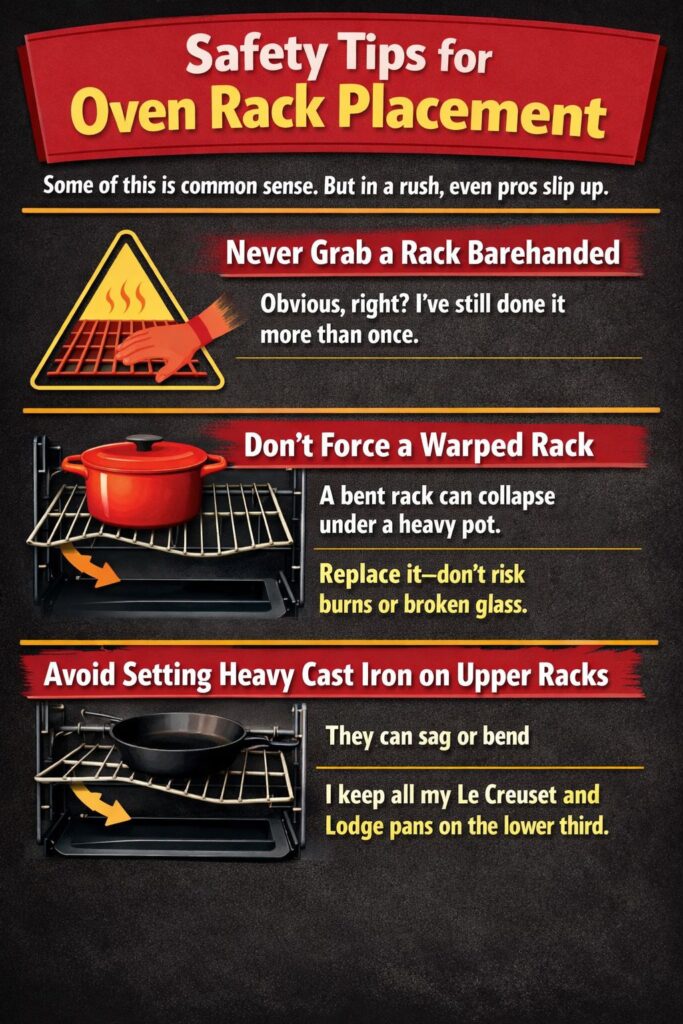
I once forgot to clean a spill on the bottom of my oven. The next time I baked a cake, the whole house smelled like burnt bacon. It was gross. Keep those racks and the floor of your oven clean!ver Grab a Rack Barehanded
Obvious, right? I’ve still done it more than once.
Don’t Force a Warped Rack
- A bent rack can collapse under a heavy pot
- Replace it—don’t risk burns or broken glass
Pizza Stones and Steel: Getting the Foundation Right
If you want that perfect New York-style slice at home, you need to understand how your rack interacts with heavy baking tools. It is not just about the air; it is about the metal and stone holding the heat.
I love a good pizza night. There is something so satisfying about a crust that “cracks” when you fold it. To get that, you have to treat your oven like a forge.
- Placement: Put your pizza stone on the bottom rack. You want it as close to the heat source as possible.
- Preheat Time: Give it at least 45 minutes. Even if the oven says it is ready, the stone needs more time to get truly hot.
- The Broiler Trick: After the bottom is crisp, I sometimes move the pizza to the top rack for 60 seconds. This bubbles the cheese perfectly.
- Heavy Duty: If you use a Lodge baking pan, the same rules apply. Low and slow for the preheat, then high heat for the bake.
Last Friday, I got impatient. I only preheated my stone for ten minutes. The top of my pizza looked great, but the bottom was like wet cardboard. It was a tragedy! Take the time to get that stone screaming hot.
Baking Sourdough: The “Dutch Oven” Strategy
Sourdough has become a huge hobby in the US lately. To get that artisan look with a big “ear,” you need to manage your rack and your steam.
Baking bread makes my whole house smell like a dream. It’s my favorite way to spend a rainy Saturday. But you have to be smart about where that heavy pot sits.
- The Lower-Middle Slot: A Dutch oven is heavy and tall. Putting it on the lower-middle rack gives it plenty of room.
- Heat Retention: Being lower in the oven helps the thick cast iron soak up heat. This gives the bread the “spring” it needs to rise.
- Steam Management: If you aren’t using a lid, you might put a tray of water on the rack below your bread. This creates the steam that makes the crust shiny.
- Safety First: Use heavy mitts. Moving a 500-degree pot on a wiggly oven rack is no joke!
I use an Emile Henry bread cloche or a classic Le Creuset. Both are tall. I always make sure I adjust my racks before I turn on the heat. Trying to move a hot rack while holding a heavy pot is a recipe for a burn.
Safety and Ergonomics: Don’t Get Burned
We often talk about the food, but we forget about the person cooking it. How you move your racks matters for your safety and your back.
I’ve had my fair share of “kitchen tattoos”—those little scars on your forearms from bumping a hot rack. They happen when you’re in a rush.
- Pulling Out the Rack: Most modern ovens have a “stop” so the rack won’t fall out. Test this when the oven is cold so you know how far you can pull it.
- Use Two Hands: When moving a heavy tray, pull the rack out halfway first. It’s easier on your wrists.
- The “Oven Mitt” Check: Make sure your mitts aren’t wet. Wet mitts let heat through instantly. It’s a mistake you only make once!
- Check the Alignment: Sometimes racks get put in crooked. This can cause a cake to bake lopsided. Give the rack a quick wiggle to make sure it’s level.
One time, I was trying to show off and pull a tray out with one hand. The rack tilted, and my beautiful roasted carrots ended up on the floor. I felt so silly. Now, I always take a second to be steady.
High Altitude and Regional Cooking
If you live in the Rockies or high-up in the desert, your oven acts differently. The air is thinner, and things dry out faster.
I have a friend in Denver who struggled with her baking for months. We realized her oven was venting heat too fast. We had to change her rack strategy.
- High Altitude (Above 3,000 ft): Things rise faster but can collapse. I suggest moving your rack up one notch. The higher heat helps set the structure of the cake before it falls.
- Humid Climates: In places like Florida, your oven might feel “soggy.” Using the convection fan or a slightly higher rack can help crisp things up.
- Dry Climates: In Arizona, bread can crust over too fast. Use a lower rack and maybe a pan of water to keep the air moist.
It is amazing how much the world outside your window changes the world inside your oven. Pay attention to how your food looks. If it’s always too dry, try moving it down.
Quick Reference: Where to Place Oven Racks for Best Results
Here is a fast guide you can keep in your head (or on your fridge).
- Top Rack: Broiling, browning, melting cheese, finishing casseroles.
- Middle Rack: Cookies, cakes, brownies, muffins, frozen snacks, and toast.
- Bottom Rack: Pizza, bread, big roasts, whole turkeys, and fruit pies.
- Two Trays: Upper-middle and lower-middle (and don’t forget the swap!).
I keep a little mental checklist like this every time I start the oven. It saves me so much stress. Cooking should be fun, not a guessing game!
The “Low and Slow” Strategy: Slow Roasting and Drying
Sometimes, you don’t want a fast sear. You want to break down tough proteins or dry out fruits. This is where your rack placement needs to be very strategic to avoid scorching.
In my kitchen, Sunday is often “set it and forget it” day. I’ll throw a pork shoulder in the oven and let it go for eight hours. The house smells like a dream, and the meat just falls apart.
- Lower-Middle Placement: For a long roast, you want the meat centered in the oven but far enough from the top to prevent the fat from burning.
- Jerky or Dried Fruit: If you are using your oven as a dehydrator, use the middle rack. Use a cooling rack on top of a baking sheet to let air get under the food.
- Meringues: These delicate treats hate direct heat. Put them on the middle rack and keep the temperature very low.
- Even Heat: Since the oven stays on for a long time, the walls get very hot. Make sure your pans aren’t touching the back of the oven.
I once tried to make beef jerky on the top rack. It didn’t dry out; it just became very salty, very hard steak. It was like eating a shoe. If you want to dry things out, keep them away from the “hot ceiling” of the oven.
Calibrating Your Craft: The Thermometer Test
You can follow every rack rule in the book, but if your Samsung oven says 350°F and it’s actually 325°F, your results will suffer. Calibrating your oven is the mark of a true pro.
I do this once every few months. It’s like tuning a guitar. You have to make sure the “notes” are right before you start playing.
- The Sugar Test: Put a spoonful of sugar on a tray on the middle rack at 375°F. Sugar melts at exactly 366°F. If it hasn’t melted after 15 minutes, your oven is running cold.
- Oven Thermometers: I use a simple Taylor or Rubbermaid thermometer. I hang it right in the center of the middle rack.
- Checking the Zones: Move the thermometer to the top and bottom racks. You might find your top rack is 20 degrees hotter. This is normal, but it’s good to know!
- Adjusting Settings: Many new ovens (like LG) let you adjust the display temperature in the settings menu. Check your manual!
I lived in a rental house once where the oven was 50 degrees off. I felt like I was losing my mind because nothing was cooking on time. Once I bought a $10 thermometer, all my “talent” suddenly came back. It’s the best $10 you’ll ever spend in a kitchen.
Delicate Bakes: Soufflés and Macarons
When you’re making something that relies on air and precise temperature, rack placement becomes a high-stakes game. One wrong move and your beautiful bake could collapse.
I still get a little nervous when I put a soufflé in the oven. I hold my breath and hope for the best. It’s a thrill, but it requires a steady hand and a perfect rack.
- Soufflés: Use the lower-middle rack. This gives them room to rise up without hitting the top element. It also ensures the base gets enough heat to “push” the air up.
- Macarons: These are very picky. I use the middle rack and a double-stacked baking sheet. This protects the bottoms from getting too brown while the tops dry out.
- Cheesecakes: Use the middle rack and always use a water bath (bain-marie). The water keeps the air moist and the heat gentle.
- Quiet Kitchen: When these are in, don’t slam the oven door! The vibration can ruin everything.
I remember making macarons for a friend’s wedding. I had trays on every rack. The ones on the bottom rack were brown shells, and the ones on the top were cracked. Only the middle rack trays were perfect. Now, I only bake macarons one tray at a time, right in the center.
Final Checklist: Where to Place Oven Racks for Best Results
We’ve covered a lot of ground today. From pizza stones to brand-specific tips, you now have the tools to master your oven. Let’s do a quick final review.
Cooking is an art, but your oven is a science. When you combine the two, you get magic.
- Is it browning too fast? Move it down one rack.
- Is the bottom soggy? Move it down to the bottom rack.
- Baking two things? Use the upper and lower middle, then swap halfway.
- Using a new brand? Check the middle rack first to see how it “feels.”
- High altitude? Move it up one notch and watch it like a hawk.
I hope this helps you feel more at home in your kitchen. Whether you’re a professional cook like me or just making a frozen pizza after a long day at work, you deserve food that tastes great. The rack is your secret weapon. Use it well!
FAQs : Where to Place Oven Racks for Best Results
Where should oven racks be placed for baking?
Use the middle rack for most baking—it’s where heat circulates evenly for cookies, cakes, and muffins.
What oven rack is best for roasting meat?
Use the center to lower rack. It helps brown the bottom of meat while keeping the top juicy.
Why do my cookies burn on the bottom?
They’re likely too close to the bottom heating element. Move the rack up to the center next time.
Can I move oven racks while cooking?
Yes, but only for sturdy dishes. Avoid moving racks during delicate baking like cheesecakes or soufflés.
How many racks should I use in a convection oven?
You can use two or more, thanks to even air circulation—but don’t overcrowd the trays.