Hey, I’m Mossaraof — a professional cook and food blogger.
The first time I tried How to Bake Chicken Tacos in the Oven, my kitchen smelled so warm and good. The shells turned crisp. The chicken stayed juicy. It felt like a small win at home.
I cook tacos this way when I want fast, easy oven tacos with big flavor. Years in the kitchen taught me simple tricks that make baked chicken tacos crisp and tasty every time.
In this guide, I will show you How to Bake Chicken Tacos in the Oven step by step. If you are new to ovens, you can also read The Complete Guide to Using an Oven to feel more sure. Let’s make easy chicken tacos together. 🌮
Choosing the Right Chicken for Oven-Baked Tacos
This is where it starts — the chicken. You’ve got choices, and I’ve tried them all. Each one behaves a little differently in the oven.
Whether I’m cooking for just me or meal-prepping for the week, I think about what I have in the fridge and how hands-off I want the process to be.
Boneless Skinless Chicken Breast
This is the most convenient, but also the easiest to dry out. I’ve learned that if I’m baking chicken breast for tacos in the oven, moisture matters. I either:
- Cover the pan with foil
- Or bake it in a salsa bath (yes, I call it a bath)
- Or dice it small and coat it in oil and seasoning first
One Tuesday night, I didn’t do any of those things. I just threw seasoned breasts in the oven — and 30 minutes later, I had sad, dry meat. Lesson learned.
Now, I stick to 375°F and bake for about 22–25 minutes. No more.
Chicken Thighs — My Ride-or-Die
Hands down, my favorite. Especially boneless skinless thighs. They’re forgiving, full of flavor, and shred like a dream.
When I roast thighs, I crank the oven up to 400°F. I usually:
- Season them generously with cumin, garlic, and smoked paprika
- Bake for 25–30 minutes
- Let them rest, then shred and toss with pan juices or a little lime
Bone-in thighs work too — just adjust the time and check the thickest part with a thermometer (165°F is your safe zone).
Fun fact: I once used thighs with mango salsa and it was ridiculous. Sweet, spicy, tangy — all baked together.
Rotisserie Chicken Shortcut
Not gonna lie — I’ve used Costco rotisserie chicken more than a few times when I’m too wiped to cook.
What I do:
- Shred it, spread it on a tray
- Add a splash of chicken broth and taco seasoning
- Bake at 350°F for 10–12 minutes to reheat
It crisps slightly at the edges and soaks up the seasoning better than nuking it in the microwave. Plus, the house still smells like I cooked.
Seasoning Ideas for Oven Chicken Taco Filling
Once you’ve got your chicken, the next step is flavor. I’ve made enough bland tacos in my early cooking days to know: seasoning can make or break it. Especially in the oven, where there’s no sizzling skillet to add extra smokiness.
This is where I get creative — or just raid my spice drawer when I’m too tired for anything fancy.
My Go-To Homemade Taco Seasoning
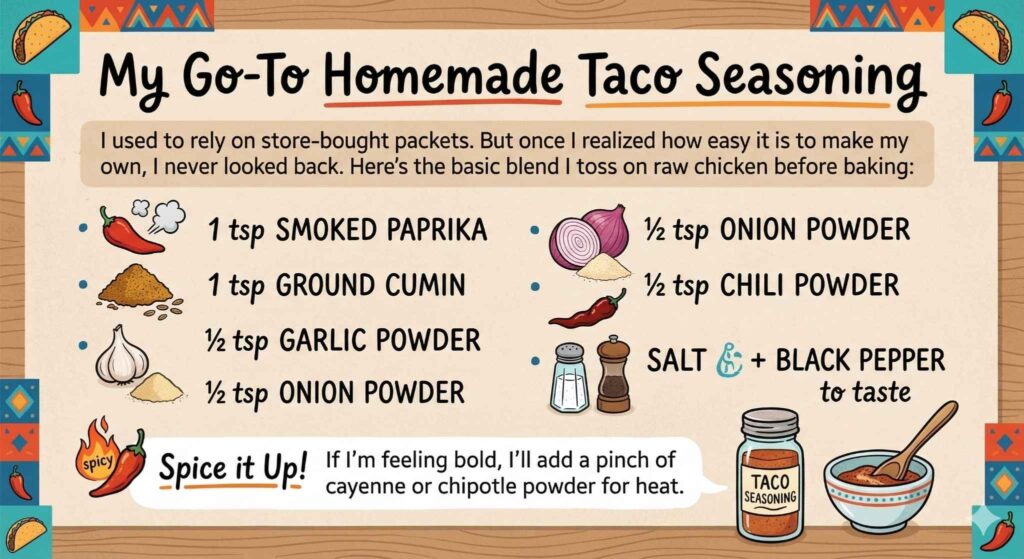
I used to rely on store-bought packets. (No shame — we’ve all done it.) But once I realized how easy it is to make my own, I never looked back.
Here’s the basic blend I toss on raw chicken before baking:
- 1 tsp smoked paprika
- 1 tsp ground cumin
- ½ tsp garlic powder
- ½ tsp onion powder
- ½ tsp chili powder
- Salt + black pepper to taste
If I’m feeling bold, I’ll add a pinch of cayenne or chipotle powder for heat.
It’s super forgiving. One time, I was out of onion powder and used everything bagel seasoning — somehow it worked. Don’t overthink it.
Keeping It Juicy — Moisture Add-Ins
Here’s what I’ve learned: dry rubs are great, but you need some moisture in the oven. Otherwise, your chicken dries out before it even shreds.
These are my favorite add-ins to keep chicken taco meat juicy and flavorful:
- Salsa (red or green) – I love Herdez Salsa Verde. It bakes beautifully into the meat.
- Tomato paste + water – Just a tablespoon and a splash of water adds depth.
- Fresh lime juice – Especially good with shredded chicken after baking.
- Olive oil or neutral oil – Helps the seasoning stick and adds richness.
- Canned green chiles – I throw these on top before baking. Adds smoky heat.
Sometimes I layer them. A drizzle of oil, a sprinkle of spices, and a spoonful of salsa — all before it even hits the oven. It’s like building taco flavor insurance.
Try a Marinade if You’ve Got Time
If I know I’ve got a busy night coming, I’ll marinate the chicken in the morning. Nothing fancy — usually just:
- Juice of one lime
- A bit of olive oil
- Garlic
- Cumin and chili powder
- Salt
Then when I get home, all I have to do is dump it in a dish and bake it. It smells amazing when it starts roasting — citrusy, smoky, warm.
A Note for U.S. Shoppers
If you’re cooking in the U.S. and near a Kroger, H-E-B, or Trader Joe’s, they all carry solid salsas and spice blends that work great for baked chicken taco meat. I’ve also had good luck with Goya adobo and Badia complete seasoning when I’m short on time.
How to Bake Chicken for Tacos in the Oven
This is the part I’ve tested the most — especially during my “I’m only using the oven this month” experiment last fall.
Whether it’s chicken thighs, breasts, or leftovers, I’ve found a routine that keeps the chicken tender and flavorful every single time. No stovetop, no mess, no staring at the pan.
This is exactly how I do it.
Step-by-Step: My Go-To Method for Baking Chicken Taco Meat
Here’s the oven method that works like a charm — even when I’m rushing around trying to get dinner on the table before the next episode of whatever I’m binge-watching.
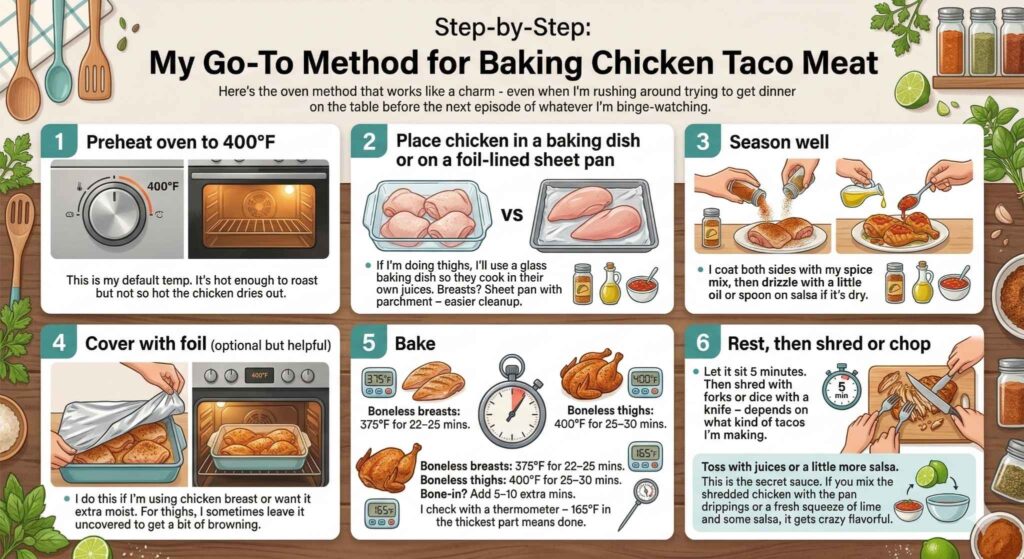
- Preheat oven to 400°F
This is my default temp. It’s hot enough to roast but not so hot the chicken dries out. - Place chicken in a baking dish or on a foil-lined sheet pan
If I’m doing thighs, I’ll use a glass baking dish so they cook in their own juices.
Breasts? Sheet pan with parchment — easier cleanup. - Season well
I coat both sides with my spice mix, then drizzle with a little oil or spoon on salsa if it’s dry. - Cover with foil (optional but helpful)
I do this if I’m using chicken breast or want it extra moist. For thighs, I sometimes leave it uncovered to get a bit of browning. - Bake
- Boneless breasts: 375°F for 22–25 mins
- Boneless thighs: 400°F for 25–30 mins
- Bone-in? Add 5–10 extra mins
I check with a thermometer — 165°F in the thickest part means done.
- Rest, then shred or chop
Let it sit 5 minutes. Then shred with forks or dice with a knife — depends on what kind of tacos I’m making. - Toss with juices or a little more salsa
This is the secret sauce. If you mix the shredded chicken with the pan drippings or a fresh squeeze of lime and some salsa, it gets crazy flavorful.
Sheet Pan Shortcut (for Less Dishes)
Sometimes I’m in no mood to wash a casserole dish. That’s when I line a sheet pan with foil or parchment, season the chicken, and bake everything on one flat tray.
If I’m tight on oven space, I’ll bake the chicken on one side and toss my taco shells on the other halfway through. Less juggling, fewer dishes.
To Cover or Not to Cover?
I get this question a lot. Here’s what I’ve learned:
- Foil = more moisture
I use this when cooking chicken breast or when I’m baking with salsa. - No foil = more browning
For boneless thighs, skipping foil gives them crispy edges I actually like.
Real-Life Note
One night I forgot to cover the pan and the breasts came out a little too dry — so I tossed the chopped meat in lime juice and olive oil, then sprinkled cotija cheese over the tacos. It turned out pretty great. Sometimes the fixes become new favorites.
How to Make Oven Baked Chicken Tacos (Start to Finish)
This is the part that changed taco night forever for me.
Once I figured out how to bake the tacos fully assembled — shells, filling, cheese, the whole deal — my kitchen got a lot quieter. Less mess. No pan splatter. And somehow, the tacos tasted better than when I fussed over them on the stovetop.
I’ve done this on lazy Sundays, meal prep Mondays, and even once on a snowy Thursday when I didn’t want to leave the house for takeout.
What You’ll Need
- Cooked, seasoned chicken (breast or thigh)
- Small corn tortillas (flour works, but corn crisps better)
- Shredded cheese (cheddar, Monterey Jack, or a mix)
- Optional: beans, chopped onions, jalapeños, salsa
You don’t need anything fancy. I’ve used store-brand tortillas and pre-shredded cheese plenty of times and still got great results.
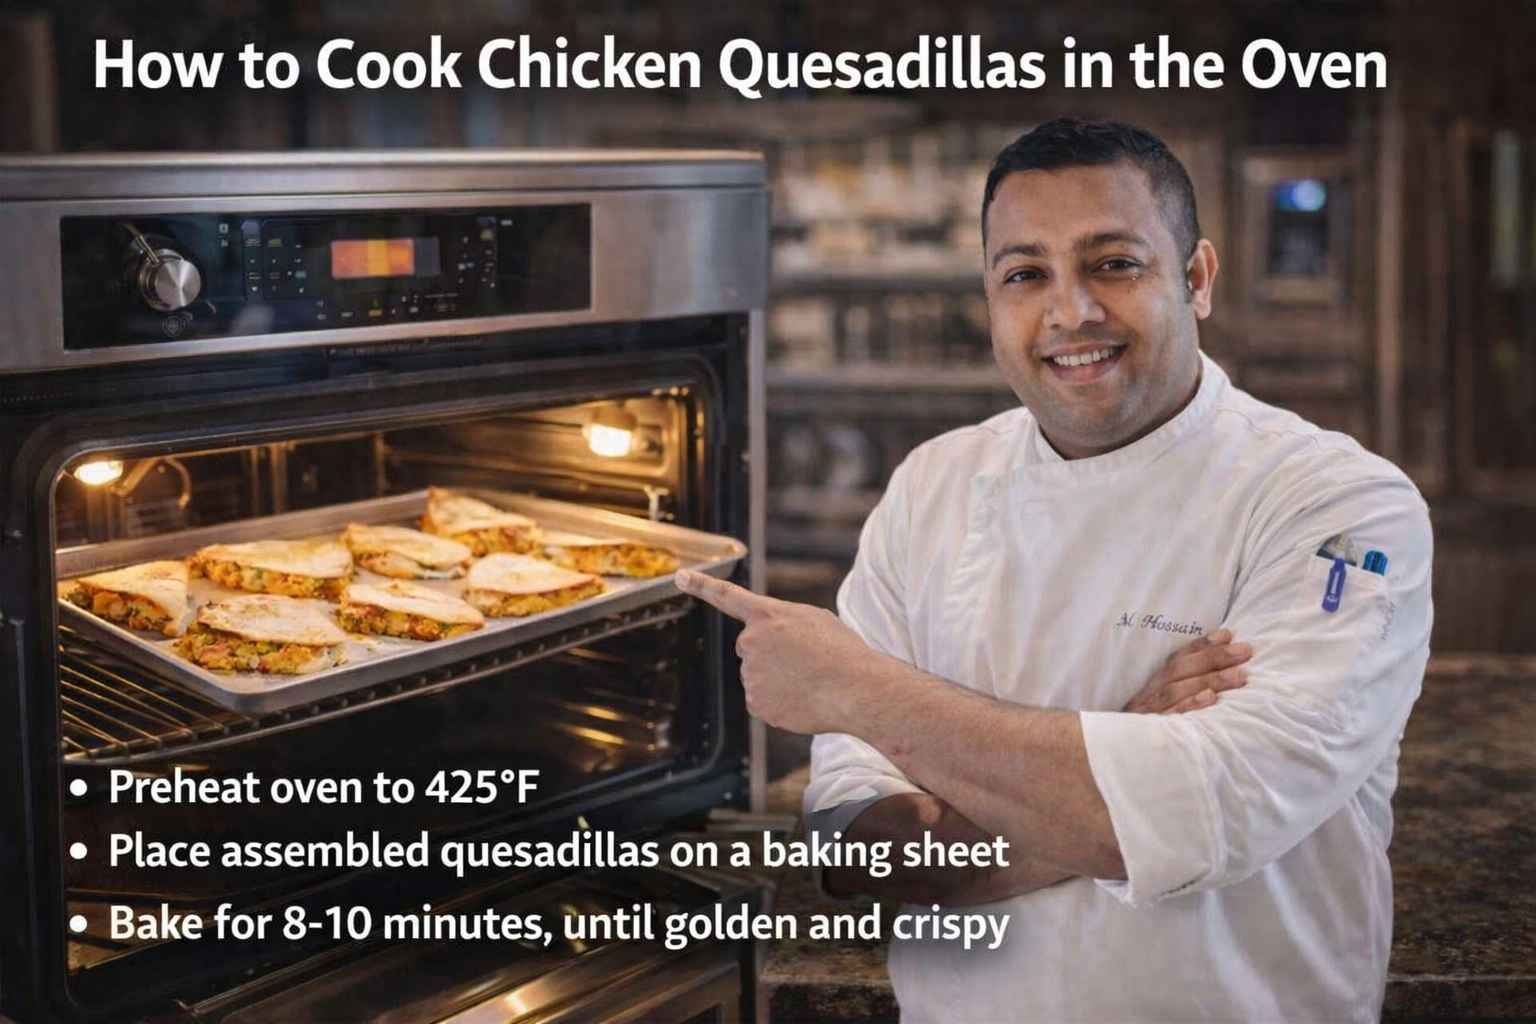
Step-by-Step: How I Bake Chicken Tacos in the Oven
- Preheat oven to 425°F
This high heat is what gives you that crisp shell and melted cheese. - Warm the tortillas first
I microwave them between damp paper towels for 30–45 seconds. They bend easier and don’t tear when folded. - Line a sheet pan with foil or parchment
Easy cleanup. I’ve ruined too many pans from burnt cheese goo. - Fill each tortilla with a small amount of chicken + cheese
Don’t overstuff — trust me. I’ve done it. They’ll bust open or get soggy. - Fold in half and press gently
I use the side of a spatula or just press them closed with my hand. - Spray lightly with oil
I keep avocado oil spray in my pantry for this. It helps them crisp without being greasy. - Bake for 10–12 minutes, flipping halfway
Watch the bottoms — they brown fast. Flip with a spatula and press again if they puff up. - Let them rest 2–3 minutes
This helps everything hold together when you lift them off the tray.
Small-Batch Version in a Toaster Oven
When I lived in a small apartment with a terrible main oven, I used my toaster oven (a Breville Smart Oven) to make tacos all the time.
Here’s how I did it:
- Preheat to 425°F
- Use a small tray (fits 2–3 tacos)
- Bake for 8–10 minutes, flip once
- Keep an eye out — toaster ovens brown fast
Perfect for a late-night snack or solo dinner. And the smell? Incredible. Crispy, cheesy, taco bliss in a tight space.
Flavor Add-Ins (If You Want to Get Fancy)
Sometimes I mix in:
- A spoonful of refried beans for creaminess
- Pickled jalapeños or sautéed peppers
- A dash of hot sauce before baking
You don’t need extras. But if you’ve got them, throw them in. Some of my best baked tacos were made with fridge leftovers I didn’t know what to do with.
How Long to Bake Chicken for Tacos in Oven (All Cuts)
One of the most common things I used to Google — and still double-check some nights — is how long to bake chicken for tacos in the oven.
The answer? It depends on the cut, how you’re cooking it (whole or shredded), and whether it’s raw or already cooked.
I’ve made baked tacos from every type — thighs, breasts, rotisserie — even random frozen tenders I found in the back of my freezer.
This is the chart I wish I had earlier.
Baking Time by Chicken Type
| Chicken Type | Temp (°F) | Time | Notes |
|---|---|---|---|
| Boneless Chicken Breasts | 375°F | 22–25 mins | Cover with foil to avoid drying out |
| Boneless Chicken Thighs | 400°F | 25–30 mins | Juicy and flavorful — no foil needed |
| Bone-In Thighs | 400°F | 35–40 mins | Check near bone for doneness (165°F) |
| Pre-cooked Shredded | 350°F | 10–12 mins | Bake with a splash of broth or salsa |
| Fully Assembled Tacos | 425°F | 10–12 mins | Flip halfway through for even crispiness |
My Real-Life Timing Habits
I usually bake boneless chicken thighs for tacos at 400°F, uncovered, for 28 minutes. That’s my sweet spot. They come out juicy and easy to shred.
If I’m using chicken breast, I keep it a bit lower (375°F) and always cover it with foil — or else it turns into cardboard. I made that mistake during a busy weeknight in August, and my tacos needed three scoops of sour cream just to go down.
Leftover rotisserie or pre-cooked shredded chicken? I toss it with salsa or taco sauce, then bake for about 10 minutes at 350°F. Just enough to warm it through and get a little edge crisp.
How Long to Bake Chicken Tacos (Once Assembled)
This was a game-changer for me.
Once you’ve got your tortillas filled and folded, 10 to 12 minutes at 425°F is usually perfect. If you like them super crispy, you can go a minute or two longer, but keep an eye on them — I’ve had a few go from golden to burnt in less than 30 seconds.
Quick Tips from My Kitchen
- Always let the chicken rest for 5 minutes before shredding
- Don’t skip the thermometer — especially for bone-in cuts
- Flip assembled tacos halfway so both sides brown evenly
- If reheating leftovers, bake uncovered at 375°F for 8–10 minutes
How to Bake Chicken Taco Meat in the Oven (In Bulk or Meal Prep)
Sometimes, taco night isn’t just about one meal.
When I know I’ve got a hectic week ahead — deadlines, errands, maybe guests popping by — I bake a big batch of chicken taco meat in the oven and portion it out. It’s way easier than cooking individual meals every night, and it makes lunch wraps, salads, and nacho toppings come together in minutes.
I started doing this during the school year when my evenings got chaotic, and now it’s just part of my routine.
Bulk Baking Setup
Here’s exactly how I do it:
- Preheat oven to 375°F
Lower heat helps prevent drying out when cooking a larger quantity. - Use a 9×13 glass or ceramic baking dish
I usually go with my trusty Pyrex. It holds 2–2.5 pounds of chicken easily. - Add boneless chicken thighs or breasts
I prefer thighs for bulk baking — they stay juicy even after reheating. - Coat with seasoning and salsa or broth
I usually add:- Homemade taco seasoning
- A cup of Herdez Salsa Verde or fire-roasted tomatoes
- Drizzle of olive oil
- Cover tightly with foil
This keeps the steam locked in — super important when cooking larger portions. - Bake for 35–40 minutes
Then check that thickest parts hit 165°F. - Let rest, shred, and stir with juices
I shred the chicken right in the dish, then mix it into all the flavorful liquid at the bottom. The smell alone is worth it.
Portioning for Meal Prep
I divide the shredded chicken into airtight glass containers. Usually:
- 3–4 single servings
- 1–2 double servings for dinners
- Sometimes a freezer bag of leftovers (label it with the date!)
If I’m planning ahead, I’ll toss in:
- A lime wedge (wrap it in foil so it doesn’t make the meat mushy)
- A little shredded cheese or a dollop of sauce
- A note to myself that says “Don’t forget tortillas”
Yes, I’ve actually forgotten tortillas before. Rookie move.
Reheating Instructions (From Fridge or Freezer)
- Fridge:
Reheat in the oven at 350°F for 10 minutes, covered
Or microwave with a damp paper towel on top (1–2 minutes) - Freezer:
Let it thaw overnight in the fridge
Then reheat as above, maybe with a splash of broth or lime
Why This Works in a U.S. Kitchen
For those of us working with electric ovens (which heat a little slower than gas), this method keeps the chicken tender and lets the flavors build over time.
I’ve done this bulk bake in my Arizona kitchen with a convection oven, in my Chicago apartment with an old electric coil oven, and even in a friend’s tiny rental oven during a holiday trip. Same great results — just adjust time and pan size based on what you’ve got.
How to Make Crispy Chicken Tacos in the Oven
This is where things get fun — and a little crunchy.
Back when I first started baking tacos, they came out… soft. Not bad, just limp. Like half a step above microwaved tortillas. Not the crispy, golden edges I was dreaming of.
But after a few trial runs (and one batch that turned into a tray of chicken nachos when the tortillas refused to stay folded), I figured out how to make crispy chicken tacos in the oven — no deep fryer, no mess, and no cracking shells.
What Makes Them Crispy?
It’s all about heat, oil, and the right technique.
I used to think just tossing the tacos in the oven would crisp them up. Nope. You need to help them along.
My Crispy Taco Routine
Here’s the process I follow now, and it works every time:
- Warm the tortillas first
I microwave them wrapped in a damp paper towel for 30–45 seconds.
If you skip this, they crack — and then you’re eating sad taco scraps. - Add filling and cheese
Don’t overstuff. Too much moisture = soggy bottom. I learned this the hard way. - Fold and press
Once folded, I press them lightly with a spatula to help them hold shape. Or I sandwich them under another baking tray for the first 5 minutes. - Spray both sides with oil
I use avocado oil spray (Chosen Foods or Trader Joe’s). Olive oil works too, but avocado oil holds up better at high heat. - Bake at 425°F for 10–12 minutes
Flip halfway for even crispiness. I sometimes press them again mid-bake. - Let rest for 2–3 minutes
They crisp more as they cool slightly — don’t skip this!
Baking Hack: Upside-Down Muffin Tin Tacos
This one’s fun if you’re making a bunch and want that perfect taco shape.
- Flip a muffin tin upside down
- Nest tortillas in the spaces between cups
- Fill lightly, spray with oil
- Bake at 400°F for 10–12 minutes
I used this method once at a friend’s house for a game-day snack board — the tacos came out looking like they were from a food truck.
Troubleshooting Crispy Taco Mistakes
Here are a few lessons I’ve learned (the hard way):
- Taco shells burning on the bottom?
Use parchment paper or switch to a lighter-colored pan. Dark metal browns fast. - Tortillas keep tearing?
Use fresh ones or steam them longer before folding. - Still soggy after baking?
Try less filling, more oil spray, and don’t cover them with foil.
For U.S. Shoppers — Tortilla Tips
In the U.S., I’ve had the best results with:
- Mission thin-style corn tortillas
- Trader Joe’s organic corn tortillas
- La Banderita soft taco flour (for softer crunch)
Some store-brand tortillas crack easily, so I try to check for freshness and softness when shopping.
Best Pans & Tools for Baking Chicken Tacos
You don’t need a fancy setup to make good chicken tacos — but using the right tools makes everything smoother, especially when you’re baking for more than one.
I’ve gone through my fair share of warped pans, sticky trays, and cheese-burnt disasters. These days, I keep a few go-to items in rotation depending on whether I’m baking in bulk or just making a quick dinner for myself.
Here’s what I’ve tested and loved in my own U.S. kitchens — from small city apartments to big family ovens during holiday trips.
Sheet Pans (The Workhorse)
If you only buy one thing for baked tacos, make it a good half-sheet pan.
What I Use:
- Nordic Ware Natural Aluminum Half Sheet
- USA Pan Bakeware Heavy Duty Sheet
Why I love them:
- Heat evenly
- No warping at 425°F
- Easy to clean if you use parchment or foil
Avoid:
Dark nonstick pans — they brown too fast and can burn the bottoms of your tacos before the tops are done.
Taco Holders (Not Essential, but Handy)
These were a game-changer once I started baking more than 4 tacos at a time.
Metal taco racks keep the shells upright while baking. No more filling sliding out or shells tipping over.
What works:
- Stainless steel taco racks — oven-safe and sturdy
- Silicone ones — decent, but some warp at high heat
I found a decent set at Target, but you can also find them online. Just make sure they’re oven-rated up to at least 425°F.
Glass or Ceramic Baking Dishes
For when I’m baking the chicken taco meat before building tacos — like shredded salsa chicken.
My favorites:
- 9×13 Pyrex dish
- Staub ceramic casserole dish (gifted — love it!)
These hold in moisture, which keeps the chicken tender during longer bakes. Great for meal prepping or when I’m bulk-baking taco filling.
Oil Spray (Seriously Underrated)
I used to brush oil on tacos by hand. Messy. Time-consuming. Uneven. Now I always keep spray oil in the pantry.
What I use:
- Chosen Foods Avocado Oil Spray — high smoke point, mild flavor
- Trader Joe’s Canola or Olive Oil Spray — solid backups
Just a quick mist on both sides of the tortilla before baking makes a huge difference in crispiness.
Bonus: Parchment Paper Sheets
I didn’t realize how much I needed these until I ruined a baking tray with melted cheese.
Pre-cut parchment sheets save cleanup and keep tacos from sticking — especially helpful if you’re loading them with cheese (which, let’s be honest, you should).
Toaster Oven Setup
If you’re cooking in a small kitchen or dorm, a basic toaster oven + quarter-sheet pan combo works perfectly.
I used this setup in my first apartment — cooked 3 tacos at a time with no problem. You’ll just need to keep an eye on the timing since toaster ovens can run hot.
Serving Ideas for Oven Baked Chicken Tacos
Once the tacos are golden and crispy, this is the part where the kitchen smells amazing and I start picking at the edges before they’ve even cooled.
But I’ve learned the toppings and sides make all the difference. The right combo turns a tray of baked chicken tacos into a full-on dinner — or even a party spread if you’re feeding guests.
On busy weeknights, I keep it simple. On weekends, I sometimes go all out.
Taco Toppings I Keep on Hand
These are always in my fridge, and they’re my no-fail additions:
- Shredded lettuce – I like romaine or iceberg for crunch
- Diced tomatoes or pico de gallo – adds freshness
- Sour cream or Greek yogurt – cools down the spice
- Avocados or guacamole – creamy and rich
- Sliced radishes – crunchy and a little peppery
- Crumbled cotija cheese – salty and tangy
- Pickled onions – quick-pickled in red wine vinegar with sugar and salt
When I’m in a rush, I’ll just do shredded cheese, salsa, and sour cream — and call it good. But when I want a little extra, pickled onions and lime wedges really brighten things up.
Simple Side Dishes That Pair Well
Over time, I’ve found a few go-to sides that take 5–10 minutes and make the plate feel complete:
- Street corn off the cob (a.k.a. esquites)
- I sauté frozen corn in butter with garlic, toss with mayo, lime, cotija, and chili powder
- Spanish rice (boxed or homemade)
- I like the Goya yellow rice packs when I’m in a hurry
- Black beans jazzed up
- Canned black beans + garlic + cumin + a squeeze of lime = easy upgrade
- Tortilla chips + salsa bar
- Grab a few different salsas (mild, spicy, verde) and let people mix and match
If I’m making dinner for a group, I’ll just line up all the toppings and let people build their own plates. It turns into a taco bar, and everyone gets exactly what they want.
Drinks I’ve Served with These Tacos
Because someone always asks.
- Citrus sparkling water – I love Spindrift lime or grapefruit
- Jarritos (Tamarind or Mango) – a nostalgic throwback
- Homemade margaritas – when I’m not too tired
- Iced hibiscus tea – tart, refreshing, and makes me feel fancy
U.S. Regional Twist: Taco Styles I’ve Seen Work
Depending on where I’ve cooked (Florida, Arizona, Chicago), I’ve picked up a few fun taco add-ons:
- Florida kitchens: Mango or pineapple salsa works great with spicy chicken
- Arizona heat: I add roasted hatch chiles or chipotle aioli
- Chicago winters: Sometimes I melt a little shredded cheddar under the chicken for extra comfort-food vibes
Tacos are forgiving. You can always make them your own.
How to Reheat Baked Chicken Tacos Without Drying Them Out
Leftover tacos don’t get enough respect. And honestly, I used to microwave them like a monster. The shells would go limp, the meat dried out, and the cheese turned rubbery. But I didn’t know better.
Now? I’ve got it down. Whether I’m reheating one taco or a tray of six, I’ve figured out how to keep the shell crispy, the chicken tender, and the whole thing tasting like it just came out of the oven the first time.
Here’s what’s worked for me over dozens of reheat attempts (and a few mistakes along the way).
Oven Reheat Method (Best Texture)
This is my go-to if I’ve got a little time and don’t want soggy shells.
- Preheat oven to 375°F
Lower than the original bake temp — you’re warming, not recooking. - Place tacos on a foil-lined sheet pan
I don’t stack them or cover them. I want the heat to circulate. - Bake uncovered for 8–10 minutes
If they’re really loaded, I’ll go up to 12 minutes. The edges should be golden again. - Let cool 1–2 minutes before eating
They crisp up even more as they sit for a second.
Tip: If the meat looks a little dry before baking, I’ll spoon in a little salsa or a drop of oil to revive it.
Air Fryer Reheat (Fast & Crispy)
This one’s great when I want tacos right now. Just don’t crowd the basket.
- Preheat air fryer to 350°F
- Place tacos in a single layer
- Cook for 3–5 minutes
- Watch carefully — they go from crispy to burnt quick
I’ve burned a few this way by getting distracted — but when it works, it’s glorious.
Microwave Reheat (Only If You Must)
I don’t recommend it… but if it’s 11 p.m. and you’re starving:
- Wrap the taco in a damp paper towel
- Microwave 30–45 seconds
- Add cold toppings after
You’ll lose crunch, but the flavor’s still there.
Reviving Toppings After Reheat
After reheating, I usually top the taco with:
- A fresh sprinkle of cotija or shredded cheese
- A quick squeeze of lime
- Chopped cilantro or pickled onions
- Sour cream (added cold, never baked)
This brings back the balance of hot + cold, soft + crunchy.
How Long Do They Last in the Fridge?
In my experience:
- Fully baked tacos: 2–3 days
- Just the chicken filling: 3–4 days
- Reheated once? Eat it that day — they don’t bounce back twice
I usually store leftovers wrapped in foil inside a sealed container. Keeps things from drying out.
Oven-Baked Chicken Tacos — My Real-Life Takeaways & Final Thoughts
If you’d told me a few years ago that I’d stop pan-frying my taco meat and start baking it all — shells, cheese, chicken, everything — I would’ve laughed.
But here I am. Not only am I doing it, I’m telling everyone who’ll listen: baking your chicken tacos in the oven just makes sense.
It’s Not Just About Convenience
Sure, it’s hands-off. That helps when I’ve got laundry tumbling, emails piling up, and a dog begging for attention. But it’s more than that.
Oven baking turns tacos into a one-pan, stress-free meal. No flipping chicken on the stove. No juggling multiple pans. Just seasoned chicken, crisp tortillas, melty cheese — all cooked together, with flavor that stays in the taco.
A Few Unexpected Wins
These are little things I’ve discovered through real-life trial and error:
- Cheese as glue: Adding cheese under the chicken helps keep the filling together.
- Midweek meal prep magic: I’ve prepped a batch Sunday night that fed me until Thursday. Never got bored.
- Crispy shell obsession: Once I started spraying the outside with oil and flipping halfway, there was no going back. Crunch city.
Real Talk: It’s Okay to Improvise
I’ve burned the edges. I’ve overfilled the shells. I once forgot to season the chicken entirely (hello, bland tacos). But every time, I learned something.
That’s the beauty of it.
These tacos are flexible. You can swap ingredients, adjust seasoning, add leftovers, or build them however your mood swings. They’ve held up in my Florida kitchen humidity and my dry Arizona oven just the same.
In the End — It’s Just Good Food
Nothing fancy. No gimmicks.
Just baked chicken, warm tortillas, crispy edges, and a meal that hits the spot every single time — especially when life’s a little messy and you need something simple, filling, and fast.
FAQs : How to Bake Chicken Tacos in the Oven
How do you bake chicken tacos in the oven?
Place tortillas in a baking dish. Add cooked chicken, cheese, and toppings. Bake at 375°F for about 10–12 minutes. The shells turn crisp and the filling gets hot and tasty.
What temperature is best to bake chicken tacos in the oven?
Bake chicken tacos at 375°F. This heat warms the chicken and melts the cheese without burning the tortillas. It also helps the tacos get lightly crisp.
Can you use rotisserie chicken for oven baked chicken tacos?
Yes. Rotisserie chicken works great for baked chicken tacos. Shred the chicken, add taco seasoning, and fill the tortillas. It saves time and still tastes rich and juicy.
How long should chicken tacos bake in the oven?
Most oven baked chicken tacos cook in 10–12 minutes at 375°F. Bake until the cheese melts and the tortillas turn lightly crisp at the edges.
How do you keep chicken tacos crispy in the oven?
Stand the tacos upright in a baking dish and avoid too much sauce. Bake until the tortillas crisp. This helps oven baked chicken tacos stay crunchy and fresh.