Hey, I’m Mossaraof — a professional cook and food blogger.
If you have ever searched how to cook chicken piccata in the oven and still get that bright lemon flavor with tender chicken, I feel you. I once made it in my tiny apartment kitchen, and the sauce split while the chicken dried out. It was not the cozy dinner I hoped for.
After many tests with oven temperature, bake time, and simple lemon butter sauce tips, I found a method that works. Now I know how to cook chicken piccata in the oven so it stays juicy, light, and full of fresh flavor. In this guide, I will walk you through easy steps, the right heat, and how to keep the sauce smooth and bold.
If you want to master your oven skills even more, read The Complete Guide to Using an Oven. Let’s turn simple baked chicken into a piccata that tastes fresh, bright, and made with care.
🍋 What Is Chicken Piccata, Really?
A quick intro: If you’ve never had it, chicken piccata is like a zesty love letter to weeknight dinners. It’s one of those dishes that makes people think you worked harder than you did.
The Anatomy of a Good Piccata
In my kitchen, here’s what goes into it:
- Thinly sliced chicken breast (sometimes pounded flatter with a rolling pin… yes, I’ve used a wine bottle too)
- A light flour coating
- Lemon juice — fresh is non-negotiable
- Capers — salty, briny little flavor bombs
- White wine or chicken broth
- Butter. Always butter.
That combo creates a tangy, rich sauce that coats the chicken without drowning it. It’s light, not heavy. Bright, but still cozy.
What It Usually Looks Like
Traditionally, chicken piccata is made on the stove:
- Dredge the chicken in flour
- Pan-sear in oil or butter
- Build the sauce in the same skillet
- Let it all simmer together
Sounds romantic, right? But here’s the real-life issue…
Why the Oven Method Works Better (At Least for Me)
I’ve had nights where I cooked piccata on the stove — and the sauce reduced too fast, or the chicken browned unevenly, or I got distracted and scorched the garlic.
Baking it in the oven gave me:
- Even heat, especially when I use my Lodge cast iron skillet
- Hands-off cooking, so I can toast bread or sip wine
- Juicier chicken, because it bakes in the sauce gently
- Less cleanup — and honestly, less stress
It’s also easier if you’re in a warm kitchen (like mine in June). I don’t need three burners going. Just one hot oven and a few basic tools.
If you’re someone in the U.S. who juggles a full day, a hot kitchen, and maybe even a small cooking space — I promise, the oven method is worth trying.
🔥 Tools You Actually Need (And What I Used)
Quick intro: I’ve tried this dish with all kinds of gear — from hand-me-down pans to high-end cast iron. Some tools made it easier. Others? Not so much.
Here’s what actually helped when I baked chicken piccata in the oven, especially in a real U.S. kitchen with limited counter space and an oven that runs a little hot on the left side (yep, still haven’t fixed it).
🥘 Essential Cookware That Made a Difference
Heavy oven-safe skillet or shallow Dutch oven
If you only get one thing right, make it this. I used my 12-inch Lodge cast iron skillet, and the results were golden. It held heat evenly and let the sauce reduce just enough.
Other times, I’ve used a Cuisinart stainless steel pan with an oven-safe handle — also worked fine, though cleanup took longer.
- Staub and Le Creuset also work if you want enameled cast iron
- Avoid glass baking dishes — they can overcook the edges and dry out the sauce
Sheet pan option
If you want to bake the chicken separately and pour the sauce on later, a rimmed sheet pan lined with parchment helps with cleanup. I’ve done this when my sauce pan was already in use.
🍋 Handy Prep Tools I Actually Grabbed
Some of these I didn’t expect to use — but they helped keep the rhythm smooth.
- Lemon zester (microplane): I used it for that little lemon pop at the end
- Meat mallet or… a wine bottle: I’ve pounded chicken both ways
- Tongs: Way easier than forks for flipping and moving chicken without tearing it
- Grater: Optional, but I add Parmesan to the flour sometimes
U.S. tip: I grabbed a lemon juicer from Target years ago and still use it weekly. Also — if you’re shopping cookware, places like HomeGoods or TJ Maxx can surprise you with legit finds.
🔌 Let’s Talk About the Oven
Temperature consistency matters.
I learned the hard way that my old oven in Chicago cooked unevenly. The back left corner was basically a broiler.
Here’s what helped:
- Oven thermometer — I now keep one hanging inside
- Middle rack only — never bake this on the bottom
- If you’ve got convection, use it. I’ve tested both modes, and convection gives better sauce reduction and crispier edges without drying the chicken.
🛑 Tools I Wouldn’t Use Again
Let’s be honest. Some of these were fails.
- Cheap nonstick pans: The chicken slides around, and you won’t get any browning
- Glass pans: Sauce reduction is uneven, and the flavor fell flat
- Air fryer trays: I tried once. Don’t recommend — the sauce doesn’t stay where it should
Unless you like scrubbing caramelized lemon off aluminum foil at 9 PM, keep it simple with a solid skillet.
🧂 How to Season and Prep the Chicken (With Real Tips)
Intro: This is where things either go right or get frustrating. I’ve over-salted, under-floured, and forgotten to pound the chicken more times than I’ll admit. So here’s how I prep chicken piccata now — step-by-step, and stress-free.

🍗 Picking the Right Chicken Cut
I almost always use boneless, skinless chicken breasts, but not the thick ones that take forever to cook.
Here’s what works better for the oven:
- Thin-sliced chicken breasts
(Target, Costco, and Aldi usually have them pre-sliced — lifesaver when I’m in a rush) - If they’re thick, I slice them horizontally into cutlets
- Bone-in won’t work well here — too slow, too uneven
Some days I pound them flatter. Other days I don’t. Depends how tired I am.
But thinner = faster cooking = juicier results in the oven.
🪵 Pounding — Yes, It’s Worth It (Usually)
When I’m feeling patient (read: it’s not already 7:45 p.m.), I pound the chicken to an even ½ inch thickness. That way it cooks evenly and doesn’t curl up.
What I’ve used to pound chicken:
- A meat mallet (obviously)
- A rolling pin
- A cast iron pan (yep)
- A wine bottle (don’t judge — it works)
Pro tip from my messy kitchen:
Sandwich the chicken between two pieces of parchment paper or plastic wrap before pounding. Less splatter, no tearing.
🌾 Flour Dredge: Keep It Light, Not Gloopy
This part makes or breaks the texture. I’ve definitely over-dredged before — ended up with soggy chicken and clumpy sauce.
Now, here’s what I do:
- Use all-purpose flour, and only a light dusting
- Season the flour with a pinch of salt and pepper
- Sometimes I sneak in a tablespoon of grated Parmesan — adds a subtle richness
I shake off the excess like I’m brushing flour off my shirt — quick and gentle.
No egg, no breadcrumbs, no heavy coating. You want the chicken to brown and absorb the sauce — not wear a thick coat.
🔥 Should You Sear Before the Oven?
Here’s the truth: you don’t have to. But I do it when I want a little extra flavor.
- Heat olive oil in a skillet — medium-high
- Sear chicken just 2 minutes per side
- Don’t fully cook it — the oven will finish the job
- Set the seared chicken aside while you prep the sauce
The smell of lemon zest and capers in that same hot skillet? Worth the extra pan.
But when I’m short on time or energy, I skip the sear and go straight to the oven — still tasty, just a little less complex.
🔄 Oven Method Step-by-Step: My Go-To Routine
Intro: This is the exact routine I followed one night when the kitchen was already warm, my feet hurt, and I needed something comforting but low-effort. It’s now my regular piccata routine — no stovetop juggling required.
🔧 Step 1: Preheat and Prep Your Pan
Start by preheating your oven to 375°F if you’re using a conventional oven, or 350°F if yours has a convection setting.
(I use convection when I want slightly crispier edges and faster bake time.)
Meanwhile:
- Grab your oven-safe skillet (I usually use cast iron or a shallow Dutch oven)
- Lightly grease the bottom with olive oil or cooking spray
- Set it on the counter — no preheating in the oven yet
If you skipped the searing step earlier, now’s the time to season and dredge the chicken, then set the pieces aside.
🧈 Step 2: Build the Flavor Base in the Pan
This part smells so good it’ll make your neighbors hungry.
In the skillet or pan:
- Melt 2 tablespoons of butter over low heat
- Stir in 2–3 cloves of minced garlic — sauté just until fragrant (about 30 seconds)
- Add the juice of 1 to 1½ lemons, depending on how zesty you like it
- Toss in 1–2 tablespoons of capers (don’t rinse them — that brine is flavor!)
- Pour in ½ cup of chicken broth or dry white wine — I’ve done both, and they each work
I sometimes swirl in a little olive oil too if the sauce feels too tart. This base doesn’t need to boil, just warm up enough so the garlic mellows.
🐔 Step 3: Lay the Chicken in the Sauce
Now, gently place each floured (or seared) chicken piece into the pan.
I try not to overlap them, but if I do — no big deal. They’ll still cook through.
Here’s what I do:
- Spoon the lemon-caper sauce over each piece to coat them
- Add a little cracked black pepper and a few fresh parsley leaves
- If I’m feeling fancy, I top each piece with a thin lemon slice before baking — it looks gorgeous and adds aroma
U.S. tip: I usually get my lemons and herbs from Aldi or Trader Joe’s — fresher and cheaper than my regular grocery chain.
⏱️ Step 4: Bake Until Juicy and Done
Slide the pan into the middle rack of your preheated oven.
- Bake uncovered for 18 to 22 minutes
- Use a thermometer if you can — aim for an internal temp of 165°F
- The sauce should bubble gently, not boil over
- The edges may brown slightly — that’s good flavor!
When it’s done, I take the pan out and let it sit for 5 minutes before serving. This gives the sauce a chance to thicken just a bit more, and the chicken soaks it up beautifully.
If I’ve got time, I garnish with a little extra chopped parsley. If not… I serve it straight from the skillet. No one complains.
🍽️ Optional Oven Add-Ons (When I Want to Fancy It Up)
Intro: Sometimes I just want to eat and crash on the couch. Other times? I want to feel like a chef without doing much more work. These are the little upgrades I’ve tried (and loved) that make chicken piccata feel extra special — even on a Tuesday night.
🥦 Add Veggies to the Oven (Let the Sauce Do the Work)
This is the easiest way to level things up without dirtying another pan. I toss them in raw — right into the same skillet as the chicken.
Here’s what works well:
- Thin-sliced lemon wheels: these caramelize and look gorgeous
- Asparagus spears: they roast perfectly alongside the chicken
- Shallots or thin-sliced red onion: they soak up the sauce and mellow out in the oven
- Zucchini rounds: I tried this once out of desperation… it worked
I don’t add carrots or potatoes — too firm, wrong flavor profile. But soft, quick-cooking veg? Totally game.
Pro tip:
Just don’t overcrowd the pan. If I have a lot of extras, I throw them on a separate small tray, drizzle with oil, and roast them next to the main dish.
🍝 Serve Over Pasta, Rice, or Bread (Let That Sauce Shine)
Piccata sauce deserves a vehicle. I’ve tested a few combos, depending on what I had in the pantry.
Here’s what I’ve loved:
- Angel hair pasta — my go-to. Light and quick to boil
- Garlic mashed potatoes — if I’m really going for comfort
- Lemon rice — especially with leftover broth in the sauce
- Toasted ciabatta or French bread — for scooping sauce straight from the pan
- One time I used polenta and honestly? It slapped.
If I’m short on time, I microwave a pouch of precooked brown rice and call it a win. Ain’t no shame in shortcuts.
U.S. insight:
I often grab pasta from Trader Joe’s (the lemon pappardelle is seasonal and amazing with this) or use store-brand thin spaghetti. You don’t need anything fancy.
🍷 Optional Pairings (If You’re in the Mood)
I don’t always pour a drink with dinner — but when I do, piccata’s lemony sauce pairs well with:
- Chardonnay — buttery and mellow
- Sauvignon Blanc — crisp and citrusy
- A lemon Spindrift or sparkling water — refreshing if I’m keeping it light
- And yes, I’ve had it with sweet tea too — when in the South…
🧊 How to Reheat Chicken Piccata in the Oven
Intro: Let’s be honest — reheating chicken is tricky. I’ve turned perfectly good leftovers into dry, sad little slabs before. But once I figured out the oven method for reheating piccata, I stopped dreading next-day meals.
🔁 My Reheat Method (That Actually Works)
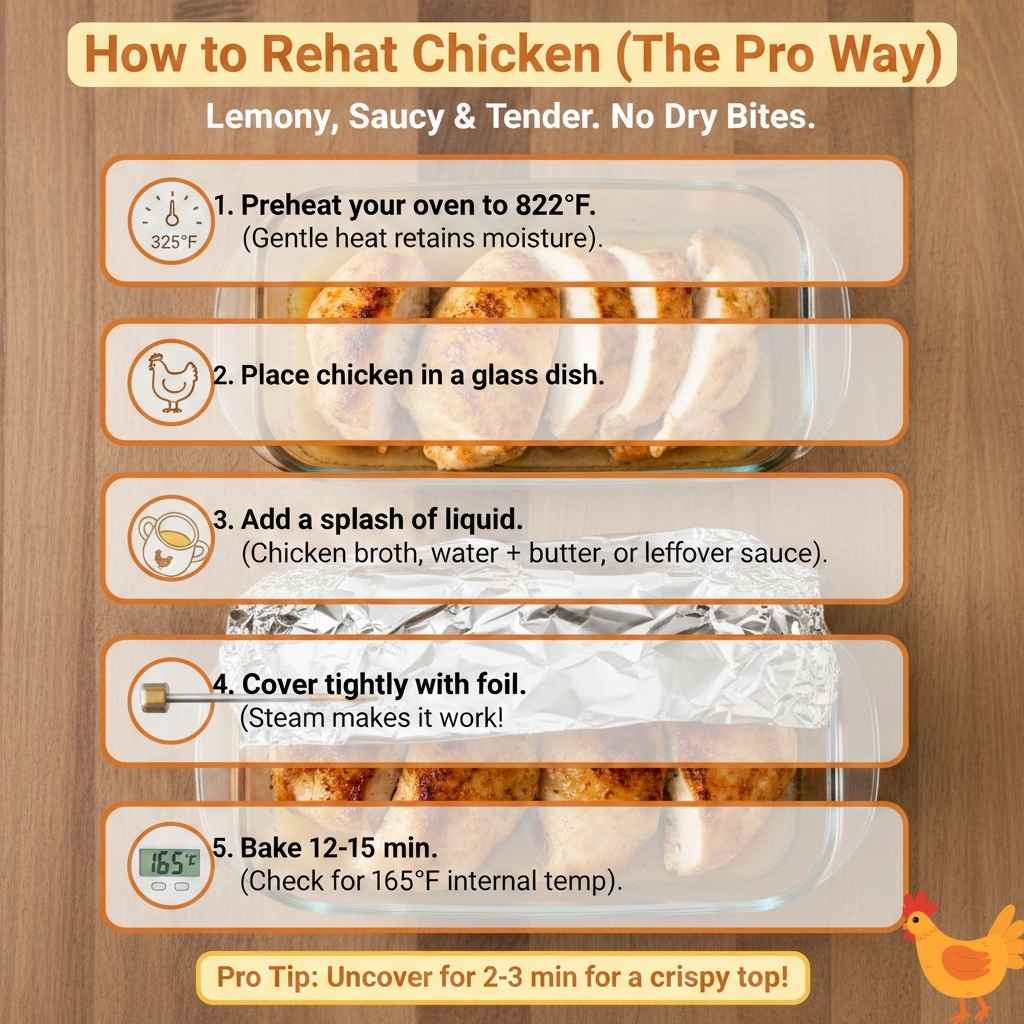
Here’s exactly how I warm it up so it still tastes fresh — lemony, saucy, and tender. No rubbery edges. No dry bites.
- Preheat your oven to 325°F.
Not too hot — gentle heat keeps moisture in. - Place the chicken in a small oven-safe dish.
I usually use a Pyrex glass container or a mini cast iron skillet. - Add a splash of liquid.
This is the secret. I pour in 1–2 tablespoons of:- Chicken broth
- Water with a dot of butter
- Or just leftover sauce if I saved extra
- Cover tightly with foil.
That steam is what makes it work. - Bake for 12–15 minutes.
Longer if the pieces are thick or still partially cold. - Check the internal temp.
You’re aiming for 165°F — same as when it’s freshly cooked. - Remove foil and finish uncovered (optional).
Sometimes I give it 2–3 extra minutes uncovered if I want to slightly crisp the top.
And that’s it. Tastes like you just made it. I swear the capers wake back up in the oven.
🧂 Quick Fixes If It’s Dry
One time, I forgot to add broth and reheated it bone-dry. Still edible, but barely.
Now I always do one of these:
- Add a spoonful of warm buttered broth after reheating
- Squeeze a bit of fresh lemon juice over the top
- Toss the reheated chicken with freshly made pasta or sautéed spinach to add moisture back in
U.S. tip: If you pack lunches, you can reheat this in a toaster oven too — just lower the heat and don’t skip the splash of liquid. I’ve done this in an office break room with great results.
❌ What Not to Do
Let me save you from my past reheating regrets:
- Microwave uncovered — the chicken gets tough, sauce evaporates
- Reheat too hot — the lemon turns bitter if it scorches
- Skip the liquid — unless you want sawdust chicken
🤝 Related Oven Chicken Ideas I’ve Tried (and Liked)
Intro: Piccata isn’t the only chicken dish I’ve tested in my oven. Over the years, I’ve burned, under-seasoned, and eventually mastered quite a few others — each one with its own little lesson. If you’re wondering how this compares to other popular oven chicken recipes, here’s what I’ve made and how they turned out.
🔄 How to Cook Seared Chicken Breasts in the Oven
This one’s like piccata’s no-sauce cousin. When I want something lean but flavorful, I sear seasoned chicken breasts for about 2–3 minutes per side on the stove, then finish them in the oven.
- Oven temp: 375°F
- Bake time: 12–18 minutes depending on thickness
- Seasoning: Garlic powder, paprika, salt, pepper
- Bonus: It’s the base for SO many other dishes (like shredded chicken, wraps, and salads)
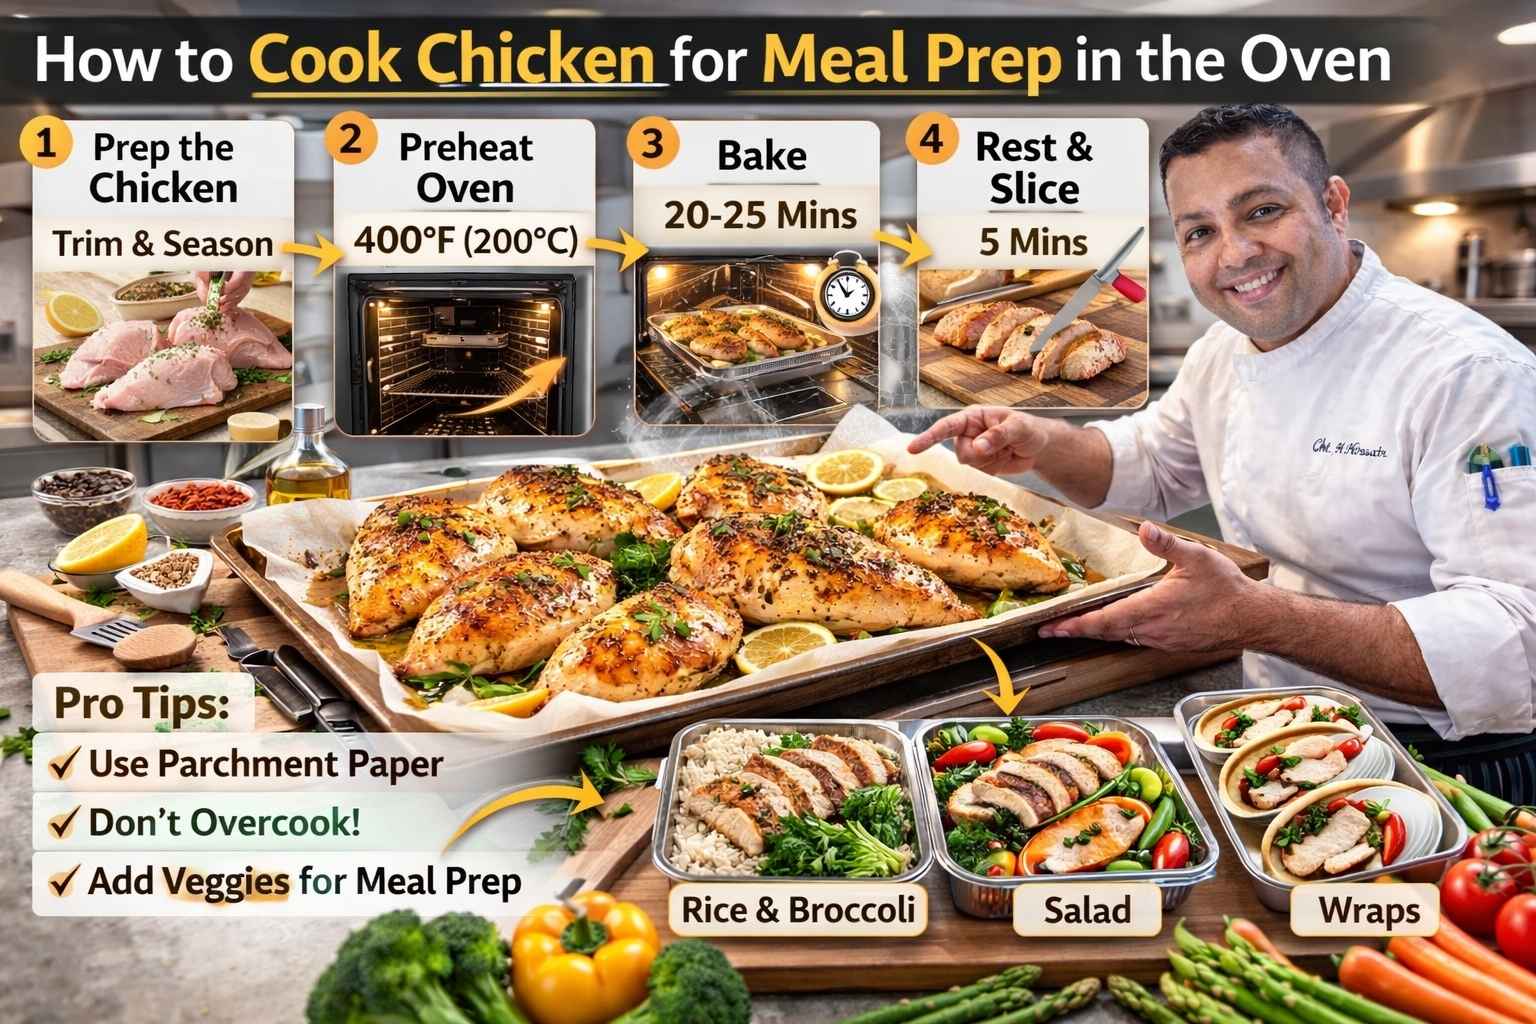
I’ve used this method when I don’t feel like making a sauce or when I want to meal-prep for the week. The trick is resting the chicken after baking. Let it sit for 5 minutes before slicing or all the juices run out.
🧂 How to Cook Seasoned Chicken in Oven
This one’s wide open — I’ve done it with thighs, legs, breasts, even bone-in cuts. The key is layering simple seasoning and letting the oven do its thing.
Seasonings I’ve used that work great:
- Montreal Chicken spice (McCormick — my favorite store-bought mix)
- Cajun spice + olive oil rub
- Garlic, rosemary, lemon zest + black pepper
Usually I bake at 400°F for crispier edges. I do this when I want bold flavor but don’t want to babysit a sauce. It’s also great for U.S. kitchens with fewer tools — just a sheet pan and foil.
🍗 How to Cook Shake n Bake Chicken in the Oven
Yep, I’ve done this too. Especially on nights when I’m cooking for kids or just want something with crunch. I use boneless thighs or drumsticks, toss them in a zip-top bag with the coating, and line them up on a foil-lined baking sheet.
- Bake at 400°F for 25–30 minutes
- Use a rack if you want them extra crispy
- Pair with honey mustard or BBQ sauce — or leftover piccata sauce (trust me!)
It’s a far cry from elegant piccata, but sometimes that crunch just hits the spot.
🔥 How to Cook Rotisserie Chicken in the Blackstone Patio Oven
Okay, this one’s more of a backyard adventure. I tested it last summer when I was house-sitting in Arizona. Dry air, blazing sun — perfect for outdoor cooking.
Here’s what I learned:
- Preheat the Blackstone to around 375–400°F
- Use a rotisserie attachment or just rotate manually every 10–15 minutes
- Season with lemon pepper, garlic, and smoked paprika
- Total time: 45–60 minutes, depending on size
The skin came out golden, and the meat was insanely juicy. I even used some of the leftovers to make piccata later — just sliced the meat and baked it in the sauce for 10 minutes. Worked beautifully.
🍗 How to Cook Seasoned Chicken Leg Quarters in the Oven
This is a weekend favorite in my house. Leg quarters take longer to cook, but the flavor payoff is huge. I roast them skin-on, bone-in.
My process:
- Preheat oven to 400°F
- Season with garlic powder, thyme, lemon zest, and olive oil
- Roast 45–50 minutes, flipping halfway
- Finish with a quick broil for crispy skin
Sometimes I spoon over a quick lemon butter sauce after roasting — basically a stripped-down piccata vibe. Perfect when I’m craving something hearty.
⏱️ Make-Ahead, Freeze, and Store Tips (U.S. Freezer Test Edition)
Intro: I’ve tested chicken piccata on days when I was ahead of schedule (rare) and on nights when I desperately needed leftovers to save me. If you’re planning meals for the week or just hate wasting food, here’s what actually worked in my kitchen — and what didn’t.
❄️ Can You Make Chicken Piccata Ahead of Time?
Yes — and I’ve done it for meal prep, dinner parties, and even road trips. (I once packed piccata in a cooler for a lakeside Airbnb dinner. It reheated surprisingly well.)
Here’s how I prep it in advance:
- Dredge and sear the chicken ahead of time
- Let it cool, then store in an airtight container
- Make the sauce separately and refrigerate in a mason jar or small container
- When ready to bake: pour sauce into skillet, nestle in the chicken, and bake as usual
This method saves at least 15–20 minutes on cook day, and honestly, it tastes even better since the flavors have time to settle.
🧊 Freezing Chicken Piccata (Tested in a Chicago Winter)
I was skeptical about freezing this dish — I thought the lemon would get weird or the chicken would turn spongy. But with a few tweaks, it held up.
What worked:
- Freeze the cooked chicken + sauce together in a freezer-safe glass container
- Or wrap individually in foil, then place in a zip-top freezer bag
- Label it (I forget what things are all the time)
- Use within 1 month for best flavor and texture
To reheat from frozen:
- Thaw overnight in the fridge
- Reheat in the oven at 325°F, covered with foil, for 20–25 minutes
- Add a splash of broth or water before baking to revive the sauce
The chicken stayed moist, and the lemon flavor mellowed just enough. Only downside? Capers can get a bit mushy. Still tasty though.
🧺 How I Store Leftovers (Real Talk)
When I make this on a weeknight, I always pack the leftovers — whether it’s for lunch, another dinner, or midnight fridge grazing.
Here’s what I do:
- Store chicken and sauce together in a shallow glass container
- I try to use them within 3 days
- If the sauce thickens in the fridge, I just add a spoonful of broth before reheating
Microwave works in a pinch — I’ve done it at least 20 times — but the oven is still better. Especially if I’m trying to impress myself.
U.S. insight: If you’re meal prepping, those divided glass containers from Costco or Amazon work great. I pack a few with chicken, lemon slices, and leftover rice or orzo — makes weekday lunches way easier.
🧠 Common Mistakes I’ve Made (So You Don’t Have To)
Intro: I’ve cooked chicken piccata enough times to rack up a solid blooper reel. These are the flops, flusters, and flavor fails that actually helped me figure out what not to do.
🫠 Mistake #1: Overbaking the Chicken
This is the most common slip — and I’ve done it when distracted by emails, dishes, or a dog barking at the oven.
What happened:
The chicken came out dry, pale, and way too firm.
Why it happened:
- I didn’t check the internal temp soon enough
- I left it in after turning off the oven (residual heat kept cooking it)
Fixes I use now:
- Bake uncovered for 18–22 minutes, and check at the 18-minute mark
- Use a thermometer — target is 165°F
- Let it rest 5 minutes outside the oven before serving
🍋 Mistake #2: Way Too Much Lemon
I love lemon — but once, I got carried away and added both the juice and zest of two whole lemons.
What happened:
It was like chewing on a citrus-scented sock. Even the capers seemed shocked.
Fixes I use now:
- Stick to 1 lemon — 1½ if I’m making a big batch
- Add zest sparingly
- Balance it with butter and broth — keeps the sauce rich, not sour
Funny enough, a friend once described it as “piccata with a punch in the face.” They still ate two servings, though.
😬 Mistake #3: Sauce That Disappears
I’ve had piccata come out of the oven with barely any sauce left. Dry pan, sticky bits, confused chef.
What caused it:
- Pan was too big — the sauce spread too thin
- Baked too long or uncovered in a convection oven
Now I do this:
- Bake in a shallow but snug skillet so sauce surrounds the chicken
- Spoon extra sauce over each piece before baking
- Add a splash of broth mid-bake if it looks like it’s drying out
🔥 Mistake #4: Garlic That Turned Bitter
One time I sautéed garlic for the sauce — and then got distracted by laundry. By the time I came back, the garlic was brown, bitter, and clinging to the skillet like a warning sign.
What I learned:
- Garlic burns fast — 30 seconds max in hot butter
- Always stir it and don’t walk away
Now I prep everything else before I start the garlic — it saves me from this recurring crime.
🤷♂️ Mistake #5: Serving It Bone-Dry
When I first tried reheating chicken piccata in the oven, I didn’t cover it. I didn’t add liquid. I didn’t even check it halfway.
The result?
Dry, chewy, almost stringy chicken.
Basically the opposite of juicy, saucy comfort food.
What fixed it:
- Always cover with foil
- Add a splash of broth or water
- Warm gently at 325°F for 12–15 minutes max
U.S. tip: I’ve since tested this in a toaster oven, a countertop convection oven, and even on a camping trip with a mini gas oven — same rule applies. Steam is your best friend.
🧵 Final Thoughts: Why Oven Piccata Became My Weeknight Secret Weapon
Intro: I didn’t expect to fall in love with the oven version of this dish. It started as a lazy-night experiment — one skillet, no stovetop juggling — but it ended up becoming one of my most reliable comfort meals.
It Gave Me Room to Breathe (Literally)
When I first tried baking chicken piccata instead of searing it all stovetop, I didn’t realize how much calmer the process would feel.
No rush to keep the sauce from reducing too fast.
No splatter across the burner.
No smoke alarm scolding me mid-flip.
I could prep a side salad.
Toast bread.
Or just sit down for five minutes and sip something cold while the oven did the work.
In a small Chicago kitchen or during a hot Florida summer, that kind of break matters more than I used to admit.
It Tastes Even Better the Next Day
This wasn’t just wishful thinking — the lemon, capers, and broth mellow overnight, and somehow the chicken gets more tender. My fridge has seen plenty of leftovers, but reheated oven piccata is one of the few that makes me look forward to lunch.
And when I take the time to pack it up with orzo or roasted veggies? Chef’s kiss.
It Makes Me Look Fancy… Without Trying
There’s something about serving this in a cast iron skillet — lemon slices glistening, parsley scattered — that makes people think I spent hours in the kitchen.
But honestly?
I’ve made this:
- While wearing fuzzy socks
- While rewatching old cooking shows in the background
- While low on groceries and out of fresh garlic (I used powder… no one noticed)
It’s forgiving. Flexible. And just a little bit special.
Which is exactly what I need after long days when my brain’s fried but my taste buds still want something beautiful.
FAQs
How to Cook Chicken Piccata in the Oven without drying it out?
To cook Chicken Piccata in the oven without drying it out, bake at 375°F and use thin cutlets. Add lemon butter sauce before baking. Cover loosely with foil to keep it juicy.
What temperature is best for How to Cook Chicken Piccata in the Oven?
The best temperature for How to Cook Chicken Piccata in the Oven is 375°F. This heat cooks the chicken fast but keeps it tender. Always check for 165°F inside before serving.
Can I skip pan frying when learning How to Cook Chicken Piccata in the Oven?
Yes, you can skip pan frying when you cook Chicken Piccata in the oven. Lightly coat the chicken in flour, then bake with lemon, capers, and butter for great flavor.
How long does it take to cook Chicken Piccata in the oven?
When you cook Chicken Piccata in the oven, thin breasts take about 18–22 minutes. Time may vary by thickness. Always check doneness with a meat thermometer.
What sides go well with How to Cook Chicken Piccata in the Oven?
Chicken Piccata baked in the oven pairs well with pasta, roasted asparagus, or mashed potatoes. The lemon caper sauce tastes great over rice or crusty bread, too.